

Applying Gradients to Multi-Line Text

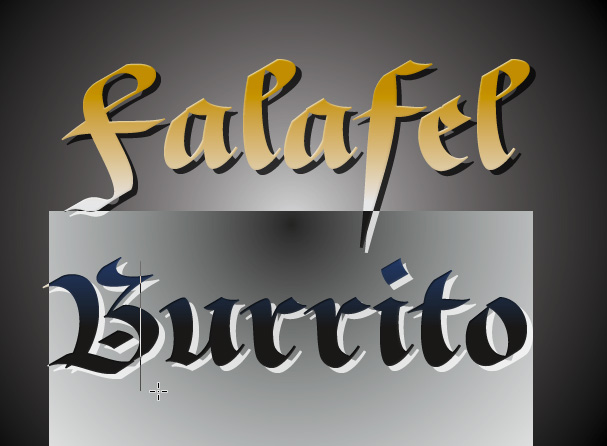
Did you ever wish you could fill multi-line text with a gradient, so that the gradient is applied to each line separately, like so:

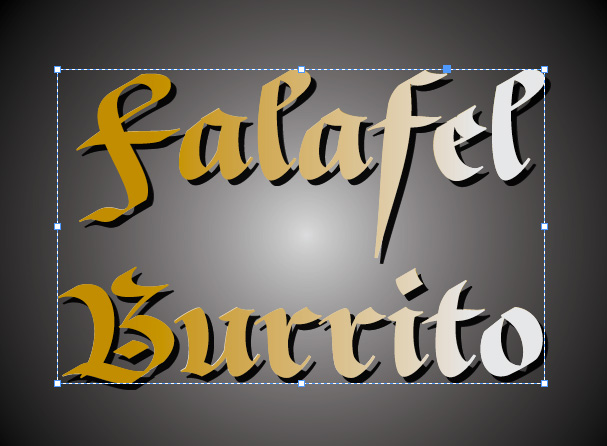
If you target the fill of the text and just try dragging with the Gradient tool, the gradient gets applied once to all the text in the frame.

Instead, take advantage of the fact that InDesign allows you to apply gradients to selected text.
Start by selecting the text on the first line with the Type tool, switch to the Gradient tool, and drag to apply the gradient fill to the first line.

It can be pretty hard to tell if you’re getting the look you want with the text selected. If that’s the case, choose Window > Arrange > Split Window to give yourself a second view where the text will display as normal. Or simply click the button in the bottom right corner of the document window to split it.


Adjust the gradient as desired by dragging with the Gradient tool. Then to apply a separate instance of the gradient to the second line of text, switch to the Type tool. Select the second line of text.

Switch back to the Gradient tool and again drag to apply the gradient as desired.
Now you have two instances of the gradient that you continue to manipulate separately.

Note that if you scale the text frame or edit the text, you may have to reapply the gradients.
Also, if you want total control over the gradient, so you could, say, apply a separate instance to the dot on the “i”, try this:
With the text frame selected, press Command+Shift+Option+O/Ctrl+Shift+Alt+O to create an outlined copy of the text on top of the original text frame.
Ungroup the outlined text. Delete the top set of text outlines.
Then with the Direct Selection tool, hold Option/Alt and click on the dot over the “i” to select it alone.
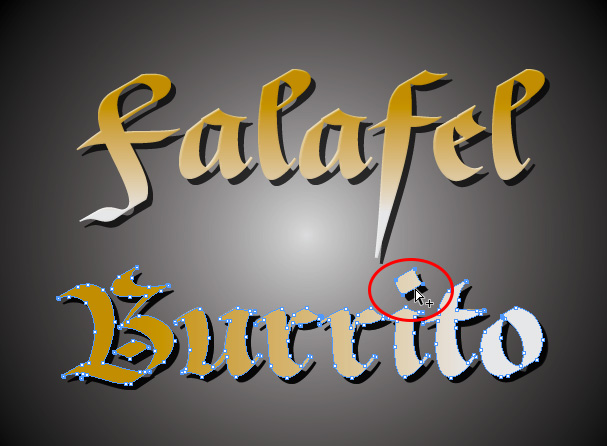
Copy it.
Press Delete twice to remove the bottom set of text outlines.
Choose Edit > Paste in Place to put a new outlined copy of the dot on top of the i. Select the Gradient tool and drag to re-apply the gradient fill just inside the dot.

When you’re done, be sure to group the custom dot with the text frame so they don’t get bumped out of alignment.
It’s a small detail, but it’s nice to know you can control it if you want to.

Hey Mike – hope you used a rich black in that gradient :P
Haha, yeah. I did, or would if I output to CMYK. The doc in this post had RGB intent.
It’s a good point that I probably should’ve emphasized more in that other post. RGB docs don’t suffer the same gray gradient problem as print docs.
Also, I really do know a place that makes falafel burritos :)
Well then – this logo for them is ready to go!
Excellent point about the RGB intent! Although – how would you go about this if it was for print and web/epub/pdf/image etc?