Creating Dynamic Layouts Where Objects Move as Text is Added
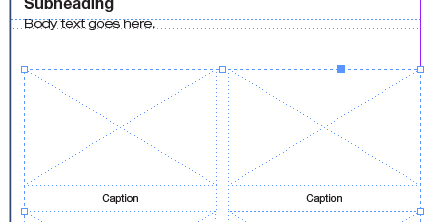
A reader just asked if it’s possible to make several objects on the page move when a text frame expands. For example, in the following image, there’s a “body text” text frame, followed by four images with captions (four graphic frames and four text frames under them):

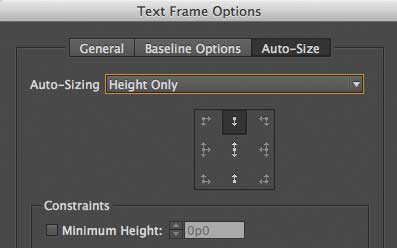
The body text frame (the one that is selected in the image above) is set to expand automatically when more text is added. That’s done by choosing Object > Text Frame Options, then clicking the Auto-Size tab, and choosing from the Auto-Sizing pop-up menu:

But the question is: As text is added, and the frame expands down the page, how can we get those frames to move, too? The answer is to anchor them into the text frame!
The first step is to select the four images and four captions and group them (Object > Group):

Next, to anchor them into the text frame, use the Selection tool to drag that blue square in the upper-right corner of the group and drop it into the frame, preferably at the very beginning, before the first word. The group won’t move, but the square turns into a blue anchor symbol. (Note that it’s only blue because the current layer color is blue; if these objects are on a different layer, it may be red or green or something else.)
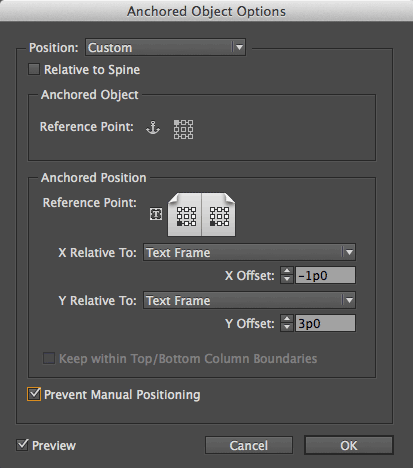
Now choose Object > Anchored Object > Options to define how the anchored object should behave. Specifically, you need to tell it what part of the anchored object should be positioned, based on what part of the text frame. In this case, we want the upper-left corner of the anchored object (the group) to move relative to the lower-left corner of the text frame, so we set it up like this:

This dialog box can be confusing, so take your time with it and look over the settings carefully. You’ll need to set the X Offset and Y Offset appropriately for your design, of course.
Also, note that I turned on Prevent Manual Positioning. In this case, I shouldn’t have done that because it’s a template that needs to be updated later. Turning on this checkbox locks the objects in the group, so you can’t place or edit text or graphics in them. On the other hand, if you turn that off, you can accidentally move the group on the page, so be careful.
Remember that anchored objects act like characters in your text story. If you open this story in Edit > Edit in Story Editor, you can see the anchored object like this:
![]()
The reason that’s important is that when you edit the text in the “body text” frame above, you have to be careful not to delete that character at the beginning! If you do, the whole group disappears. Ooops.
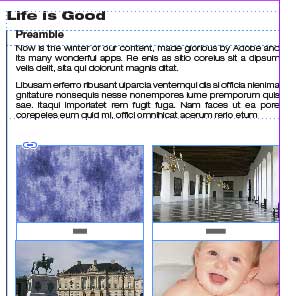
But as long as you keep that in mind, you can now edit the text, and as you add/remove text, the other frames move, too — but always stay in relation to the bottom of the text frame:

Anchored objects take some getting used to, but they’re incredibly powerful!


Thanks David, this will help speed up the web page design we’re doing. Cheers!
Nice! Anchored objects are so useful. My first inclination was to put the graphics in a text frame and apply text wrap to the top header text frame. But your solution is much more elegant. I usually only work with inline anchored objects, or anchoring only small ornaments and such (not large anchored objects). This is a great solution. Thanks for sharing.
Thank you. Your illustrations and explanations help clarify a concept that can be really confusing. I always get confused about which reference point applies to which.
Quick question. Modifying your example a bit, if it were a template for a sequence of steps instead of just pictures with captions.
If you grouped the bottom images/captions (we can call them steps 3 and 4) and anchored them to the top images/captions (steps 1 and 2) Then anchored that to the body text above it. Is there an easy way to then select step for and delete it in the off chance you end up with a section with only 3 steps? Or do you have to unanchor everything to do so?
I tried using the Direct Selection Tool, selecting the box, and deleting it. Nothing happens. I did find out that if I move Step 4 to another page it will just disappear completely without deleting it which worries me.
Adam: I’m not sure why nothing happens when you select with the direct selection tool (except perhaps you’re selecting the wrong thing, such as the image inside the frame instead of the frame itself). I rarely use the Direct Selection tool. Instead, I double-click to select inside a group with the Selection tool, or I use the Object > Select features to select inside a group.
Hi!! Thanks for great content!
I have a question… My anchored object feature is grayed out and I can’t use it. What should I do