

Creating Indented Cell Strokes

I was recently designing a few tables in InDesign and wanted to give certain cells the impression they were indented in the table. Giving text inside of cells an indent is very easy to do because you can even choose between paragraph level settings or the actual cell indent options. But that wasn’t enough, I wanted to give the stroke an indent too. And the technique I wanted to use had to be flexible also. Here’s an example of what I want to achieve.

On the top you see the normal table, on the bottom you can see that the cell strokes are indented on the left.
Other techniques to make this work include:
- Don’t use a horizontal cell stroke but a paragraph rule instead: the advantage of a paragraph rule is that you can give it an indent too. But I wanted to avoid this solution as it takes a lot of time to align it with the horizontal stroke of the cells on the right. And if I ever change the height of the cells I’d have to access the Paragraph Rules options again and surgically make the rules fit the rest of the table again.
- Add another column before the data and don’t give it a horizontal stroke: yes this technique is interesting too. But I didn’t want to use this one because I’d like to automate my layout a little bit using table styles. And adding new columns all the time would be too time consuming, I don’t want to spend too much time on the actual table structure.
Step 1: take measurements
Let’s try a different technique for this by only changing the stroke settings for the cells that should be indented. But before we can start working on that, we have to take a few measurements first. There are two numbers that are important here: the length of the cell stroke (which is the column width), and the indent value we want (in this case based on where the text starts).
To measure the indent, I simply place the Type tool cursor just before the first character in my cell and take a look at the Info panel which shows me the X-value of my cursor. In this case I need to use a 3 mm indent.

To measure the width of the column, I simply selected it and looked at the Table panel. Here I’m using a 70 mm width.
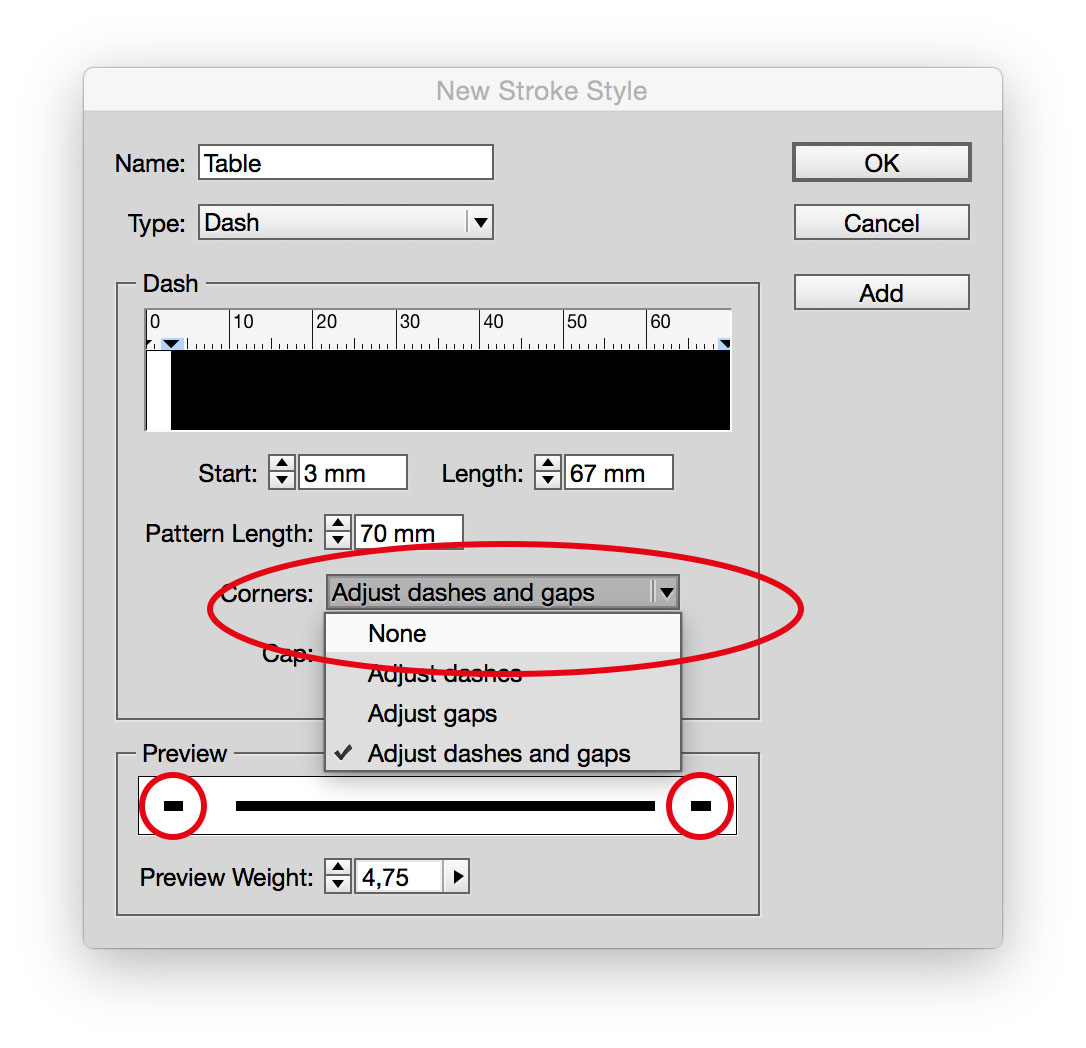
Step 2: create a stroke style
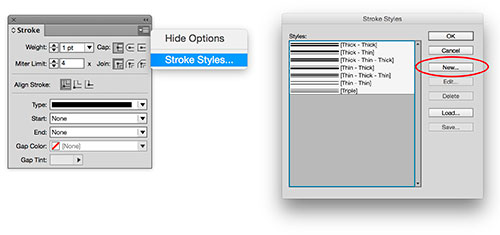
Click the Stroke panel menu and choose Stroke Styles. Once there, choose New from the right to create a new custom stroke style for your cells.
Step 3: set the basic options
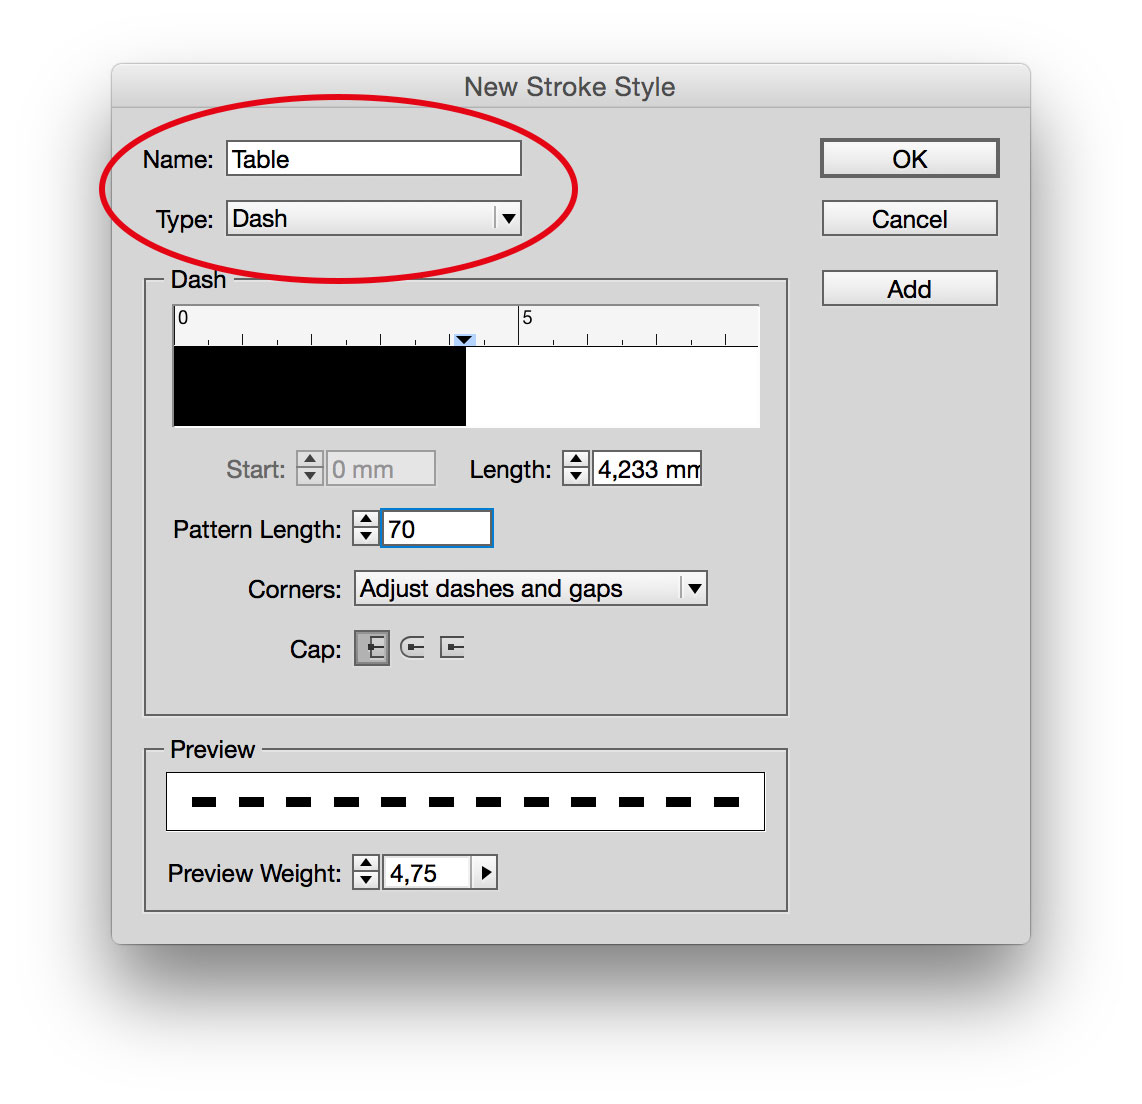
Give your new stroke style a name and make sure that Dash is the current type (should be by default). The dash stroke allows you to set the interval of the dashes yourself. Click and drag in the white area to add a second dash to the pattern. Once done, make sure you select the first dash and change its length to 0 mm. This will result in an empty area to start with, followed by the second dash.

Step 4: refine the second dash
Now it’s time to make your new stroke style match the cell width you want to apply it to. Start by giving the Pattern Length the width of your column (70 mm in our case). Then you can scale the dash to match the stroke length you want. So type in 3 mm for Start and 67 mm for the Length Value.

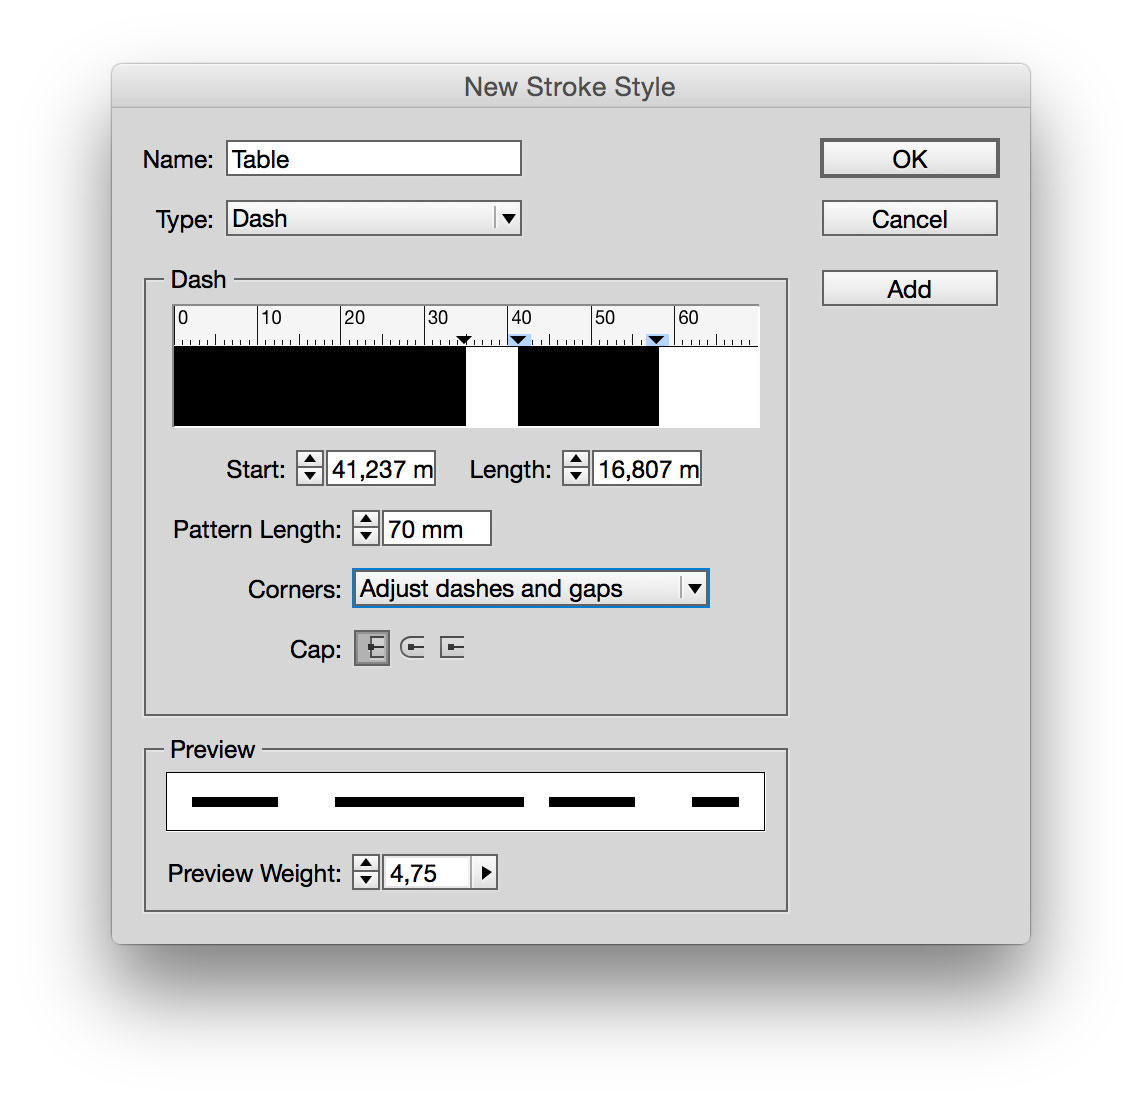
Now, by the numbers, your stroke should work. But the preview at the bottom is still showing this extra smaller dash. This is because of the default Corners options which should be set to None to avoid any artificial changes to your strokes. After choosing None you’ll notice there’s still a hairline visible, ignore that for now. Choose OK to finish. Now when you apply your new stroke to your cells you’ll see it matches perfectly.

A few considerations
Of course you’ll have to be careful when changing the width of your columns as this will make your strokes fall apart. So if you do change the width of your columns, simply measure the width and type in this new number in your stroke style.
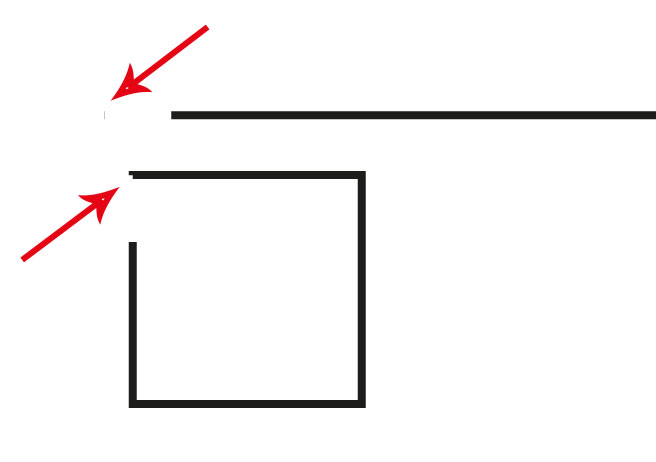
Remember that tiny hairline that appeared in the preview box of your new stroke style? Well for some reason it DOES appear when applying your style to regular objects like lines and rectangles. Though it’s a very fine line it stills appears in print and PDFs, so be careful.
Very clever, Bart! A great solution to a common problem. Reading the post got me thinking…it seems to work fine to define an extra large “Pattern Length” value that is much wider than your column. So you could use 1000mm for the pattern length, 3mm for the “Start” and 997mm for the “Length” in your example. That way you don’t need to adjust the custom pattern when you change the column width.
Interesting Keith, I thought I tested this and it gave me a gap in my stroke.
Hi,
Why don’t simply use 2 para styles (with 3 tab.) and a grep research:
Find .$ Replace by $0\t
Paragraph rule below is much easier, in my opinion. And for those types of tables, I wouldn’t even use the table feature. I would just set as 2-column list. Paragraph style sheets for the indents and rules below and the tab.