

Creating a Pinwheel Effect With Image Frames

Nowadays it seems like there’s an almost infinite supply of design inspiration at your fingertips with Behance, Pinterest, Flickr, Google Images, and of course, Twitter. A recent tweet from the official InDesign account shared the link to an awesome Flickr set of vintage science and tech ads from the ’50s and ’60s. And one of the ads that caught my eye included a set of illustrations in a sort of pinwheel effect.
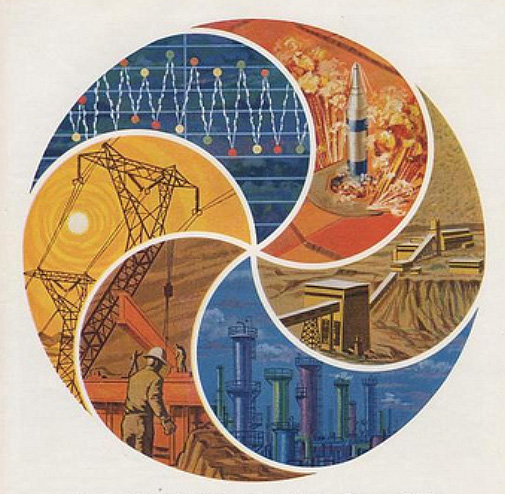
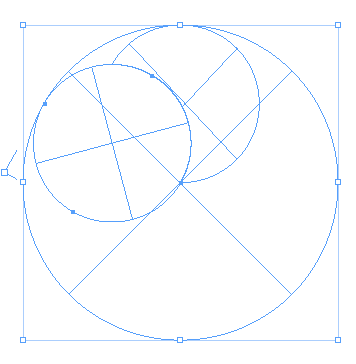
I’m sure that the intent was to convey a sense of energy, progress, and the coordinated nature of the company’s diverse offerings (at least that’s the kind of stuff I would say if I were pitching the design). Anyway, I loved the retro feel of the ad and felt compelled to recreate it with InDesign. So here we go. To create the set of pinwheel image frames, start with a circle. Make sure it has no stroke and no fill.

Copy and paste the circle in place. Set the reference point in the Control panel to the top center and scale the copied circle down to 50%

Switch the reference point to the bottom and double-click the Rotate tool. In the dialog box, rotate the circle 60° and click Copy.
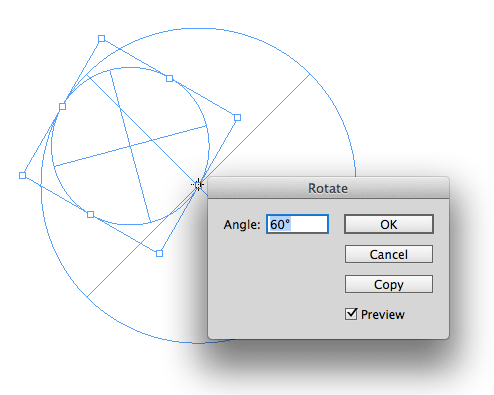
Now you have two overlapping circles that are half the diameter of the original.
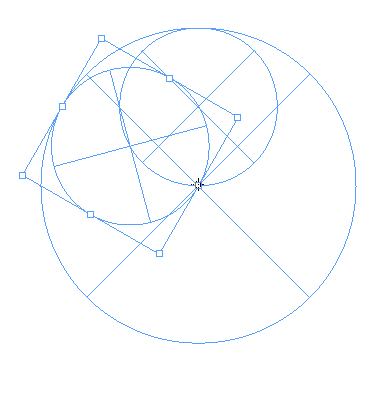
Copy the rotated circle to your clipboard. Select both the small circles and use the Pathfinder Subtract command so the rotated circle is punched out of the original small circle.

Choose Edit > Paste in Place to paste a copy of the rotated circle back into the layout. Select it and the large circle and again use the Pathfinder Subtract command.
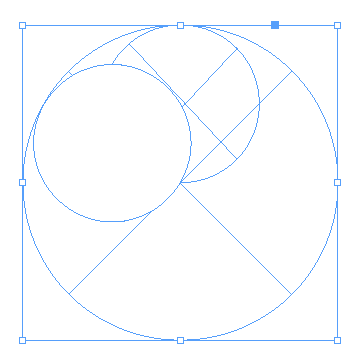
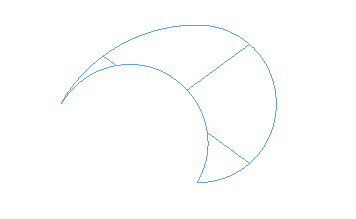
Now we have all the curves that we need to make one section of the pinwheel.
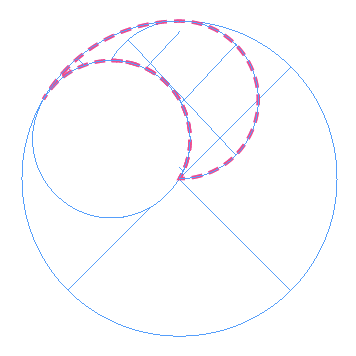
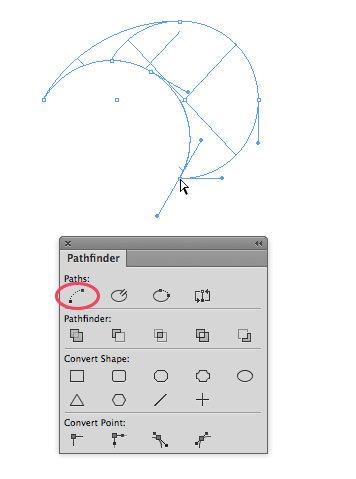
Next, we need to remove the parts that we don’t need. Use the Direct Selection tool to select the unwanted path points and segments and delete them. You should end up with a shape like this.
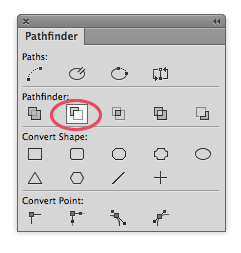
At this point, it’s not a single closed path, so it won’t look right if you place an image into it or apply a stroke. To make it a closed path, select overlapping points and use the Pathfinder Join command to unite the separate segments.
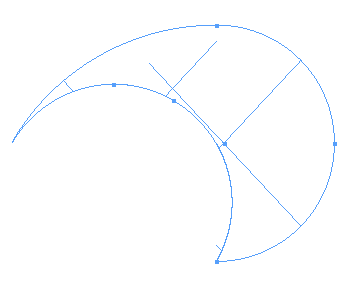
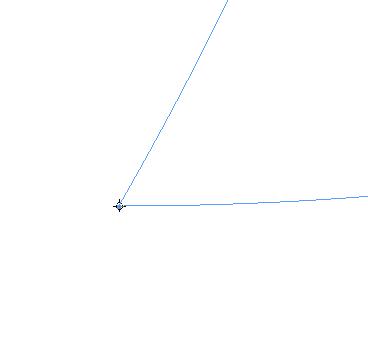
Zoom in on the bottom of the object. I mean WAY in, like 4000%. Switch to the Direct Selection tool so you can see the anchor points on the shape (but make sure all points are still selected).
Take the Rotate tool and click directly on the bottom anchor point of the path. This will set that axis around which the shapes will rotate, and it has to be just about perfectly on that anchor point, so take your time and click carefully.
Double click the Rotate tool and enter a value of 60° and click Copy.

Choose Object >Transform Again > Transform Sequence Again (or press Command+Option+4/Ctrl+Alt+4) repeatedly until you have a complete set of rotated shapes.
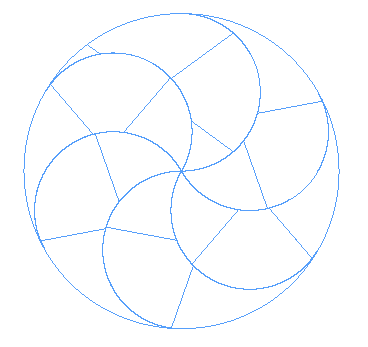
Now you can fill each shape with an image or color, and stroke with the same color as the background, if you want to match feel of the original ad.


You can also customize this effect by uniting some of the shapes to make things like a yin-yang, or even the Mac’s spinning cursor/wheel of death.


For over 100 more cool effects like these, check out my lynda.com course, InDesign FX.
Pretty cool. It’s amazing though how in the 50’s and 60’s they didn’t have the technology we have today. I’d love to see the process in the original design of that wheel.
It would have been hand drawn and the process to get to print is a lost art.
Didn’t work for me. I wasn’t able to get rid of the last of the unwanted segments.
Never mind. Always pays to try, try again :-)
That is the trickiest part, for sure. Glad you got it to work.
I am also having trouble figuring out where to remove the segments. Can you give me a hint? :-)
Julie- Check out this IDML file (you can open it with InDesign CS4 and later). It shows the objects in each step–or you can just cheat and copy the finished pinwheel from the last page ;) https://creativepro.com/downloads/IDS_pinwheel_steps.idml
I can’t get past “To make it a closed path, select overlapping points and use the Pathfinder Join command to unite the separate segments.” How do you detect “overlappint points”?
Hi Beni-
Usually you can drag over them with the Direct Selection tool. If you try that and the Join command doesn’t work, or the object looks wrong when you add a fill color/image, then you probably have overlapping lines and need to delete one of them. When this happens to me, I take the Direct Selection tool and click on a segment then tap an arrow key on my keyboard to nudge the segment out of the way and see if there’s anything behind it. Then you can delete one of the redundant pieces and Join should work. Good luck!
It also helps to use even increments- I used a 17p by 17p circle. Ended up using the add command under pathfinder as well, after getting rid of some extra points