

Creating Scalloped Edges

You know what a scalloped edge is, right? Named after the humble marine mollusk, scalloped edges are made up of a series of curved projections, and can be found on everything from bricks and buckets to bikinis and blankets. Here are a few ways to make a scalloped edge in InDesign.
Use a Custom Dotted Stroke Style
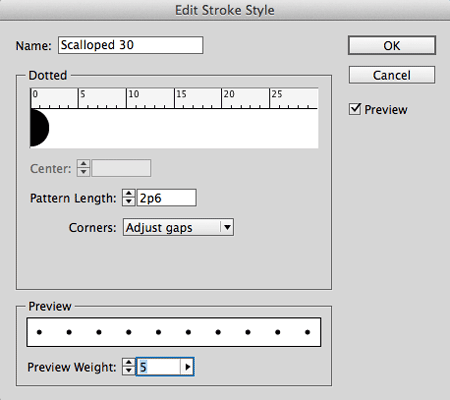
From the Stroke panel menu choose Stroke Styles. Click New and choose Type: Dotted.
Make the Pattern Length equal to the desired stroke width (aka the diameter of the circles that will make up the edge), and leave Corners set to Adjust gaps.
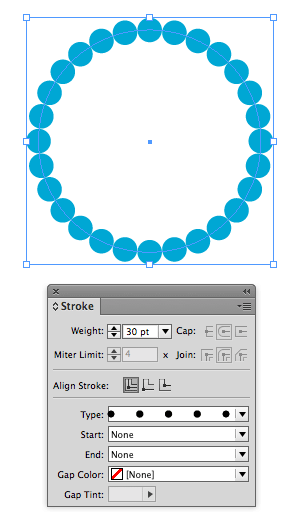
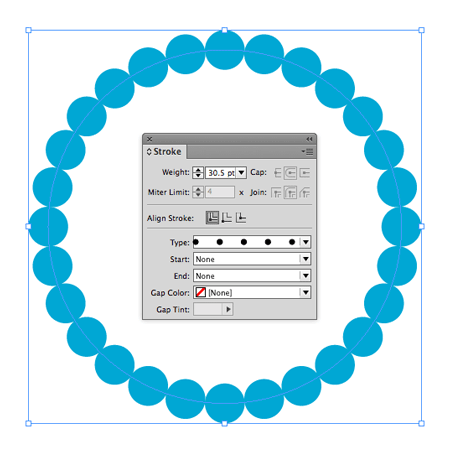
Depending on the shape you apply the stroke to, you may have to fiddle with the pattern length or stroke width a bit to ensure that the dots just touch.
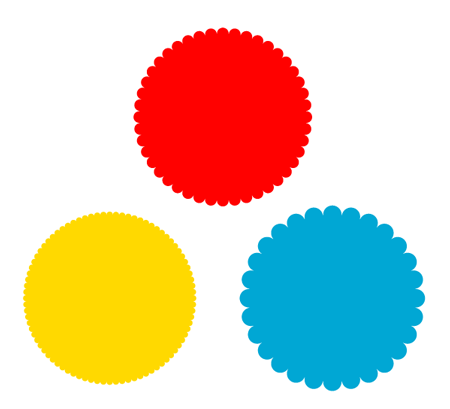
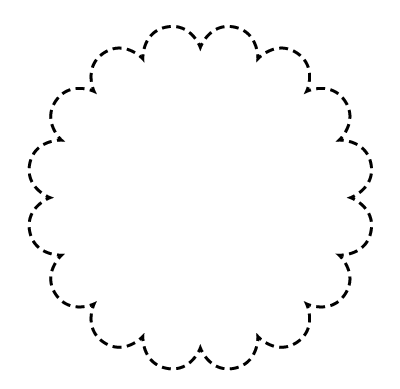
Fill the object with the same color as the stroke and you’re fully scalloped.
Also: check out Understanding Dotted Stroke Styles in InDesign by Kelly Vaughn on CreativePro.com for everything you ever wanted to know about custom dotted stroke styles.
Scalloped Edge with a Different Color Fill
If you want the scalloped edge to be present on an object with no fill (so you see a stroke composed of semi-circles), then you need two copies of the object. The first one should have the dotted stroke. Copy that object and paste it in place. Press Shift-X to exchange the stroke and fill (so the top copy has no stroke). Set the fill color of the top object as desired.
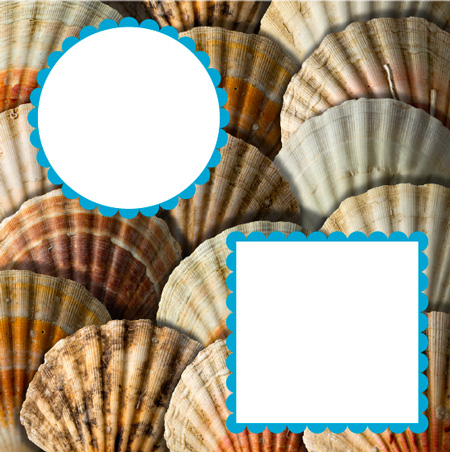
Scalloped Edge with No Fill
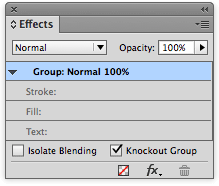
Or, if you want to see through the fill to what’s beneath, use a transparency trick. Set the fill of the top copy to [Paper]. Set the blend mode of the fill to Multiply. Group the two objects together and in the Effects panel apply the Knockout Group option to the group.

Stacked Stroke Effects
You can create some cool effects by stacking multiple copies of an object with the same stroke style applied, and varying the color and stroke widths.

The Effect of Scaling Preferences
One thing to be aware of if you use the dotted stroke method is the effect of InDesign’s preference for scaling stroke weights. You can find this preference in the Transform panel menu.

In the image below you can see the effect of this option turned on and off.

Reverse Scalloped Edges
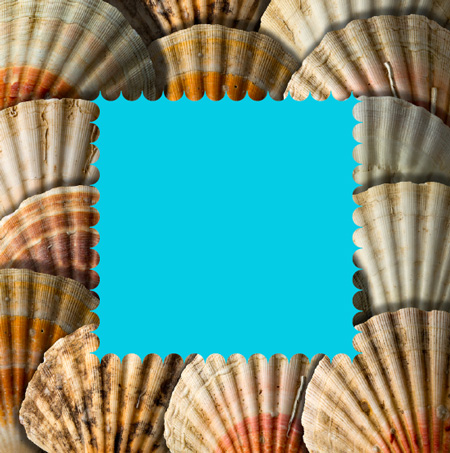
You can also create a reverse scalloped edge with a little blend mode trickery. Use the same custom dotted stroke style as before. Apply the [Paper] swatch to the stroke.

In the Effects panel, set the stroke to Multiply. Then target the Object level in the panel and select Knockout Group.

Scalloped Edges from Starbursts
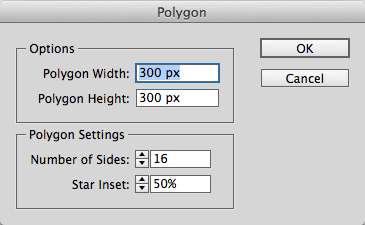
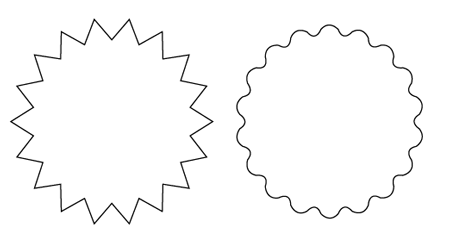
If you just need a circular scalloped shape, you can create some very interesting effects by starting with a starburst. Start by creating a starburst with the Polygon tool. Use a large star inset value and make the number of sides match the number of curves you want.
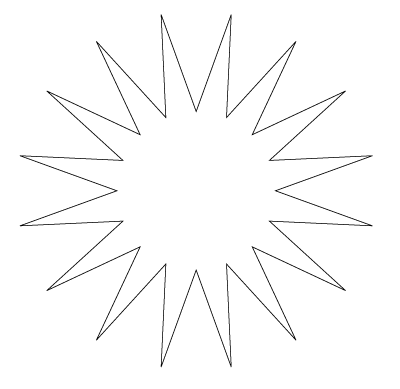
Then with the Direct Selection tool, select just the outer points on the starburst. It’s easy to do this by first selecting all the points, then hold Shift and drag over the inner points to deselect them.

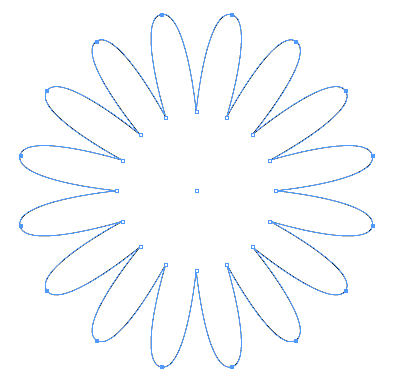
With the outer points selected, choose Object > Convert Point > Symmetrical.
This creates a sort of daisy flower shape.
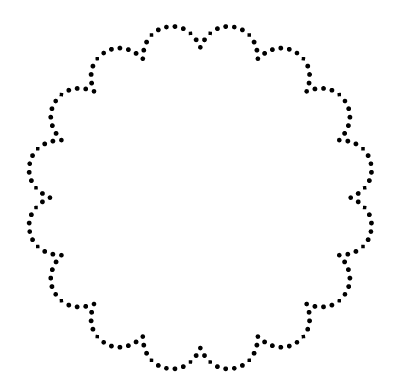
Next, make sure the reference point in the Control panel is set to the center and use the Scale X Percentage or Scale Y Percentage controls (with constrained proportions) to decrease the scale of the selected points. I just click on either button to the left of the fields and press Shift+down arrow a few times till I get the look I want.

The big benefits of this method are that when you scale the path up or down and the number of curves remains the same, and you can apply any style of stroke, including dots, dashes, double strokes, etc.

Using Inverse Rounded Corner Effects
Finally, as a slight variation on the scalloped look, you can quickly create a continuously curved edge on a round shape by creating a starburst and then applying the Inverse Rounded corner effect style. It’s similar to what you’d get by applying the Wavy stroke style to a circle, except that the curves go a little deeper (although if you zoom in you can see that they’re not 100% smooth).
So there you have it, scallops any way you like ’em.
Thanks Mike, that’s really cool – especially the starburst version.
I found that once you have made your final ‘daisy’ shape, if you then select just the inner points and then scale them up/outwards you end up with a cool ‘sunburst’ sort of shape, or effectively a star with curves between the points.
Whoa. Awesome stuff. I usually shy away from bursts, but some of these are very usable.
Thanks!
I love it when pros take a simple effect, such as a dotted line, and create diverse creative effects.
Thank you for the tips.
Well done.
I am using InDesign CS6. I don’t see the first box as my option when I choose the Stroke window? I do have the second box but when I choose 30 as my weight, they dots do not connect around the circle. It’s an interesting concept and would be very useful in my publications.
Fantastic tips! Just blew my mind when I started to play with these tools. you can create quite simple and effective pattern effects or complex patterns worthy of talented Illustrator users. Thank you so much for this one!
Thanks for comments!
Barbie, did you create a new custom dotted stroke style? If you do, and make the pattern length the same as the desired stroke width, and the dots should come very close. (eg. create a pattern with length of 3p, apply it to an object, and make sure the stroke weight on the object is also 3p). You may have to increase the stroke weight or decrease the pattern length a little bit to get them to touch precisely.
Thank you, Mr. Rankin, all is well. I missed the first step of creating a new stroke…so elementary on my part. I appreciate your time and expertise.
So simple and effective. I usually steer clear of sunbursts too but this produces a far more sophisticated result. Even more surprising is I would usually have turned to Illustrator to do this kind of thing.
Love this – so simple! thanks so much for sharing this. Just last week i was wondering how to change the gap space on a dotted line – so very helpful!
Thanks!!!!!!!!!!!!!!
Thanks! I have a thousand and one customers who want starbursts all over their advertisements. I always try to turn them into something a little softer, but I’ve been doing that in Illustrator. Great to know there’s a way to do it in InDesign!
GOD!! THANK YOY SO MUCH!!!!!!!!!!!!!!!!!!!! LOVE YOU!!!!
Wonderful tips! Thank you so much sir! :)