

How to Find Obscured Text in InDesign

Someone recently asked if there was a way in InDesign to find text that was obscured by an image. While there isn’t a way to directly find obscured text with InDesign’s preflight features, you might be able to use some other features to help.
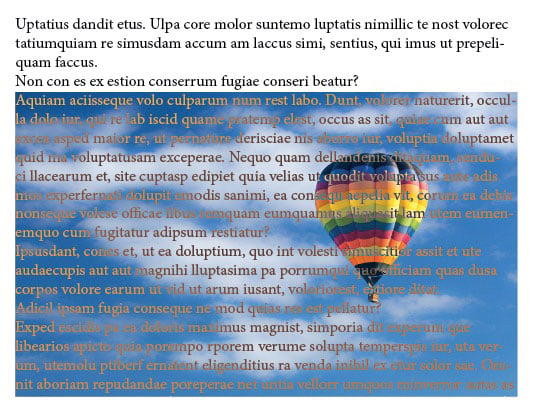
For example, here’s an image that partially obscures some text.

Normally, you’d have to look at the text in the Story Editor or move/hide the image to see the obscured text.
But if you apply a blending mode like Difference to the image frame, the text can be seen.
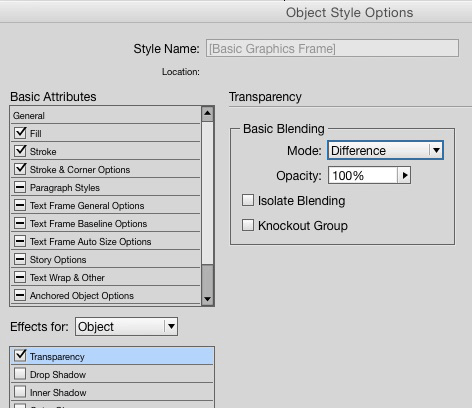
So to help find obscured text throughout document, you can temporarily apply an object style that includes the Difference blend mode to all image frames. If you’re already using custom object styles, good for you! All you have to do is edit your object style to apply the Difference mode and then page through your document looking for text that is visible through an image.

If you’re not using object styles, then edit the default [Basic Graphics Frame] style to include the Difference mode.
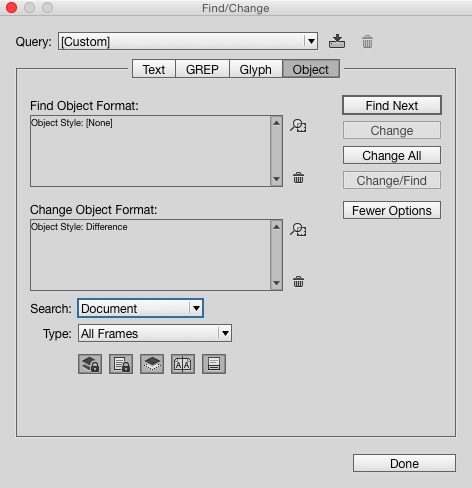
If you have image frames formatted with [None] (which can’t be edited), then you’ll have to use Find/Change to replace [None] with another object style.
After you’ve finished detecting and correcting the problem, you can edit the applied object style(s) to change the Difference blend mode to Normal, and return the document to its original appearance.
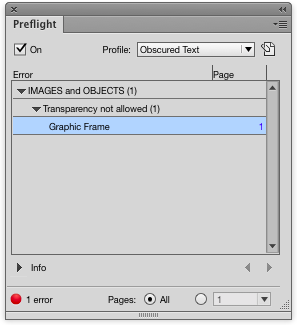
You might also consider using the Preflight panel to speed things up. By creating a custom preflight profile that flags any use of transparency as an error, you can double-click on each item to quickly jump to image frames in the document with the Difference blend mode applied, and see if they are obscuring text.
Similarly, you could use the Links panel to jump to images by clicking on their page numbers.
For heaven’s sake, just do a Ctrl+A to see all the text and photo boxes(at least in outline)on the page. (This is a “left-over” from PageMaker.) It shows you what’s hidden, if anything. Such a simple process! I do it all the time before doing the PDF on a final product.
Using Select All will not show you whether there is text in those frames, which was the problem being addressed here, only that there was a frame (or part of a frame) under a photo. It also won’t reveal anything locked or on locked layers, as this method would.