

How to Number Rows in an InDesign Table

InDesign tables are often used for product lists, for good reason: The table tools are powerful and the basics are pretty easy to master. But the supplied input (e.g. an Excel file) doesn’t always include an extra column with some kind of a numbering system for the items. Of course, that won’t stop your client from asking for one! So it’s up to us to use InDesign and create just that: an extra column with a numbering system for all the product rows.
The Basic Setup
Start by creating a table, or placing your input. Remember that we need an extra column (in my case to the far left) that will hold our numbering system. Don’t resize the column width to the desired amount just yet because we need to tweak the number options first and that will require some room to work with.

Inserting the Number System
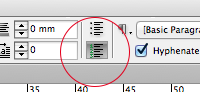
There are only a few options in InDesign that can create an automatic numbering system; I’ll be using the Bullets and Numbering function. First, place your cursor in the first cell and click the Numbered List button at the top of the screen, located inside of your Paragraph options.
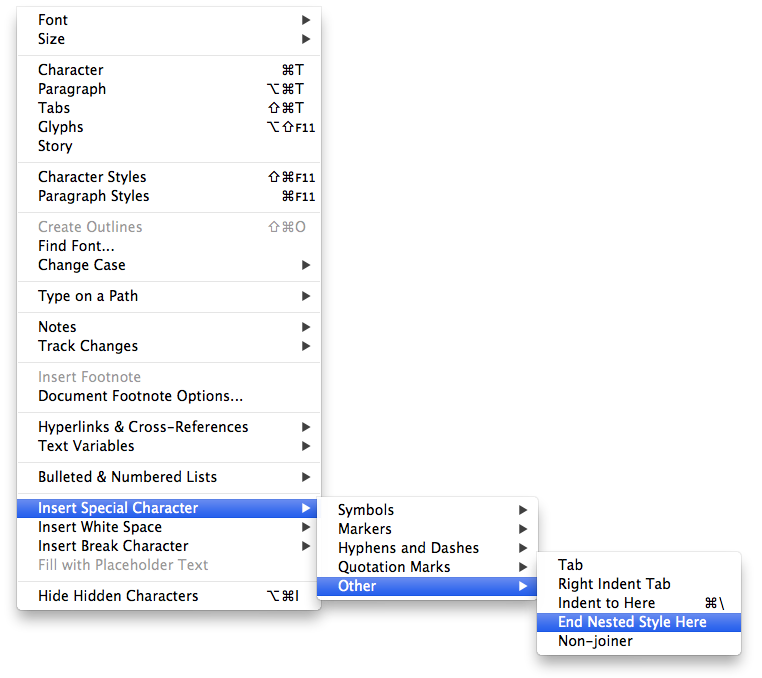
You’ll notice that nothing probably happened when you clicked the button; that is because there is no text inside of the cell to number. So, InDesign is now waiting for you to type a character, any character. The problem here is that we would like to have a character that takes up no or almost no room. There are a few special characters that take up no room when typed (“zero-width characters”), so I like to use one of those. I usually use the End Nested Style Here, but you can really use whatever you feel like. You can find this character here: Type > Insert Special Character > Other > End Nested Style Here. Now you’ll see that InDesign types this character and also starts the numbered list at 1.

Start by putting your cursor inside of your first cell.

Because we typed a character the Numbered List option kicks in.
Configuring Your Numbered List
We still need to change a few options. So while the text cursor is still in your cell, let’s take a look at the Numbered List options. The quickest way of doing this is by holding down Option/Alt and clicking the same Numbered List icon in the Control panel.
In the Numbered List options you can change the notation of the numbered list in the “Number” field. The ^# represents the actual number. By default, you usually see that followed by a period (dot) and ^t (which means a tab character). Delete the ^t at the end; you’ll see this change applied to your text if you activate the Preview checkbox.
I also want the number to automatically progress so change the Mode from Start At 1 to Continue from Previous Number. When you’re done, click OK to close the dialog box.
If you want, you can center the number in the cell by using the regular paragraph text options. When you’re happy with the way your number looks it’s safe to change the size of the cell to whatever width you want.

Change a few options to tweak your numbering system.
Applying the Number to Other Cells
You have the number in one cell, but what about the others in the column? Select the entire cell, but be careful: Don’t just select the text, you need to select the entire cell! The quickest way of doing is is by placing your text cursor inside the cell and then pressing the ESC key on your keyboard. The Esc key toggles between selecting the text and the cell — you want the cell. Next, copy this cell by using Command/Ctrl+C.
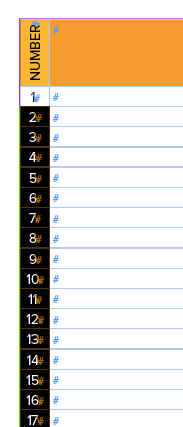
Next, select all the other cells in the column (the cells that you want to have numbering). You can click and drag over the cells with the Type tool to select them all. And finally, paste. You’ll see that all the cells receive a number and the numbers continue the list.

Place your cursor inside of the cell and hit the ESC button on your keyboard to select the entire cell.
Paste your new cell where you want to add numbers.
This copy-paste trick works because when you copy a cell, select more than one cell, and paste, the content of the one cell is duplicated into all the other cells!
How to Handle Multiple Columns with Numbers
If you are using this technique on two columns in the same table you’ll see that InDesign will change the system and continue counting to the cells on the right. That is because InDesign will scan the table from left to right and then from top to bottom and apply the numbering this way. This can be pretty handy, but this can also mess up whatever you had set up before, so be careful.
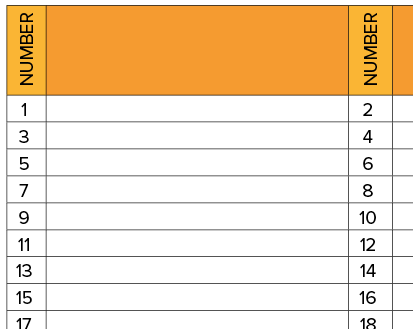
If you paste to other cells InDesign will number cells from left to right and top to bottom.
If you do want to have two or more consecutive numbered lists across your table it is possible to resolve this by using the List function inside of your Numbered List options. To do this you need to open up your Numbered List options and choose “New List…” from the dropdown menu. There you can rename your new list and save it. Remember you can use as many lists as you want, using 1 per numbered series. This way every number will be faithful to their respective list inside the table.
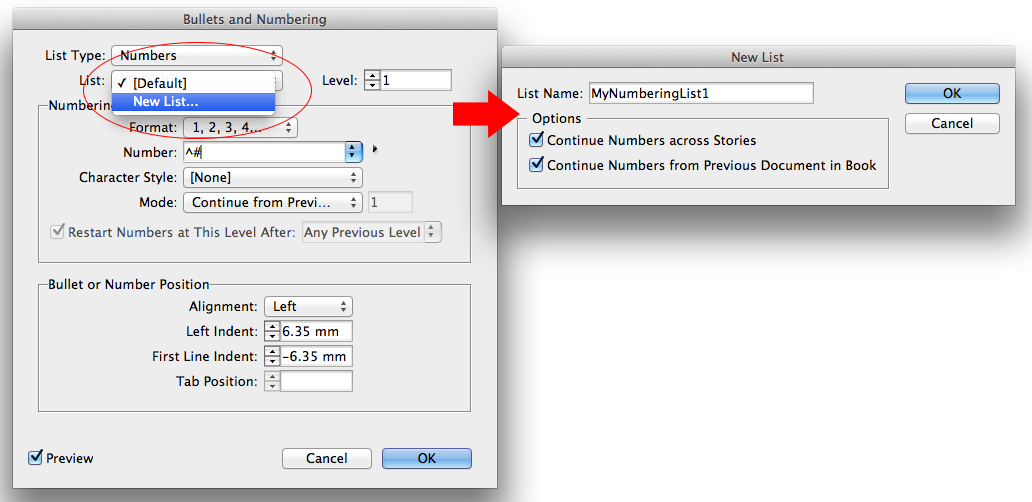
Create your own list for separate numbered lists.
More Resources To Long Documents
CreativePro Week is the essential HOW-TO conference for creative professionals who design, create, or edit in Adobe InDesign, Photoshop, Illustrator, Acrobat, and Microsoft PowerPoint.
Featuring over 30 expert speakers and 75 sessions and tutorials, CreativePro Week offers five days of in-depth training and inspiration, all in one place. No matter your skill level, you’ll learn techniques and best practices you can start using immediately to improve your productivity.
Members get a special discount on registration! Sign up today.
I do something very similar. Except I insert a soft return – then I reduce the leading to 0
This sort of trick is great for numbering calendars.
Thanks for the tip Eugene. Remember that if you want to create calendars you could also try the calender wizard script, saved my butt a few times in the past
https://calendarwizard.sourceforge.net/
Well job… I’ve been waitin for that for looooong time
Thanks sir…
Nice tip – thanks very much.
Thanks for this tip. Just a quick question. Is there any way to change the order of the numbering to go up and down and then left to right, instead of it going left to right first? Or is the only way to do this to create separate lists for each column?
Hi Mollie,
In that case you’d need separate lists I think. Just change the starting number of the second list manually, that way you’re sure that 2 lists follow each other. Thanks for your comment.
It’s cool. Thanks.
But how to reset the number for the next table?
The list flows columns wise in InDesign tables. i.e it will fill all the column first in Row1 and Row2 etc. However, I would like to fill all the rows first then it should go to column2 and fill all the rows then column3 and so. For example:
Default style:
1 2 3 4 5
6 7 8 9 10
11 12 13
I need:
1 6 11
2 7 12
3 8 13
4 9
5 10
Any tips, please share
Thanks,
Masood Ahmad
@Masood: The Tomaxxi fill table script that Bart mentioned above can do this.
Hi David,
Thanks for your suggestions, however, I already tried that. There is one problem with the script that it just fill the table with numbers (they are not automated) and if you delete or add a row then the numbers below do not change automatically. You have to again run the script.
Secondly, in InDesign Tables the data flow horizontally first than vertically.
DEFAULT NUMBERING FLOW STYLE IN INDESIGN’S TABLE
1 2 4 5 6
8 9 10 11 12
13 14 15
ALTERNATE, WHICH IS NEEDED
1 7 13
2 8 14
3 9 15
4 10
5 11
6 12
I came up with some trick and successfully achieved what I want.
https://creativepro.com/topic/number-list-in-tables
“Thanks Jong, however I got something better at my end. I created a text box with 4 columns of fixed width then inserted a table with one column (i.e. one table column per text columns.
Oops, I love troubleshooting.”
I need there should be some kind of script which can tell InDesign in which direction the data must flow.
Hi Masoodahmad,
Hmmm I fear that might be difficult. Yes you’re right the script does not create a live numbering system so right now your best help will be the trick that you’ve just read on the forums.
Thanks a lot…. very useful….
Very helpful article. Thanks for sharing this.
Thank you! That was helpful.
Hi all,
I tried this indesign cs6 windows, but not working,
Any solution ? When paste it comes 1 in all cells. I copeid the cell itself, not text.
Mohammed: right click in the cell and choose “continue numbering.” It seems as though the first cell you copied had the numbering settings to start at 1, so when you copied the cell, it brought with it that setting. Choosing continue numbering will make the numbered list correct.
Hi Bart
thanks a lot to share it.
I need it so much for numbering for books.
I use it for another things.
when I need auto numbering whit icon.
thanks so much
Oh, and you can make calendars with this. Great for us who can’t number things!
A little after the fact but this is what I have been looking for.
This tip worked very well for me, but broke down when my table crossed the page. I had to restart the numbering at the top of the second page.
I’m a newbie, so I quite possibly/probably did something wrong with the table, but I don’t know what because the header transferred properly to the second page. Did I miss something about page breaks?
Hi. I have tables with 2 columns. I need to number down the first column and then continue in the second column.. ie numbering down, not across. Is this possible? I don’t seem to be able to achieve this.