InDesign Eye Candy, part 4: Pattern Swatches
Unlike Photoshop and Illustrator, InDesign doesn’t have pattern swatches that you can use to fill an area with a repeating pattern. But it’s easy enough to make your own pattern swatches from scratch, and apply them via step and repeat.
Start with a rectangle. It doesn’t have to be a perfect square, but make its dimensions nice clean numbers. No 4p1.657 nonsense.
Find or create an item you want to repeat. I’ll call this the “pattern object”, for lack of an official term.
Your pattern object can be a path, photo, Illustrator graphic, a text frame with live text, etc. Just be aware that a pattern can seriously increase the complexity of your page. You can avoid pokey redraw by turning on High Quality Display only when you really need it.
Place copies of the pattern object in the dead center of the rectangle and at all 4 corners.
Be certain that the center of the pattern object is perfectly aligned with the corners, or the pattern won’t work.
With CS4, Smart Guides make this a cinch.
You can use a different object in the center, but you have to use the same object in the corners.
Group the pattern objects.
Cut and choose Edit > Paste Into.
You now have something like a pattern swatch. You can also give it a fill if you like, but you can’t place a graphic in it. There’s only so much one frame can hold. Hey, let’s not get greedy!
If you decide to change the look of the pattern objects, you can select them individually with the Direct Selection tool, or select them all by selecting the frame, then clicking on the Select Content button in the Control panel.
Then apply strokes and fills as you usually would. But be careful with drop shadows and glows that might get clipped.
To use the pattern swatch, select it and choose Edit > Step and Repeat. Check Preview. Set the vertical offset to zero and the horizontal offset to the width of the pattern swatch.
Click OK. Select all the rectangles. Then choose Step and Repeat again and set the vertical offset to the height of the pattern swatches and the horizontal offset to zero.
Good times. View your pattern at even zoom percentages, so you don’t get tricked into thinking they’re misaligned by screen artifacts.
Now certainly, you could dispense with the swatch idea and just use step and repeat to make a pattern of objects. But I think having a swatch is less unwieldy than a bunch of free range objects floating around. It’s easy to fill any space with them. They’re also nice to keep in a library or snippet.
If you make your pattern out of live text frames, then you can use Find/Change to edit the pattern.
You can also play around with shearing to make 3D-looking objects.
If you need inspiration for your patterns, just search the Web for “tessellations,” which are patterns or tiles that cover an area without overlaps or gaps.
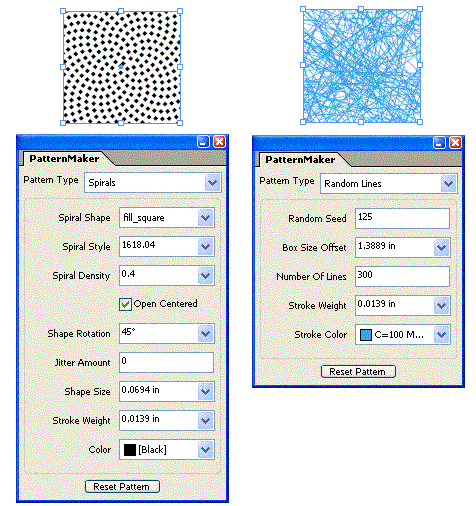
Also check out Teacup Software’s PatternMaker, which allows InDesign CS–CS4 users to easily create PostScript Patterns.
Corner Options
A related technique is using corner options in combination with step and repeat.
Start with a square frame. Choose Object > Corner Options, Inverse Rounded. Set the size as desired, but making it one third the height of the square works well.
Choose Edit > Step and Repeat, and set the horizontal offset to the width of the square and the vertical offset to zero. Set the repeat count to taste. Click OK.
Select all the squares. Choose Step and Repeat again and set the vertical offset to the height of the squares and the horizontal offset to zero. Click OK.
If you want to apply an effect like Bevel and Emboss, you first need to join the squares. Select them and choose Object > Pathfinder > Add.
Then go nuts.
You can’t join pattern swatches because then you’d only have one frame and the pattern wouldn’t repeat. Then again, if you want your pattern to look like tiles, select the pattern frames and bevel and emboss ’em.
After you get the hang of it, experiment! You’ll see that you don’t have to place pattern objects only at the corners of your swatches, as long as you take care that the pieces align precisely. Use the Control panel and your arrow keys instead of the mouse. It may take a little trial and error, but with the power of patterns, you can turn a single spacecraft
into an invasion fleet.
To InFinity, and beyond!


nice ideas!
awesome ideas! Never would have thought about them…. i guess the idea is to get the right “pattern object” then move on from there.
Is there a way to save a particular “pattern object” to make them easier and more accessible for later use or reuse?
Reuben
Martin and Reuben-
Thanks :)
I think the easiest way to save them for re-use is as a snippet, library item, or in a master pattern document with all the items in your swatch collection.
In any case, if your pattern uses linked graphics, it’s probably best to not embed them. Although this would remove the hassle of keeping track of the linked graphics, your document would swell in size very rapidly.
If you use a master document, you could package it to collect all your links.
Two other pattern points:
Another fun thing to try: paste your pattern objects into non-rectangular frames. No reason why you can’t use ellipses, polygons, stars, etc. It won’t make a seamless pattern, but it makes for some funky masking effects.
Alternative to Step and Repeat: For a different effect, select your swatch, set the reference point to the bottom center, and keep clicking the Flip Vertical button in the Control panel. Then make the reference point the center right and keep clicking on the Flip Horizontal button.
Thanks for the little plug for PatternMaker, too. Note that the “demo” version you can download is actually a fully-functional plug-in with 3 infinitely-customizable patterns.
If you want more patterns (like the spirals that Mike showed) then you’d buy the PatternPack addition. But the 3 you get free are pretty nifty, even if you just get that demo.
The good thing is that you can have more than one function per filter but also that you can add you own function to existing filters very easily.
i just started using indesign and am going to try the pattern maker. how can you adjust the color without being stuck with the CMYK? In other words, can you adust the levels of C M Y or K?
@kristen: Do you mean the PatternMaker plug-in? You have to make a new color swatch (in the Swatches panel) first.
Great article, I was looking for this idea quite long time achieve this. Thanks.
awsome!