

Ten Things to do with Arrow Keys in InDesign

Here are 10 ways that using keyboard arrow keys can help you be more efficient in InDesign.
1. Move or duplicate selected objects (including guides). Pressing arrow keys moves selected objects the distance specified in the Cursor Key preference.
Adding the Option/Alt key duplicates the object.
Adding Shift increases the increment to 10x the cursor key value.
Adding Command/Ctrl+Shift decreases the increment to 1/10th the cursor key value.
You can also combine these tricks. For example, Shift+Option+Arrow duplicates the object offset 10x the cursor key value.
2. Increase/decrease values in panel and dialog box fields. This works when the value is highlighted or with a blinking cursor in the field. Adding shift increases the increment in different ways depending on the unit of measure.
For example, in the Control panel:
If your default units are picas, the arrow key moves or resizes the object by 1pt. Add shift to move/resize to the nearest pica.
If your default units are points, the arrow key moves or resizes the object by 1pt. Add shift to move/resize to the nearest 10 points.
Note that InDesign rounds off decimals into integers (which may or may not be what you want).
click ![]() , then up arrow to get
, then up arrow to get ![]()
3. Navigate through (or select) text. Command/Ctrl+Left/Right Arrow jumps to the previous/next word. Command/Ctrl+Up/Down Arrow jumps to the previous/next paragraph. Add Shift to select text. Command/Ctrl+Shift+Left/Right Arrow selects an adjacent word. Command/Ctrl+Shift+Up/Down Arrow selects to the beginning/end of a paragraph.
4. Navigate through (or select) table cells. Arrow keys move your cursor to the next cell. When you reach the end of a row or column, pressing the arrow key again loops you back to the other end of the row or column. Add shift to select cells. Press the opposite arrow to deselect cells.
5. Play with polygons. Press the Up/Down or Left/Right Arrows to change the number of polygons as you draw with the Polygon tools. Press the Right Arrow to add polygons in a row. Press the up arrow to add them in a column. Tap the Spacebar and then press Up and Down Arrows to change the number of sides of the polygon(s). Press Left/Right Arrows to increase or decrease the star inset value.
6. Navigate panel lists. When you summon the Swatches, Links, or Layers panels (with either their keyboard shortcut or by choosing them from the Window menu), you can immediately navigate through them with Arrow keys. If the panel is already open, Command+Option/Ctrl+Alt click on list, then navigate with arrows.
7. Navigate through menus. Up/down Arrows move through the available menu choices. Left/Right Arrows enter/exit submenus. Add Command/Ctrl to jump to the top/bottom of menus.
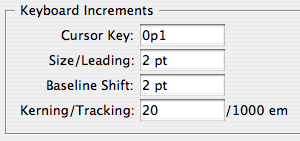
8. Change text spacing. Press Option/Alt with Left/Right Arrows to change kerning or tracking. Press Option/Alt with Up/Down arrows to change leading. Press Shift+Option/Alt with Up/Down arrows to baseline shift text.
9. Use Quick Apply. When the Quick Apply list is open, press Left/Right Arrow keys to move through the selection field; press Up/Down Arrow keys to scroll through the list.
10. Select a file to place. When you’re placing multiple graphics or text files, press an arrow key to cycle through them, and select which one to place.
A few more arrow points
When you’re in a dialog box you can tab through the controls and use the arrow keys to select different radio buttons. For example, when you open the Numbering and Section Options dialog box, you can use the down arrow to switch from Automatic Page Numbering to Start Page Numbering at.
![]()
Shift into High Gear: As noted above, you can press Shift in some cases to increase the increment of change when you use an arrow key.
Adding Shift changes:
- percentage values by 10%
- angles by 5 degrees
- columns by 5
- tabs by 10 pts or 1 pica (depending on your default units)
Power Zoom: You can click and hold with the Hand tool to invoke Power Zoom. Drag the red rectangle and release the mouse button to move to a different part of the document. If you want to change your magnification level too, use the arrow keys. Up or Right Arrow increases the size of the rectangle (increases the visible area). Down or Left arrow decreases the size of the rectangle (zooms in closer).
thanks for all of the “pointers”
re: number 5…wiggling the mouse is a Mac only requirement.
Navigate through fonts names to change live the text format.
New in CS4: Use the arrows to change the number of rows and columns when placing multiple graphics as a contact sheet.
And with the Shift key increase/decrease the gutter of the contact sheet
Using the arrow while placing a contact sheet requires a third hand. On my left hand I hold down cmd+opt and drag out the contact sheet, with my free 3rd hand I am able to use the arrow keys to change the size of the gutters as well. My forth hand is still free to juggle though.
@ Fritz: use the other side of the keyboard! left hand on cmd/ctrl + alt, with thumb on the arrows, right hand does the dragging :-)
@Somerset – I could do that, but why would I want to press my command key on the right side of the keyboard? It is still pristine and readable, while the other command key is worn off and abused.
oops i posted a duplicate, my apologies.
#3 can be used in any text field. (On a mac anyway, to my knowledge) I was just doing it while editing an email. Fabulous!
Just in case… When using the Contact Sheet Place option, you only need to press the Cmd+Option/Ctrl+Alt keys initially. Once you start the drag to create the grid, you can let go of those keys, which then frees up your non-mouse hand to press the arrow keys to adjust the rows/columns/gutters.
Nice tip, Michael…but it would still be far easier if we could all just grow a couple of extra hands.
Michael-
Here’s a suggestion for CS5: include 3 modifier pedals (USB, of course), so we can play InDesign like a piano. All these years our feet have sat idly by. Put ’em to use! To select and delete all objects on the targeted layer we could Command+Shift+Option+STOMP. The kids will love it ; )
Hmm, a quick check reveals such things do exist:
https://www.kinesis-ergo.com/foot.htm
I wonder if anyone out there is using one of these things with ID…
@ Mike: Until then, don’t forget — you can always resort to banging your head on the keyboard. :)
How about this: For some reason (I havn’t figured out yet why) I can’t use my arrows at all with Indesign CS4, installed on my MacPro at the office. I mean, they are completely dead and don’t respond. However I don’t have this problem with my mac at home.
Please help!
Lodie
Any way to turn off power zoom? It kicks in far too quickly on my eMac (when i’m actually wanting to just navigate around the spread at current zoom level), causing endless consternation.
incredible word play sir
For point 3. Navigate through (or select) text, is there a way to do that in a table cell? In a regular text box it’s possible but i can’t in a table :(