

Spaced out dots…

I don’t know about you… but I love my dots.
InDesign includes two dotted stroke types. The Dotted and the Japanese Dots varieties.
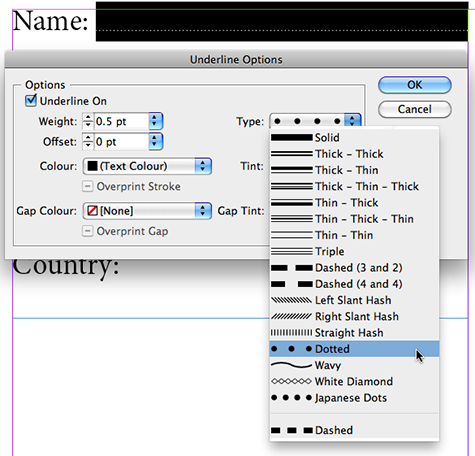
The Type drop-down menu that displays these stroke types pops-up in several areas in InDesign. As soon as you find yourself applying a stroke setting of sorts, you’ll also be prompted to pick a stroke type. You might be applying an Underline (as above) or Strikethrough setting or a Paragraph Rule or adding a border (stroke) to an Object using the Stroke panel.
I’m always a little spaced out by the fact that I seem to have so little control over the spacing between the dots. Basically the space between the dots increases as I increase the stroke weight.
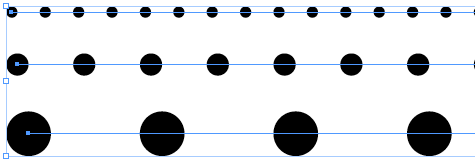
For instance the “Dotted” stroke type, will distribute the dots at 3pt intervals when applied to a 1pt stroke. Increasing the stroke weight to 2pt will increase the distance to 6pt and so on.
So what do I do if I want to check-out some dot distance variations that are applied to a fixed stroke weight, just to see what works best in my design?
Building new Stroke Styles
It’s time to add some new stroke styles to InDesign in which we only define the dot distance.
If you’d like to have the newly added stroke styles automatically appear in each new InDesign document you create, ensure you have no InDesign documents open when adding the new stroke styles.
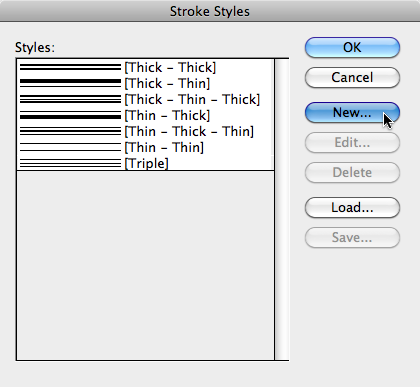
To define new stroke styles to InDesign choose Stroke Styles… from the Stroke panel menu (or Control panel menu).

Next, click New… in the Stroke Style dialog that appears.
The New Stroke Style dialog displays. Choose Dotted for the Type and Name the stroke style. Then set the Pattern Length and click Add. To add additional stroke styles, increase the Pattern Length and amend the Name and click Add for each additional style you’re adding. Once you’re done, click Done.

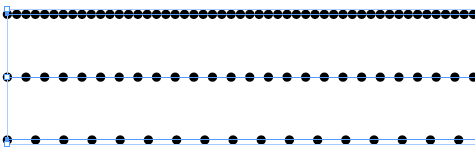
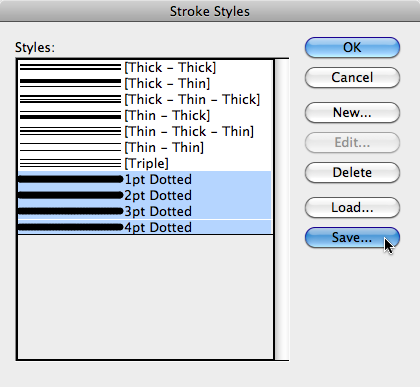
I’m adding four new stroke styles for 1, 2, 3 and 4 pt Pattern Lengths.
Saving the new styles
Once you’ve added a series of new stroke styles, you might want to share them with your colleagues, or just keep a back-up copy somewhere. You could load these styles again if they ever vanish ;-) for instance after your InDesign preferences were reset.
To Save your stroke styles, press the Shift-key on the keyboard and click the first and last Stroke Style you want to save. Then click the Save… button. In the Save As dialog appears choose a location to save the styles to and name your file. Stroke styles are saved with the .lnst extension (line style).
Applying the new styles
You’re now ready to apply your newly added dotted stroke styles. They will be listed at the very bottom of the Type drop-down menu in your Strokes panel (or Underline or Strikethrough options or Paragraph Rules settings).

Nice, now if only Adobe would let us make our own line start and end caps strokes would be really customizable :)
A nice cheap way to make scalable strokes in InDesign, type on Path – Window>Type Options> Center type on line – then use a SHIFT TAB while typing on the line and then give it a Tab Leader – type tab – seleact all – choose Wingings and the letter “w”, for instance, and you get a nice diamond shaped stroke pattern.
Of course you can use any font here – but it’s great fun. You can then use the kerning to space it out or make it tighter :)
Line caps, and custom arrowheads … that’d be the finishing touch …
@Roland you could probably ‘fudge’ that by drawing a line, then using Type on a Path and inserting the start and end icons (artwork), then choosing the Justify All Lines alignment to push the start and end-point apart. It’s a bit of a work-around. In all honestly I’d probably jump across to Illustrator for that and build a Brush.
time to put in a wish (feature) request :-)
https://www.adobe.com/cfusion/mmform/index.cfm?name=wishform
Custom size arrowheads is something I really want.
I’ve rarely used InDesign’s arrowhead feature ? I usually have to draw my own because there’s no control over their size and the size is almost always wrong.
Annoying because in Photoshop you have full control over arrowheads.
(I also miss the sliders Photoshop has for adjusting things like drop shadow distance and size.)
Hi, I make books for kids and have to make/draw a clock. How do I get the minutes dotted around the circle?
Hi Jackie, please check-out this new blog-post on how to do this: https://creativepro.com/clockwork.php
I know this post is 2+ years old, but I’ve got an issue with InDesign dots and thought someone here might have a solution.
When I add a dotted stroke to a circle shape, often there are 2 dots (I’m assuming there are the start/end dots) that do not space properly, ie the space in between these two “problem dots” is tighter than all the others.
Is there a way around this? It’s a little thing, but quite annoying!
Thanks!
Hello, sorry but I just realized this problem is specific to Adobe Illustrator, InDesign works fine. Please feel free to delete my posts!
Joe
@Joe
Adobe introduced a solution for that in Illustrator CS5. Not sure which version you are using.
Select your object in Illustrator with the Selection tool, then in the Strokes panel click the ‘Adjust dashes to corners and path ends, adjust lengths to fit option. Only possible issue I see with that is that your dots might become ‘ovals’ in some spots ;-)
You can build a Pattern brush as well and control how the spacing is set as part of the brush options.
Hope this helps,
Cari