

The Gradient Panel Is Such a Drag

Question from the Mailbag:“One thing I can’t figure out, and it’s very frustrating, is how to make a color gradient in InDesign. The gradient panel only gives me a b/w gradient. Is there a way to get this to be a color gradient? What am I missing here?”
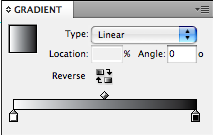
Great question. I share your frustration. Let’s take a look at the Gradient panel. First deselect everything. The Gradient panel seems to have a knack for applying gradients when you don’t want them. Open the panel by choosing Window > Gradient. There’s no default keyboard shortcut.

A silent cipher of a panel. Could there be any less information to work with? Oh well, when in doubt, click.
With either selection tool, click on the ramp (the long rectangle) or the fill box (the big square) to show the gradient stops (the little shapes dangling from the ramp).
Click on a stop. You can tell a stop is selected when its teeny tiny triangle is black. Magnified here for your enjoyment.

With the stop selected, you can see in the Swatches panel that this stop is [Paper].

Now let’s pause and take a vote. Without peeking below, raise your hand if you think that clicking on another swatch will fill the selected gradient stop with that swatch color. There’s every reason to believe that it will, right?
The answer is, clicking a swatch will not fill the selected gradient stop, but it will hide all the stops in the Gradient panel! Excuse me a moment…WT@#%!?…Ahem. This is like clicking on a character style and the only result being all your text becomes de-selected.
There are two ways of dealing with this quirk.
1. Hold down the option/alt key while you click on the swatch.
2. Instead of clicking on the swatch, drag it to the gradient ramp. You don’t actually have to select a stop first. Nor do you have to drop the swatch on a stop. If you drop it in between stops, it becomes its own stop.
Drag the diamond on top of the ramp to move the midpoint of the gradient, if desired.
Once you’ve made the gradient with the colors you want, what do you do with it?
Good: To apply it to a frame, select the frame (your stops will disappear but don’t panic) and click the ramp or the fill box. Or drag and drop from the fill box onto the frame.
Better: Create a new gradient swatch by drag and dropping the fill box into the Swatches panel.
Best: Choose New Gradient Swatch from the Swatches panel menu. This way you can give your new gradient the name it deserves. You’ve come too far to just call it “New Gradient Swatch.”
Actually I think an even better approach is to avoid the Gradient panel. Make, store, and edit your gradients in the Swatches panel, for the same reasons you make, store, and edit solid colors there: consistency, control, and convenience.
It didn’t used to be much of a problem in CS2, but since they decided to scrap CS2’s panels setup for CS3’s panels ? of which you can only have one open at a time (who the F came up with that?!?) ? it’s been a major pain in the rear end. More in Illustrator than in InDesign though, as as you point out, you can just make a new gradient swatch (set the Stop Color to Swatches to use those colors) and be done with it in InDesign.
If you’re doing gradients, or at least when i’m making gradients.
I pull the swatches panel out and dock it beside the other panels. Then I pull the gradient swatches out and dock it into the swatches (not as a tab) at the bottom of the swatches panel (you see a thick blue line when dragging the gradient panel to the bottom of the swatches).
You can click on each icon to bring up it’s individual panel, but pressing the two arrows at the top right of the docked panels brings out both panels at the same time, it even moves your window over, so you don’t overlap anything you may be working on.
It’s the simple to pull a swatch into the gradient, and then pull the gradient into the swatches panel.
It’s easy enough, and besides, I don’t use gradients all that often to want an elaborate setup, although I agree it could be a little easier to create gradients.
Screen shot
https://tinyurl.com/4knv8v
Just create a new gradient swatch (the option in your swatch pallet), click on the left ramp (rectangle) now you can choose your color, CMYK, GRAY, RGB or from your swatches. Do the same thing with te right color rectangle. You can also choose if you want a linear or radial gradient. click OK and you have your gradient swatch.
Sorry for the english :)
Great post, thanks!!! The gradient panel has always confused me.
Phyllis
@was frans
That’s actually my least favorite way of creating a gradient. The window they give is too small, and if you have a lot of swatches it can be tedious. There is no way to make the swatch view any bigger.
The Gradient panel works much better in Illustrator. I really don’t understand why they don’t work the same way. In AI, when you select a gradient stop, the fill box in the Color panel shows that color. To alter it, you can just drag a different swatch into the fill box.
If you think gradients work better in Illustrator CS3, just wait ’til you see how they work in CS4! AI CS4’s gradient tools are drool-worthy, compared to the simple and confusing features we have in InDesign.
The problem is that Adobe can’t just pull a feature from one program and plug it into another one. Doesn’t work that way. Each program has to build their own features their own way. Sigh.
I sigh in concert, David… But it seems to me that Adobe are working in that direction. The type engine in Photoshop and Illustrator are synchronized. In CS3 we got the first round of “headless” Photoshop inside InDesign. Illustrator seems to be migrating, under the hood, toward a plug-in architecture similar to the other suite apps, which will ultimately make it lighter, nimbler, and easier to integrate.
The mind boggles at the amount of integration Adobe has achieved already while simultaneously upgrading, incorporating Macromedia apps, and porting to MacIntel over the last three years or so. I can’t imagine the amount of engineering time involved.
Roland, if the hiding panels upset you that much :) just click on the double arrow in the dark gray bar at the top of the panel well. This will toggle the panels to their expanded mode. As long as the Swatches panel and the Gradient panel are in different panel groups (as they are in the default workspace), you can easily have the Swatches and Gradient panels visible at the same time.
Self Edit: Eugene already pointed this out I noticed. Sorry.
Mark, having the panels open like that is nothing like how InDesign CS2 handled panels, as in you could/would dock them and open or close as many ‘sets’ as you’d like. Now you can only open one at a time, or open the entire ‘dock’, which takes up lots of space.
This does help. The question I have is how to make a radial gradient but instead of a round one make it like a star or even a square. I haven’t been able to figure out how to do it. When I needed a square radial gradient I did it in Quark, then made a pdf of it and imported the pdf into Indesign CS3. There has to be a way of doing it in CS3.
Joe-
What you’re talking about sounds like an Illustrator-style blend. Since ID doesn’t have a Blend tool or command, you’ll have to fake it.
Try using an Inner Glow. Fill your square or star with one color. Then choose Object > Effects > Inner Glow.
Set the blending mode to Normal and click the swatch button and pick your second color. Set it to 100% opacity.
Now you’ll have to monkey with the Options to make it look nice. Choke it 50% or less. You can reverse the blend by switching the Source from Center to Edge or vice versa.
Thanks Mike. It does help but I still can’t quite get what I was looking for. I had a large square that a customer wanted me to put a radial gradient in. The wanted the gradient effect to be square in the box. By default ID makes it a circle. I’ve been playing with tip you gave me and I’ve gotten in better but not perfect yet. I’ll keep messing with it.
Thanks again for the great help!
It might not give you just what you need. It’s kinda like using a butter knife as a screwdriver. But in a pinch, it’s worth a shot. I might write it up as a post sometime.
Actually it would be funny to do a, “What could you do Quark 4, But not in CS4,” post, and the workarounds.
Joe
Why not make the desired blend in AI? You will then have total control over the end result, Star, Triangle, Square any shape you want.
I’m fairly new to InDesign and am having trouble creating gradient swatches. Are there any free or inexpensive downloads of various gradient swatches available?
@Barbu: If you have Adobe Illustrator, apply a cool gradient there, then copy the object and paste it into InDesign: https://creativepro.com/getting-cool-illustrator-gradients-into-indesign.php
Wow. What a great trick and so simple.
Thanks.
Thank you, thank you, thank you! I was sooo frustrated, but now my gradient is colorful, thanks entirely to you. The Adobe help page is a misnomer for sure.
BTW: That thank you is directed to the author, Mike Rankin, of course.
Thank you so much for showing me how to get round a problem that I’ve been struggling with for years. There’s a pint of Guinness on me for you if you ever come to Dublin.
Sean
Sean, if I’m ever in Dublin, I’ll take you up on that ;)
This too had been bugging me. I wish i knew before that it was aa simple as clicking the gradient marker and then alt click the colour.
Why is it that CS6 is different to every other program i have used for gradients? In other programs you simply double click the gradient marker and you are shown the colour selector.
Adobe is becoming the new Microsoft, doing what they want and forcing change on paying customers rather than providing customers with the features they ask for and need.
Btw, this is a great site
You are a bloody genius = how the &*&^%%& did you work that out. Thank you God
Terrific post — informative and entertaining. I learned something here even though my quest was to find out how to remove a gradient that insists on applying itself to my text and refuses to go away.
Good work, thanks. One question:
Is it possible to apply *two* gradients to an object, for example one at the top and one to the left?
Thanks!
You are a legend!
As someone who loves to work with Fireworks, AI is a real challenge. Thank you so much for making sense of it for me.
All the best to you.
When making a radial gradient, is there any way to tone down the white center? It doesn’t seem to matter what color I choose I always get a white dot in the center of my radial gradient.
Paul: You would need to change the color from Paper (white) to something else (such as a tint of black)
For me the thing with alt+click didn’t work so I found another way…If you create a new gradient in the swatches. And then open in (double click on the small colour square) then you can change the colours in the gradient stops using swatches, CMYK, LAB and some more option