

Three More Great Ways to Add Colors to InDesign Documents
Editor’s note: This post is a follow-up to Erica’s earlier article on how to add colors to InDesign documents using Adobe Capture.
How to Add Colors to InDesign Documents With Adobe Color
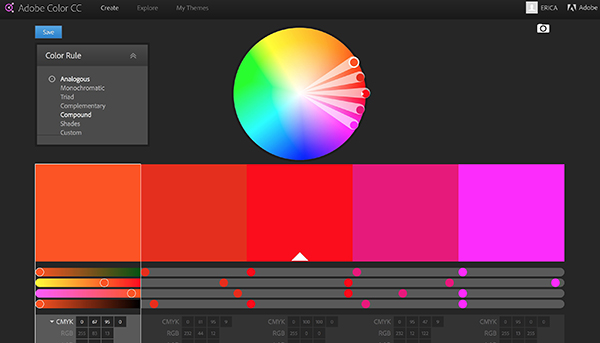
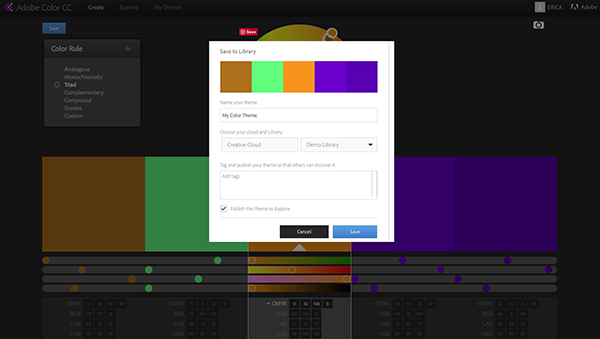
Adobe Color—which is what the late, great Kuler eventually morphed into—is the online home of all your color themes. If you created a theme in Adobe Capture, you can access it from the Colors site. Not only can you access themes, but you can also manipulate them, or create new color themes as needed. Select the Create tab to create a color theme from scratch, choosing from the color rules on the left-hand side. Drag the selection around the color wheel, and individually adjust each color’s mode and value sliders. You can also click the camera icon in the upper right if you want to use a source image to create the theme. When you’ve perfected your theme’s components, choose Save. Just as with the Capture app, you can assign the theme a name, send it to a CC Library, add tags, and choose to Publish to Explore (make it public).
The second option, if you don’t want to create a theme from scratch, is Explore. Selecting this option lets you browse public themes. You can view them in random order or by popularity. The great thing is, once you find a theme you like, you can choose to edit a copy of it. Rolling over a theme gives you that option, as well as the choice to appreciate, share, and save. When you save a public theme, again, you’ll have to choose which Creative Cloud library to save it to.
The last main tab on the Color page is My Themes. This is where themes you’ve created live. View your theme collection all together, or by individual library. Clicking on the info icon for any theme brings up not only information on the theme, but the chance to make it public, if it isn’t already. Use the Edit Copy icon to make changes at any time, including the theme’s name, by clicking the blue pencil icon next to the name.
Using InDesign’s Color Theme Tool
Introduced in InDesign CC 2014, the Color Theme tool gives you the opportunity to capture color directly from elements in your InDesign document. First, make sure you have the tool configured to your liking by double-clicking on the tool’s icon (which occupies the same square as the Eyedropper in the Tools panel). Options include whether or not to ignore opacity and effects when sampling color, and choosing how to handle the color mode. By default, the colors are added—and converted, if necessary—in the color mode that matches the intent set up when the document was created.

Once you’ve set the options, sampling colors is easy. Select the tool and either drag across items on the page, or click on an image. Clicking an image will sample up to five colors from the image, but you can focus the selection by dragging across only a portion of the image. When you’ve got a palette you like, you’ll want to save it somewhere. You can click the Add to Swatches icon (it looks like a palette with a plus sign) to add the entire theme as a color group. If you just want a single color to be added, Option/Alt-click the same icon. You can also choose variations of the theme, such as Bright, Dark, or Muted before saving. If you want to have the theme available outside of InDesign—or in other InDesign documents—click the Add to Library icon (the cloud with the arrow). Note that this saves the theme to your currently selected CC Library, so make sure to select your library first in the CC Libraries panel.
Working With Colors in Creative Cloud Libraries
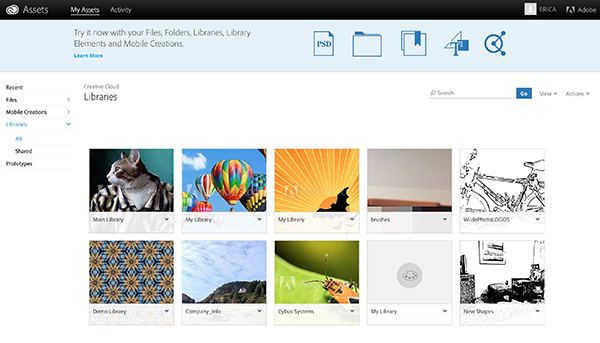
No matter where you’ve created your colors, there’s a common thread running through each method: Creative Cloud Libraries. Not only is the Creative Cloud the place to store all of your assets, color and otherwise, but it’s the easiest way to be assured you’re using the same defined colors throughout your apps. You can view colors stored in libraries either from within InDesign, or you can head over to assets.adobe.com and click on libraries. Clicking on a specific library will display all of its assets, including color themes. From here, you can rename the theme, and move or copy a theme to another library. I prefer to manage my color themes this way, so that I get an overview of my assets outside of the confines of any app, but you can organize library assets from the CC Libraries panel within InDesign as well. Once everything is organized neatly in libraries, it’s time to head to InDesign to use these colors.
Bringing It All Together
Back in InDesign, it’s easy to access the colors you’ve captured and saved. If you created them with InDesign’s Color Theme tool and saved them to a document’s swatches, you can either open that document, or load swatches from that document. Otherwise, you will probably select them from a Creative Cloud library. With the CC Libraries panel open in InDesign (Window > CC Libraries), choose the library where your desired color theme lives. Once you’ve scrolled to the desired theme, right-click or control-click on the theme to bring up the contextual menu. Choosing Add Theme to Swatches puts the entire theme into the Swatches panel as a color group, while choosing Add to Swatches will add only the exact swatch your cursor is hitting, so point and click carefully.

There is yet another way to access colors stored in CC Libraries, and that’s by using the Color Themes panel (Window > Color > Adobe Color Themes). This panel is like a mini portal to the Adobe Color webpage, in that you can create new color themes, explore others’ themes, and access your existing themes. I’ve had issues with this panel since it was introduced, namely that the scroll bars are non-existent, so I can only view the first eight or so themes in each library (which I’m sure is a bug and not a feature). If you are able to view the theme you want, either click once on a specific color to add it to your swatches, or use the Action menu below each theme to add the entire theme.

Color Yourself Informed
There are many ways to get that perfect color—arranged in harmonious themes—into InDesign. The uniting power of Creative Cloud Libraries makes the transition between apps fairly foolproof. The hand-off from capturing colors, to editing them, to putting them to work in InDesign is precisely the seamless operation that Adobe’s Creative Cloud was created for. And anything that makes my life easier is something I think is worth embracing.