

Tip of the Week: Gridify Magic

This tip was sent to Tip of the Week email subscribers on November 19, 2015.

Sign up now and every week you’ll get a new InDesign Tip of the Week and Keyboard Shortcut of the Week, along with roundups of new articles at InDesignSecrets, plus exclusive deals sent right to your Inbox!
Just scroll all the way down to the bottom of this page, enter your email address, and click Go! We’ll take care of the rest. Now, on with the tip!
I can’t play the piano, though I can tap out a few tunes on the keys with one or two fingers—sort of like I’m using a bunch of keyboard shortcuts in InDesign. And sometimes when I’m using shortcuts in InDesign, it feels like I’m playing a little tune on the piano—like when I’m using the Gridify feature to create a set of duplicate objects on the fly. While this does require more than one finger, it’s easier than playing “Chopsticks”, and for your efforts you get an instant grid of objects, you can adjust as you drag. Here’s how.
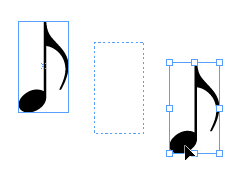
Start by selecting the object you want to duplicate.

Pause for a moment, then press and hold Alt (Windows) or Option (Mac).
Start dragging. The original object stays put and you’ll see a second copy at your cursor.

Without releasing Alt/Option, press the right-pointing arrow on your keyboard. You’ll see the bounding box of a new copy in the middle of the original object and the one at your cursor.
Want more copies? Press the right arrow again to make as many copies in a straight line from the original to your cursor.

If you keep adding copies, eventually they’ll start to overlap, which might be what you want for a certain effect.

If you want fewer copies, press the left arrow key.
To constrain the set of objects to a horizontal row (or 45 degree angles), add the Shift key.

Now you can turn the single row of objects into a grid by adding more rows (to create columns). Press the up arrow key to increase the number of rows, press the down arrow to remove rows. Hold Shift to equalize the spacing in between objects.


Practice a few times and you’ll get the hang of it. You might never master Beethoven, but you can quickly fill a page with the magic of Gridify.
This is pretty awesome, thanks!
In a recent past with old versions of Indesign, sometimes this feature became default. Everytime dragging the object without pressing anything the copy appeared in the middle. Why? There’s a way to on/off that behavior?
Sorry for the english.
Hi Thiago- There’s no preference to turn Gridify on or off, so I’m not sure why you’d see that behavior. If it happens again maybe try restarting InDesign or try another keyboard to see if it’s a hardware issue.
Thank you! Maybe a bug.
I’m using InDesign CS6. When I Alt->, instead of the third copy appearing halfway inbetween the first two objects, each copy nudges in tiny increments, so all new objects appear just a pixel to the right of the original. Is this because of my version, or is there a setting to correct this?
Hi Lexa- It works in CS6, and there’s no setting to worry about, so it sounds like maybe you’re accidentally releasing or re-pressing one of the keys at the wrong time. Try doing it really slow and deliberate, one step at a time, following the instructions exactly.
Hi – I am using InDesign CC2015, on MAC, but my laptop has an extended keyboard – with this configuration (not sure which part), I had the same results as Lexa. Where using the right-pointing arrow only copied my object.
Here’s what I was doing wrong: I needed to hold the ALT key and drag with my mouse, and then not let go of the mouse or the ALT key when I used the arrow keys. (I was letting go of my mouse when I was done dragging.)
Plus, when I used the arrow keys, my right and left arrows didn’t work for me, I needed to use my up and down arrow keys. But I realize this was the behavior for the extended keyboard. When I use the keys on my laptop, the left/right & up/down arrows behaved as Mike describes.
Thanks for the tip. – deb (aka c0d3gr1)
I’m on an iMac with extended (wired) keyboard & had the same results as Lexa. I tried it in both InDesign CS6 & CC2014. Same in both.
My coworker tried it & it worked fine. The only difference is he uses an older “pro” keyboard.
I’m using CS6 on a PC and am experiencing the same problem Lexa reported: gridify duplicates in teensy increments whether I use up or right arrows. And no, I’m not releasing the ALT key.
thanks
I have to release opt then use arrows. “Without releasing Alt/Option, press the right-pointing arrow on your keyboard”
Great Tip
OH MY @&$#*$&(*@#(&*@#$&(*@#$&*(@#$(&*$!!!
I can confirm that this works on CC 2017 for Mac without holding ALT after the copy has been dragged out. You just need to hold the CLICK. After using the arrow keys, you can continue to drag the initial copy to increase/decrease the space between each of the gridified copies. Once you release the click all copies will be confirmed.
This gridify feature is very cool. I’m trying to know how it’s call my language which is french.