

Aligning the fills on objects with a stroke


This past week a client was sharing a frustration that they were having with the alignment of fills on frames that had a large stroke.
They were trying to line up the fill of an object that had a stroke with another object that didn’t have a stroke. Since the align panel didn’t seem to be working for them, they were manually trying to line up the fills and it was becoming quite a chore for everyone involved.
To lineup the fills of the object I aligned the stroke to the inside. After selecting the two objects, I aligned their top edges.
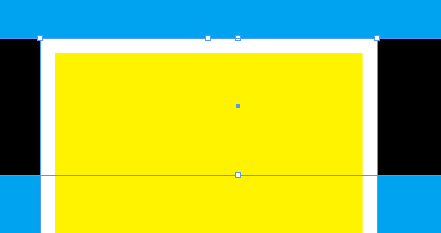
Now that the top edges are aligned, I can change the alignment of the stroke to the outside to achieve perfect alignment of the two fills.

After sharing this work around it made me think that the align panel should be enhanced at some point (CS5?) to allow alignment based on stroke or fill.
Interesting idea, Fritz.
However, the ‘filled’ panel effectively becomes larger by double the width of the stroke in both dimensions when you change the stroke to the outside (I assume the images you’ve posted above are not to scale, or that last bit should read ‘the panel effectively becomes quite a bit smaller’, which I for one would be at a loss to explain).
While this may not be a problem in all instances, I can imaging it could be in some.
Erique, it doesn’t have to be if the stroke’s set to outside or center to begin. Just change it to inside and then back after aligning.
Personally, I don’t see why the stroke gets applied to the object in such a way the object’s dimensions actually change.
Perhaps it’d be nice for InDesign to not only let you align with and without the stroke, but also give two dimensions (with and without stroke) which should make resizing an object without having to factor in the scaling of the stroke quite a lot easier also.
@Fritz: Join the “wish for” club.
I hope someone will listen to your wishes.
About 5 years ago, I made a wish for 3 align features:
(1) Align to Page/Margins.
(2) “Don’t Use Preview Bounds” option (apposing to Illustrator’s “Use Preview Bounds” feature).
(3) Key Object alignment as in Illustrator (which was once documented as existing, but was never actually there).
I’ve seen the first one added in CS3. Still waiting for the other 2.
Nice little workaround.
I think you can also note the stroke width. Then in the Distribute Objects insert the stroke width, then distribute to top.
It won’t matter if the stroke is on the outside, center or inside. It will distribute top and bottom. It could have some uses and some faults.
@Eugene:
A bit of a problem to use distribute when you try to align more than 2 objects.
If you uncheck “Dimensions Include Stroke Weight” from Control Panel´s flyout menu, you can use X and Y positions of objects with different strokeweights.
If you set a top edge of all objects to go – let´s say – to Y: 18mm, the real edge of the object fills goes to that point. (Reference Point has to be in right position too.)
Not so handy, but one more workaround anyhow….
@Adi,
I have an AppleScript developed for CS 2 and 3 that aligns to page or spread with or without margins. It will also align selected options “as a group” so that you don’t have to group them and ungroup after the alignment is done.
For the other two I would have to look at the functions in Illustrator to see how they work but I would imagine that it could be done without too much problem.
-Jerome
I wouldn?t even see this as a problem. If you want a stroke to stick out then you give it an outside stroke (after you have it in position, obviously).
@Adi Ravid…
(3) Key Object alignment as in Illustrator (which was once documented as existing, but was never actually there)
The easiest workaround for this is to temporarily lock the “key” object. When performing the aligning, all the remaining objects have no choice but to align relative to the position of the locked “key” object…
But I’m guessing you knew of that workaround… ;)
@Casey D’Andrea:
I know about the Lock Position and used it, but it’s not as strait forward as the simplicity of the key object, plus it produces a strange result for distributing.
Try this:
Draw 5 objects in a column. Make sure there’s a noticeable difference in the gap between the middle one to the top and bottom ones, then lock it. Next select all 5 and distribute by vertical centers. The top ones will distribute in the space between the top and the locked objects, and the bottom ones will distribute in the space between the bottom and the locked, resulting with 2 different distributions.
Nice feature….
Now, try to distribute by value and again you’ll get 2 distributions, one from the top object down, and the other from the locked one down.
What the hell…
I like this tip, but Petteri’s comment is very important: For example, if I want the tops of two objects to align (regardless of stroke), I would turn off Dimensions Include Stroke Weight, then set the Y coordinates in the Control panel so that they’re the same (I usually copy the field from one, select the other object and paste the value into the same field). Somehow dealing with the actual numbers makes me feel more secure sometimes.