

Create a Valentine’s Day Pattern Using Conditional Text

Originally published on January 18, 2016
Valentine’s Day is coming up, and so for me it’s time to take a break from the serious work in order to make a design full of fun and whimsy. Checkerboard patterns are easy to make in InDesign because there are so many ways to create these tidy little blocks of color. You can use gradients and stroke styles, PatternMaker, and nested styles; and that’s just for starters!
But in today’s exploration of obscure ways to make patterns in InDesign, I’d like to explore Conditional Text. If you’ve never used Conditional Text before (which is probably most of you), let me explain it. Conditional Text is a way to show and hide certain bits of text all within a single document. It’s a great way to create multiple variations of the same document (such as a student/teacher guide, or a catalog with different currencies). But there are also some unconventional uses for Conditional Text, including creating patterns that would be difficult or impossible to make any other way in InDesign. So let’s get started!
- Create a new text frame. Bring up the Glyphs panel and insert the heart-shaped glyph from Monotype Sorts. Color it red using the Swatches panel.

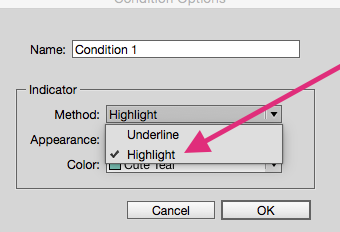
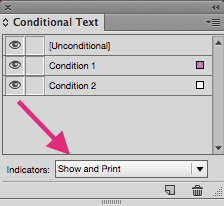
2. Open the Conditional Text Panel (Window > Type & Tables > Conditional Text) and make a new condition. Now, notice that the default indicator method for conditional text is “Underline,” but we’re going to change that to “Highlight.” The great thing about the Highlight method is that the height of the highlight automatically expands to the height of the character. So as the character gets larger, so does the highlight. Note: when using this technique, if the character isn’t vertically positioned within the highlight to your liking, use baseline shift to tweak it.
Now, make a second condition in the same manner, but choose white for your color.
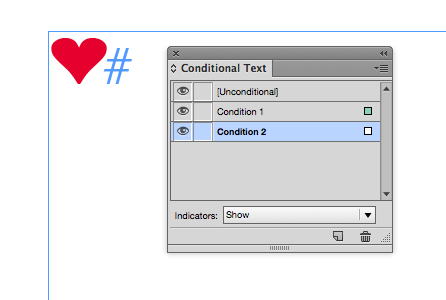
3. Next, select the heart and apply the white condition to it.

4. Copy and paste the heart. (You may have to remove an extra space that InDesign automatically places in between them.) select the second heart and color it white. Apply the other condition.
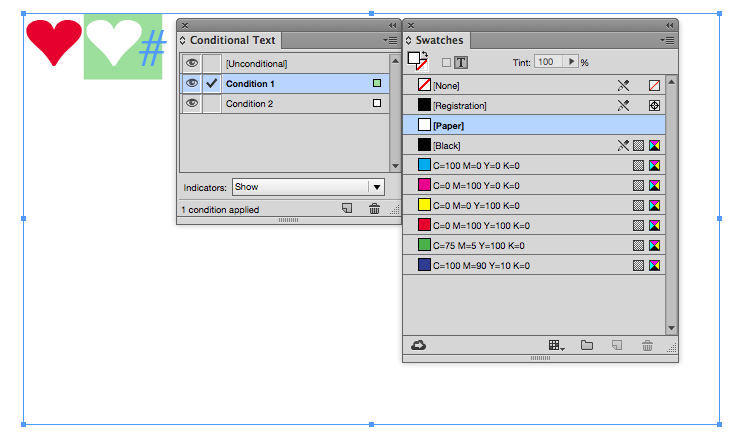
5. Select both hearts, then copy and paste them a bunch of times. Again, you’ll need to remove the extra spaces that InDesign puts in. But you can this with the Find/Change dialog box. Simply type a space in the “Find what” field and leave the “Change to” field blank. Then click “Change All.”


Because the colors in the grid are based on conditions, it’s very easy to change them. Simply double click the condition and choose a new color. 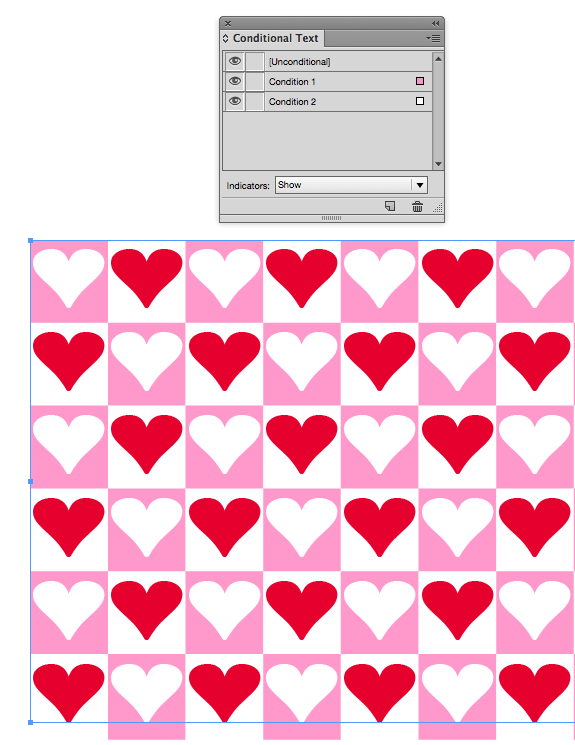
7. Show and Print. Because conditions are normally used for editorial purposes, they are by default set to “Show.” But for this purpose, we’ll need them to “Show and Print.”
Just by changing the color of the conditions and the swatches, you can create whatever kind of Valentine’s Day sentiment you desire. I can easily see this design followed up with a dozen roses and a fancy dinner.

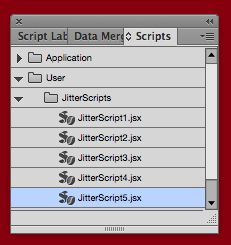
But this current design is a little boring. There are already so many other ways to make a checkerboard pattern in InDesign. What if there was a way to make all these little hearts rotated a bit, so they look a little more hand-drawn and a little less computer generated? Well there is! Last night while I was sleeping, a memory of an old script was resurrected from my long-term memory. Jitterscript is a quirky little script written by the amazing Kris Coppieters of Rorohiko. I first heard about Jitterscript at an early PePcon Print and ePublishing Conferences) where Kris demonstrated this script at his Ignite session.
Jitterscript adds a ‘hand-written’ quality to text. It slightly rotates and vertically moves each character. When applied to a frame full of icon characters, it transforms them into an arrangement that looks like it has elegantly scattered about, like sprinkled rose petals. The script folder contains five different variations to the script, all which yield slightly different results.
The script takes each individual character, puts it in its own text frame, and then rotates it slightly. The original, unaltered text frame remains at the base of the layer. When viewed with frame edges on, the result is rather frightening.

But when viewed in Preview mode, the result is stunning. It looks like I have created 200 individual valentines, and spread them out gently across the page.

Add a sentiment for your sweetheart, and the design is complete.

Oh, you clever, geeky person, you! That’s hilarious. And stolen, as of now. :)
Fantastic and elegant.
WOW! Excellent thanks for sharing!