

Creating Smarter Text Styles for Long Documents

Working as both a designer and prepress specialist, I receive a lot of files that I wish were built better, smarter, and with intelligence working in the background. All of which can be accomplished with strategic use of the Based On feature for styles. A lot of people do not use this fantastically time saving function, but it can be an incredibly powerful tool, especially if you deal with long documents, or documents with strict specifications for text formatting.
What is a Parent Style?
A Parent Style is a style that acts as a master for the subsequent styles that are “Based On” the Parent Style.
For example:
Header Master (Grandparent)
Heading 1 (Parent) [Which is Based On Heading Master (Grandparent)]
Heading 2 (Child) [Which is based on Heading Master (Grandparent)]
Heading 2 numbered list a (Grandchild) [which is Based on Heading 2 – Child)]
Heading 2 numbered list 1 (Grandchild) [Which is based on Heading 1]
Heading 2 numbered list 1.1 (Great-Grandchild) [Which is based on Heading 2]
Body Style Master (Grandparent)
Body Text (Parent)
Body Notes (Child) [Based on Body Text]
Body Text Level 1 (Child) [Based on Body Text]
Body Text Level 2 (Grandchild) [Based on Body Text Level 1]
Body Text Level 3 (Grandchild) [Basedon Body Text Level 1]
Body Bullet (Child) [Based on Body Text]
Body Bullet Level 1 (Grandchild) [Based on Body Bullet]
Body Bullet Level 2 (Great Grandchild) [Based on Body Bullet Level 1]
Body Bullet Level 3 (Grandchild) [Based On Body Bullet Level 1]
Body Number (Child) [Based On Body Text]
Body Number Level 1 (Grandchild) [Based on Body Number]
Body Number Level 2 (Great Grandchild) [Based on Body Number Level 1]
Body Number Level 3 (Great Grandchild) [Based on Body Number Level 1]
This might seem like overkill and needlessly complicated, but it’s not –setting these styles up is the biggest time saver especially when it comes to making future edits to a document that’s hundreds of pages long! Do you really want to go through each paragraph of text to adjust the leading by .5 pt? Or increase the size of the text by 1 pt? How are you going to fit all the text on 198 pages and when it’s currently spilling over into 204 pages? Hopefully you’re not going to go through it all page by page—and you don’t have to if you use the Based On feature properly.
How to set up Based On styles
Let’s set up the Header Master style first. Just be sure NOT to base it on the Basic Style whatever you do. For the details of what can go wrong, check out this post.
Create a new document – you don’t need text, although it can help visually.
1. Window > Text > Styles > Paragraph Styles
2. Create a New Paragraph Style

Ok now that simple step is out of the way – on to the rest.
Press Ok and the new style is saved.
Create another new Style – this time name it Heading 1 – but note that you’re going to select the option for Based On: Header Master

This means that Heading 1 will have the same properties of style as Heading Master.
We can go ahead and create the rest of the styles this way until you have something like this.
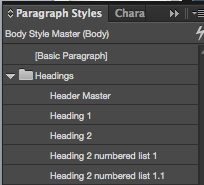
The panel isn’t great, it would better if Adobe indented the styles that are Based On others – but hey this is what we have to work with… If you want a visual representation of the Based On relationships of your styles, check out the free script by Harbs at In-Tools: Show Paragraph Based On.
When you begin to work on the Body Styles make sure that you start off with Body Style Master, and Based On: No Paragraph Style as shown below.
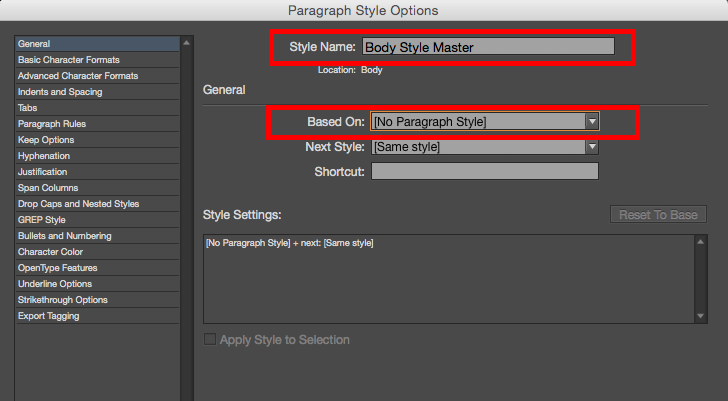
Then keep building your styles as you see fit.

Until you have something like this:

Now what I have is a structured smart set of Family Related Styles, where the Headings are independent of the Body styles, and they can all be altered in a flick of the main Master style (Grandparent) all the way down to the tiniest change in the Child or Grandchild or even Great-grandchild stage.
Here’s an example of how this is an advantage:
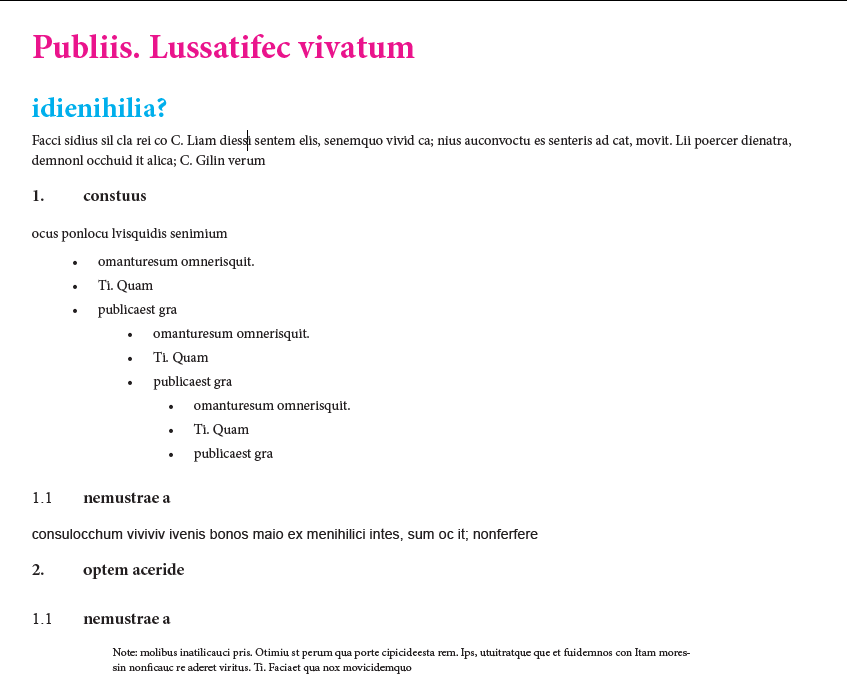
Edit Body Style Master and change the font size – notice how the text changes in the other styles.
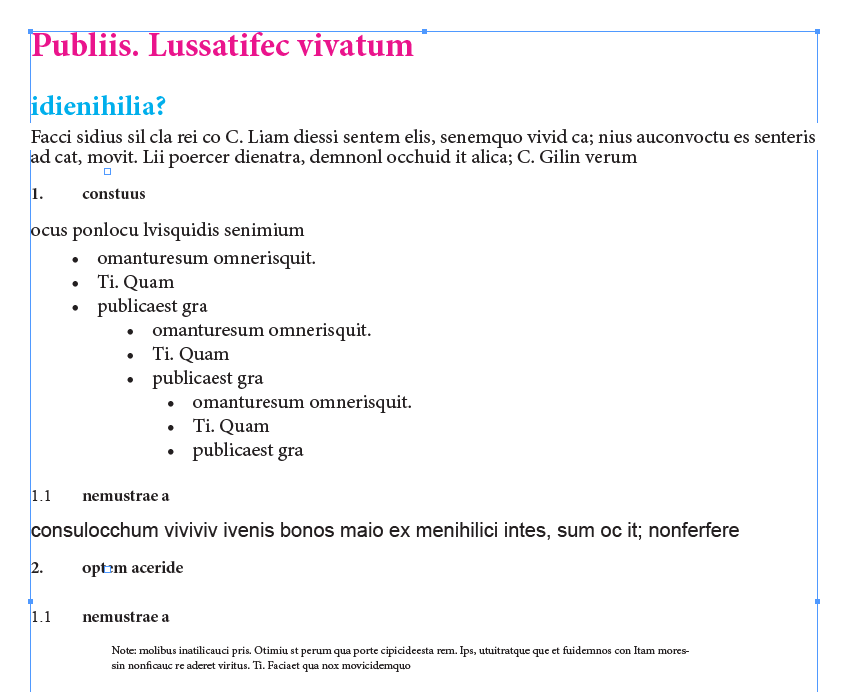
Even the bullets changed size, which is fantastic. That happened because the Bullets styles are based on the Body Text Style, which is Based On the Body Text Master style.
What to Watch Out For
Nothing is foolproof, and there is always a caveat. With the Based On feature, the styles are linked, but parts of the styles become unlinked when you make changes. For example, the Heading 1 style is pink, and thus so is Heading 2—at first. But if I make the Heading 2 style blue, the colors of the styles are no longer linked. So If I want them both to be green at some point in the future, I’ll have to make that change in both styles separately. So try to think ahead and be aware that making changes to your styles makes them less connected.
You can see another example of this in the screenshots above. The Body Notes text did not change text size when I changed the Master Style, because the font size had already been changed to distinguish it from Body Text. This unlinked the text size from the Master Style. The Body Notes style still keeps the same leading, the same color, and other characteristics of the Master Styles, but not the font size.
The Power of Based On Styles
The advantages to using Based On styles are endless. What if you have ten Heading Styles and someone wants you to change them all to a different color? Some people would edit ten different styles to apply the same color. Other less fortunate people who don’t even use styles would go manually, line by line changing the color. Ugh!
In a nutshell, with smart use of Based On in the paragraph style settings you can base your styles on other styles, so that you can make a change in one place and instantly have that change applied wherever you want it in your document (or every document in an InDesign book when you synchronize styles)!
And don’t forget, this applies to every kind of style available in InDesign, Character Styles, Object Styles, Cell Styles, and Table Styles.
To get the complete round up of how all this works I highly recommend Michael Murphy’s book, Adobe InDesign CS4 Styles: How to Create Better, Faster Text and Layouts.
Trust me – the time you spend mastering Based On styles will save you many hours in design and production work!
Style naming tricks are also helpful.
1 Give master styles names that always include MASTER and are done in ALL CAPS to make them stand out and make clear that style isn’t to be used for actual text.
2. Give them a name that will cause them to sort to the top of the list of styles they control. For instance, HEADING following by double spaces and then MASTER will cause that style to sort in front of all other styles named Heading. That no only makes the relationship clear, it makes finding the various heading styles easier in long, scrolling lists.
Also, when I name styles, I use the words in the order of their importance. Body comes first for all body styles. Quote might come next for indented quotes. Third would be a smaller characteristic such as First, Middle, and Last, when I vary the space before for multi-paragraph quotes. For example:
Body Quote First
Consistency like that helps me to remember their names.
—–
I use a lot of styles. It’d be great if in the style panel Adobe gave us an option to color the background to style names in lists. All body styles might have a blue background. All heading styles might have a red one.
“It’d be great if in the style panel Adobe gave us an option to color the background to style names in lists.”
I’ve been requesting this feature from Adobe for years You can imagine how many styles you produce when you produce a complicated reflowable text ePub. Colour coding would be really helpful.
Thank you for Article! I am creating a catalog where I list about 1,000 statues and monuments – with all its descriptions and information – and I am preparing myself to deal with so much information on InDesign!
It helped me a lot! Thank you again!
(Google Translate)
I hope this is gives you some help :) good luck with your project! The smarter the document is the easier it is to make amends!
Well, with Derek and I both requesting color for style sheet lists, how can Adobe resist? The argument they might advance, that it goes against those who work in color and need a grey-neutral background, doesn’t really apply. Users don’t have to use color.
Of course, the UI feature I’d most like to see is larger panels with larger type. My post-40 eyes strain to read all the tiny type. Adobe could offer two panels, one like now and one with larger type. Those tiny panels are a legacy of when screens were smaller. Most of us now have lots of screen space. There’s no need for tiny type.
I so agree. I’m still on CS6 and can not use cross references because the screen you have to scroll through looking for the element you want to reference is absolutely tiny.
Great write-up.
I’ve always used “based on” with my style sheets (going way back to my Quark 4 days). And I make sure I either make the next style as “same style” or whatever style I may want next if I need to type something.
One thing I don’t do is the folder thing. Since I use XTags for importing all my tagged text files, XTags doesn’t like the folder structure. If it doesn’t see the style sheets on the main level, then it imports new ones and ignores the folder stuff.
However at work, we all use pretty much the same style sheets. For example:
TX = body text
TXF = text flush left
HA = A Head
HB = B Head
CN = chapter number
CT = chapter title
We usually have all our paragraph style sheets in all CAPS, and character style sheets all lowercase.
Thanks for all the nice comments!
And I totally agree that the InDesign panels can help us out in a lot of ways and I hope someone at Adobe who has the power to make it happen is reading this!
I think it’s so important to have your styles related when designing! And having some visual representation of how they are linked would be very useful InDeed!
Keeping your style sheet genealogy all within a folder and note version in the folder name helps. I typically renew my basics yearly so I use the year in my folder name. If you bring in content that included an older version you can quickly identify them and reassign.