

How Resolution Affects Image Proxy Quality

When working with images into your InDesign layouts, did you ever notice how some image previews (aka the proxy) on the page can appear low-res while others look high-res, even though you’re using the same display settings? For example, look at these three images.

They all have the exact same pixel dimensions in Photoshop (1133 px x 1133 px). And they were all placed into the same-sized frames in InDesign (about 1.3 inch square) with the same fitting option (Fit Content Proportionally).
Yet the appearance of the proxies is wildly different when using the default Typical display settings. How can this be?
This happens because the three JPEGs are set to different resolutions in Photoshop (100 ppi, 900 ppi, and 2400 ppi).

So the same number of pixels is being squeezed or stretched over a different area in each image.
When the files are placed into the layout, InDesign creates a proxy image that is 72 ppi at the physical size of the image file.
So for the one that is 100 ppi in Photoshop, InDesign makes a proxy that is over 11 inches in width and height.

To fit the 1.3-inch frame in my InDesign layout, the proxy is scaled down a lot, so it always appears crisp and detailed.

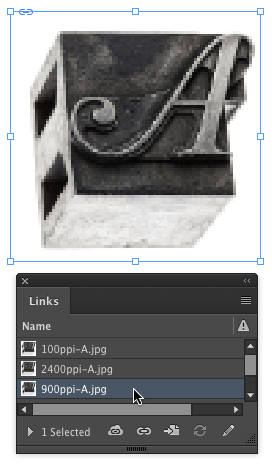
For the one that is 900 ppi in Photoshop, InDesign makes a proxy that is a little more than one inch in width and height.
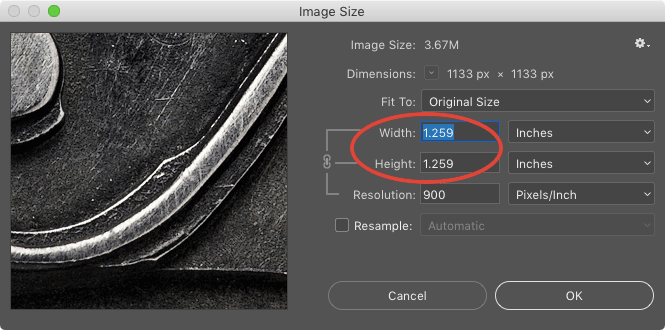
To fit the 1.3-inch frame in InDesign, the proxy is scaled up a little, so it appears somewhat pixelated.
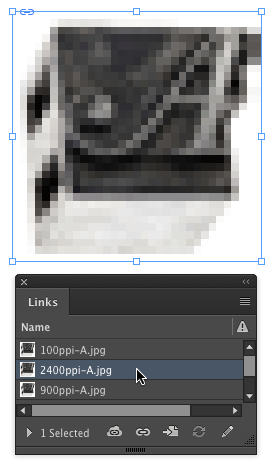
And for the one that is 2400 ppi in Photoshop, InDesign makes a proxy that is less than half an inch in width and height.
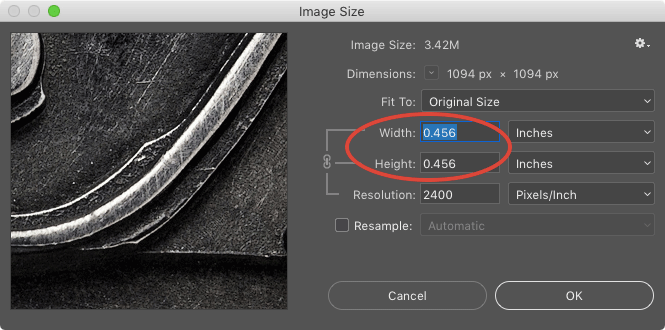
To fit the 1.3-inch frame in InDesign, the proxy is scaled up a lot, so it appears very pixelated.
At first, this might seem confusing. Just remember that we’re only talking about the proxies here, not the actual images, which all have the same pixel dimensions and will all look the same when the file is output.
If you’re working with placed Illustrator files, the size of the objects on the artboard will determine the size of the proxy in InDesign.
And of course, you can make this all a moot point by switching to High Quality Display Performance, turning on Overprint Preview, or going to Display Performance preferences and changing the settings for Raster Images and Vector Graphics from Proxy to High Resolution.

One last thing: I suppose this also means that the resolution of the images you place into your InDesign layouts will affect your InDesign file sizes, especially if you have a lot of images in your layout. But I haven’t tested that to see how much of a difference there is.
Neat Tip!
Thank you for sharing this insight. It’s the “under the hood” info like this that helps everyone get better results from the tools they use.
@Mike While making it look pretty in InDesign is helpful — we are designers after all, what resolution the image will output at is where the bacon is saved. My two favorite tools to control that are:
The Links panel when you select an image, the information section will show Actual and Effective Points Per Inch for the image. Actual will tell you the image resolution and Effective will tell you what it will be taking into account any scaling applied in InDesign.
The Preflight Panel, turned on and set to warn you when a minimum and maximum resolution is exceeded is the other “Good Golly we were going to try and print that image at that size!” indicator before a piece ships.
Great insight Mike!
Nicely explained. Keep sharing…