

InDesign Basics: How Strokes Work in InDesign

New InDesign users are often confused by the term stroke. When we talk about a stroke in the Adobe applications, we’re referring to a a visible line applied to the shape of an object. It can be a circle, square, star, line, or any custom shape really. Many users want to refer to a stroke as a frame or border, but when you apply a stroke to an open path or line, that term doesn’t quite fit the bill, so we’ll be using the term stroke throughout this article.
Applying a stroke to an object
A stroke can be applied to an open or closed path in InDesign and although there are some differences once the stroke is applied, the method by which you apply a stroke to either type of path is the same. A stroke has two primary attributes, color and weight, so you can use either of these properties to apply a stroke to an object.
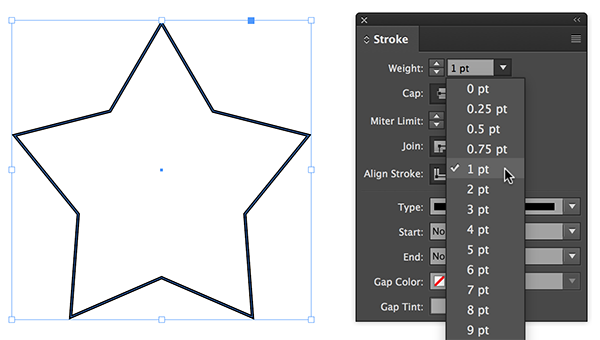
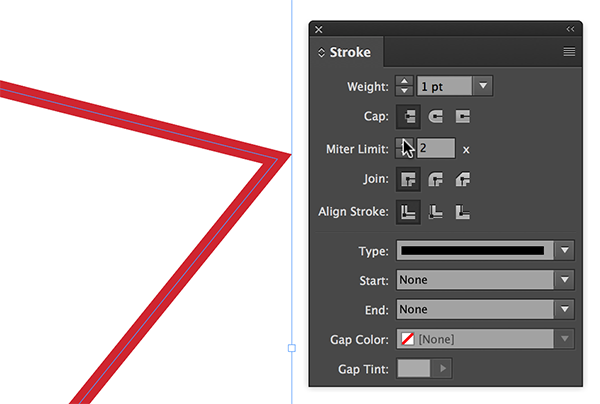
Let’s begin by adding a stroke to an object and adjusting its weight. Open the Stroke panel by choosing Window > Stroke, with an object selected, enter a value (defined in points) or choose a value from the Weight drop-down menu. You’ll immediately see a visual stroke added to the selected object with a color of black by default.
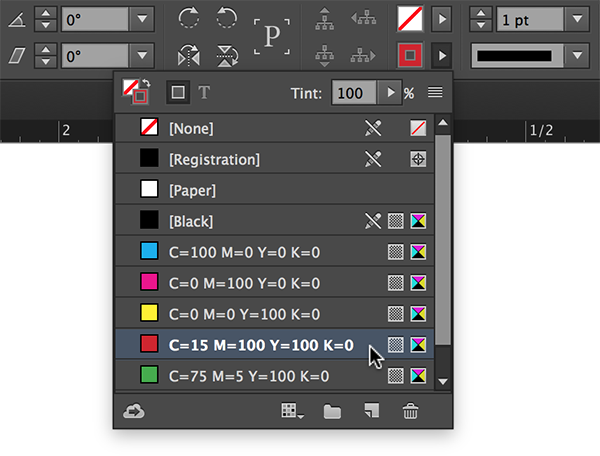
InDesign provides several options for changing the color of an object’s stroke. In the Control panel, there is an option for choosing the stroke color by clicking on the drop-down menu next to the Stroke icon. Choose a swatch to apply that swatch color to the selected object. If you prefer to define custom values for the stroke color, hold down the shift key while choosing the drop-down menu.
You can also adjust the stroke color of a selected object by making sure that the stroke property is targeted. This can be accomplished using the icon at the bottom of the Tools panel, or at the top of the Swatches panel or Color panel.
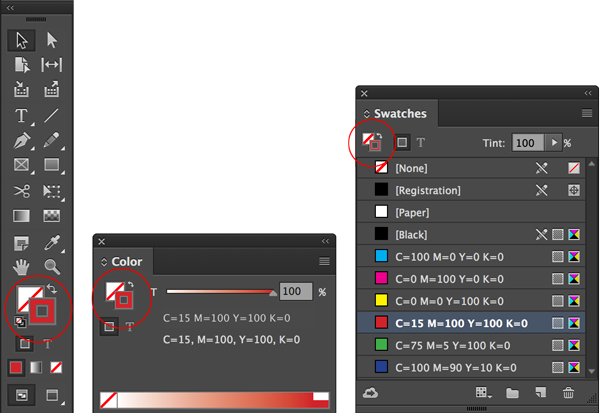
Simply click on the stroke indicator to bring it forward, then select a color in the Swatches panel, the Color panel, or by double-clicking on the stroke indicator to open the color picker to define a color. I highly recommend using Swatches when applying color to objects in InDesign, read this article to learn how.
Stroke Properties
You’d think that there wouldn’t be much more to say about a stroke beyond the width and the color, but there are many more properties to control how a stroke is applied to an object. Open the Stroke panel by choosing Window > Stroke. The options available in the Stroke panel can be a bit confusing because some of the properties only apply to open paths while others apply to both open and closed paths. I’ll start by covering the options that apply to both open and closed paths.
Miter Limit
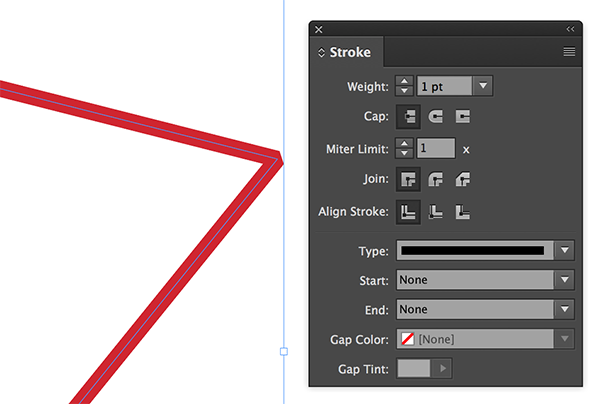
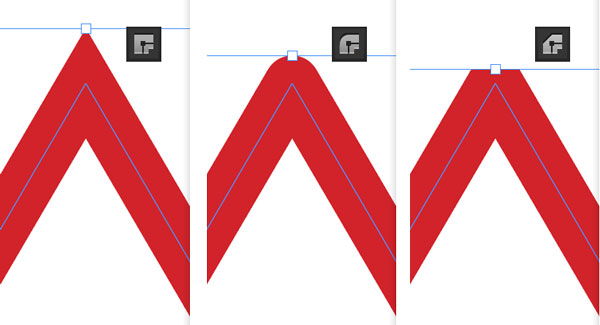
The Miter Limit value determines whether the corner of a path will create a true miter or will be beveled when the Miter Join is chosen. In the figures below, you can see that the corner of the object on the left is beveled when the miter limit is set to a value of 1, but when the miter value is increased, a true miter is applied to the point of the shape. The more acute the corner of the object, the higher the miter limit needed to produce a mitered corner. The Miter Limit is only available when the Miter Join option is chosen. See below to learn more about Joins.
Joins
The Join controls how two segments of a path are joined together. InDesign provides three options to choose from: Miter, Round, and Bevel. A Join can only be applied to an entire path not to individual anchor points of a path. Click on the appropriate Join option to apply it to the path.
Align Stroke
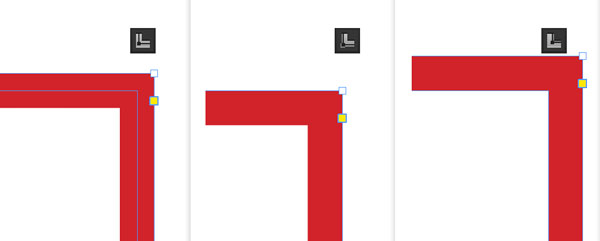
The stroke alignment controls how a stroke is aligned to a path. The default alignment in InDesign aligns the stroke to the center of the path, but you can align a stroke to the inside or the outside of a path as well. Stroke alignment is particularly useful when trying to align several objects to one another without doubling up on the width of the stroke.
Type
The Stroke Type provides many options to choose from that allow for the control of the visual appearance of a stroke. Popular choices range from dashed to dotted and anything in between. You can even create a custom stroke using the Stroke Styles feature found in the Stroke panel menu.

If you choose a dotted, dashed, or striped stroke, you’ll have the ability to apply a color to the gaps of the stroke using the Gap Color drop-down menu and the Gap Tint field. In the case of a dashed stroke, you even have the ability to customize the length of the dashes and gaps at the bottom of the Stroke panel.
Open Path Properties
The Stroke panel contains a few options that apply only to open paths (paths that don’t create a complete shape). These options include the Cap and Start/End options.
Cap
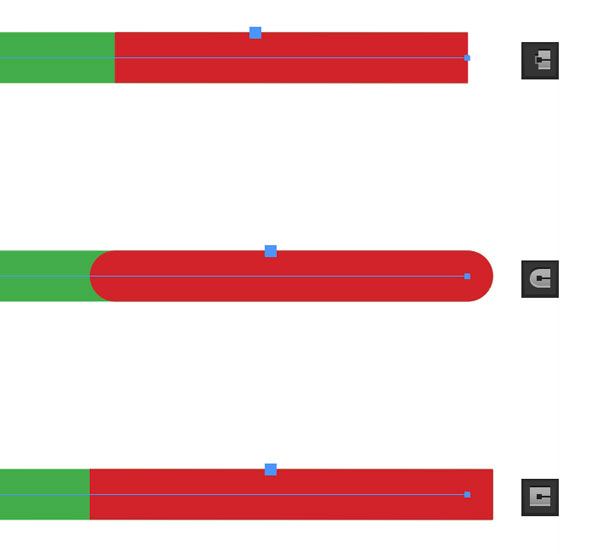
The Cap of a stroke applies primarily to how a stroke is applied to the open end of a path. It can also be applied to a closed path but generally won’t be noticeable until the path is broken apart into an open path or until a dashed stroke is applied to the closed path. Cap choices include the Butt Cap, Round Cap, and Projecting Cap.
Dimensions
If you commonly create artwork with any amount of precision where the alignment of objects is critical, you’ll want to be aware of a somewhat hidden feature that could make this type of work easier. In the Control panel menu located in the far upper-right corner of your screen, you’ll notice an option “Dimensions Include Stroke Weight”.

With this option disabled, the dimensions shown in the Control panel will not include the weight of the stroke applied to an object. But with the option enabled, the dimensions will include the stroke weight, making it easier to size and align objects in your design.
Wrapping Up
Who knew there were so many properties available when applying a stroke to an object in InDesign? Hopefully you’ve learned some new tips that will make your job easier and more productive as well!
My control panel menu doesn’t look anything like yours. I’m using CC 2017.
Are you referring to where I show the “dimensions include stroke weight?” Make sure that you’re clicking on the panel menu and not the little gear icon in the Control panel. They added that icon recently and that doesn’t show the options that you’re looking for. Let me know if that helps.
Ah, I see the problem now. The menu options change depending on which tool you have selected. If I select the line tool, those options show up.
Awesome writeup Chad!
– Guy
Thanks Guy!
Hi, I have some trouble with the “dimensions include stroke weight” function. Even tho I have disabled it, it stills adds the stoke wight to the size of the line. I am using Adobe InDesign CC 14.0.1
Thanks!
I have encountered the situation that the stroke weight appearance and stroke numbers showing in the panel are not making any sense when I scale the object. The way I find how to fix this problem is to make all the object percentage to be 100% and not scaling it. Then I have the correct stroke number and appearance. But I think there is a better solution… My apps are most recent version.