

Making Snowflakes with InDesign

I’ve spent the past week shoveling snow in my driveway, so it’s no wonder that I’m thinking about snowflakes. So even though this post is a little late (most people probably wanted snowflakes for pre-Christmas holiday art, not now), it’s worth adding it for posterity. Here are a couple of ways to make fun snowflakes in InDesign.
First, there’s the rip-off-a-font method, which Ted posted about last week. There are lots of snowflakes in fonts, so that one could be helpful.
Here’s one way to build your own:
1. Draw a frame (some regular-sided polygon is best; either a triangle, square, or hexagon)
2. Choose Object > Corner Effects, and pick a fun corner effect, such as Fancy or Inverse Rounded.
3. Choose Object > Paths > Close Path. This appears to do nothing (it closes an alreaedy closed path), but it actually converts the corner effects into real bezier curves and points.
4. Then, do one of the following:
- Apply another corner effect. In most cases, you get a cool fractal effect.
- Option/Alt-click one of the rotate 90-degree buttons in the Control panel. Holding down Option/Alt duplicates while rotating. Similarly, you could just type a rotation value into the angle field in the Control panel and then press Option-Return/Alt-Enter. (Make sure the Reference Point is set to the centerpoint before you do this.)
- Duplicate the object in place and adjust the size of the duplicate in the Control panel.
Repeat these various steps in whatever order you feel like for a while. If you have duplicated the shape, then try selecting two or more of the shapes and using the Object > Pathfinder (or Pathfinder panel) features to merge them together in wacky ways.
Here’s a few I just threw together quickly:

If you make even cooler ones (wouldn’t be hard… I’m not must of an artist), email them to me (david at indesignsecrets.com) and I’ll post them here.
David,
I just have one questions that I suspect everyone is thinking:
“But will they print?”
(Although you know me, I never understand the pre-occupation with printing. Doesn’t it look nice on screen?)
Oh, these will print just fine. They’re just simple paths. I mean, compare them to these intricate shapes created with the NINA and Mystic Rose scripts that Ole Kvern wrote and we included in Real World InDesign:
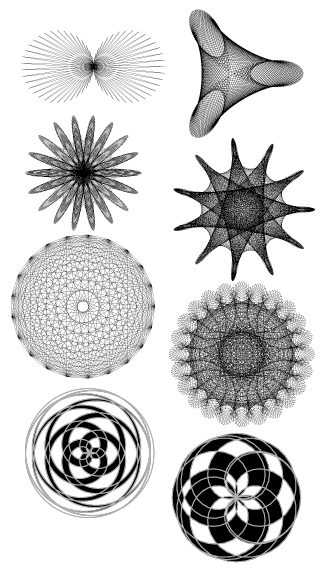
Those all printed “easy peasey” (as my boys like to say), even though they have hundreds (or thousands) of points.
Whoah!
Those shapes are amazing!!!
Yup, the snowflakes are nothing compared to them.
Hey, I never got those NINA scripts to work. As I recall, the book hinted that there were downloads, but I never found downloads that I would be able to use. I tried to email David Blatner about those, but never got an answer.
I would really like to get a working NINA script!
@Teemu, I’m sorry that you didn’t get a reply; it looks like you sent it to our “info” address, and we get so much email there that sometimes we can’t address it all. My apologies.
Here is a working NINA script that you can all use. Here’s the .js version and here it is in a zip file (usually easier to download).
Place the .js file in the Scripts Panel folder. Before running it, set the zero,zero ruler coordinate to somewhere on the page (by dragging the square box where the two rulers collide).
Sure the NINA script is fun, but for stuff like that I prefer my Spirograph (;
This was fun!
snowflakes
Cool! Thanks David! Works perfectly.
Happy New Year!