

Moving Word Highlights into InDesign

I recently had a student ask me how to get the yellow highlights from Microsoft Word into InDesign. He had been copying and pasting the text, but the highlights were lost each time he did. I immediately thought that File > Place would be the right way to preserve the highlights. But I was wrong. As I found out in this November, 2009 post by James Fritz, Word’s highlights are lost—totally gone—when you move text from Word to InDesign.
Unfortunately, it’s too easy for writers and editors to apply the pretty, yellow highlight to Word text. There’s the control, right up there in the tool bar. The temptation is too great.

My student understood that highlights in InDesign are applied using custom underlines. In case you don’t know how, here’s an article by David Blatner that provides step-by-step instructions. In that article, David strong recommends that you create a character style so that it is easy to apply the underline highlights. The problem is that once the text is inDesign, there are no “tags” or formatting to do a Find/Change. You’re stuck with manually checking which text had the highlight in Word and then applying the character style in InDesign. Ouch!
Creating a character style
Your goal is to apply a character style in Word to whatever text has the highlight applied. First thing you need to do is create a character styles in Word. (Don’t be surprised that there are character styles in Word. Most Word users have no idea this exists or how to do it.)
Choose Format > Style. This opens the Style dialog box.
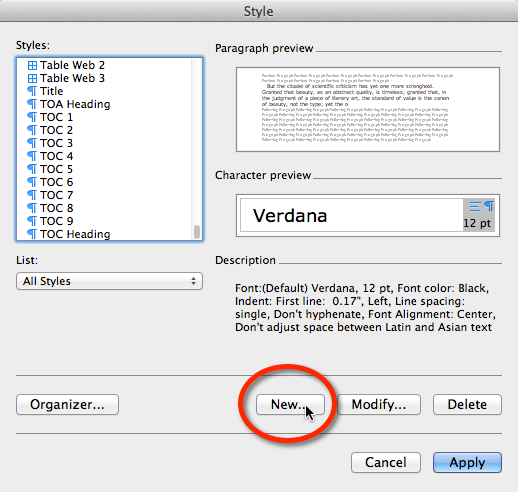
Click the New button at the bottom of the dialog box. This opens the New Style dialog box. Give the style a name. I use “underline for highlight” because Word has some internal styles that won’t let me use names like “underline” or “highlight”.
Use the Style Type menu to choose Character. That’s important. Also, make sure the Style based on menu is set for underlying properties. That’s the equivalent of “None” in ID.

Use the settings in the rest of the New Style dialog box to format your text any way you want. It doesn’t really matter what you do here because InDesign will override any settings. I like to give an underline format to the text just so I can tell in the Find/Change steps that I’m doing things correctly.
Click OK
Setting up the Find/Replace
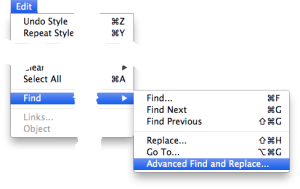
Now that you’ve got a character style, you can set up the Find and Replace options. You need more than the quick Find settings in the document window. You need heavy-duty controls. Start by choosing Edit > Find > Advanced Find and Replace.
This opens the Find and Replace dialog box. Click the Find what field. A blue highlight indicates that you’re setting the Find attributes. Then go down to the Format menu and choose Highlight. The word Highlight appears as a Format setting.

Click the Replace with field so that it has a blue highlight. Choose Style from the Format menu. This opens the Replace Style dialog box. Scroll through the list to select the character style you created. Click OK.

The Find and Replace dialog box now has the correct settings.

Click Replace All and your highlighted text will now have a character style applied. At this point you can save the file and place it into InDesign.
The text comes in to InDesign without the highlights, but does have the underline character style. Make whatever changes you want to the definition of the character style.
Of course, if you’re a designer who doesn’t work in Word, send a link to this article to your authors or editors and show them how to apply the character style to the highlights. That way your text will automatically come in correctly styled.
Nice workaround Sandee! I completely forgot about that post I wrote a few years ago.
BTW – Anne-Marie just released a brand new course all about Using Word and InDesign together at lynda.com
https://www.lynda.com/InDesign-tutorials/Using-Word-InDesign-Together/122930-2.html
Advance Word Find & Replace software is an useful tool to FIND and REPLACE multiple words & Phrases in multiple MS Word 2000, 2003, 2007, 2010.
The only hitch, as far as I can tell, is when the writers use different color highlighting to indicate different things. The Word find/change dialog doesn’t include the color of the highlight. Can any of you think of a workaround for that?
First, get a big piece of wood and knock some sense into those writers.
Next, create a character style for each color of the highlight.
Then, while the writers are still a little loopy from being hit, tell them to MANUALLY go through the Find/Replace and change each color to a different character style.
Or, if you’re not a violent person, you can manually go through it yourself.
Then, work with the writers so that they apply character styles with different colored text instead of highlights.
Still works in December 2020 with cloud version of Word for Mac and ID 2021. Unfortunately, this workaround is still needed. Thankful for the info here.