

Using the Rectangle Frame Tool to Add Hyperlinks

by Ben Richardson
Adding hyperlinks to interactive PDF files in InDesign isn’t anything new. We’ve all been doing it since we started using InDesign, and it’s something quite easy to pick up. This tutorial is about a less conventional (but just as easy) way of making hyperlinks using invisible rectangles that you create with the Rectangle Frame Tool.
At first, it might not be obvious why you would want to add hyperlinks like this, but this trick is versatile, and once you get a grasp of the concept, you’ll probably find plenty of ways to use it. In this tutorial I will demonstrate a few different options, including how to turn a JPG of a document into an interactive PDF, and how you can make a simple quiz or adventure game with InDesign.
Converting a JPG into an Interactive PDF
Let’s start with the most straightforward use of this trick. Imagine you received a JPG of a document, and you want to add hyperlinks to it and then export it to PDF. Your first instinct might be to retype everything and add hyperlinks the usual way, but that’s unnecessary and time consuming.
Instead, select the Rectangle Frame Tool (press F) and draw a rectangle over the word that you’ll be linking from.
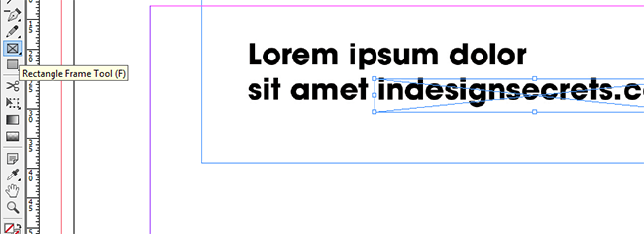
While the rectangle is selected, open the Hyperlinks panel and add the hyperlink the same way you would normally do.
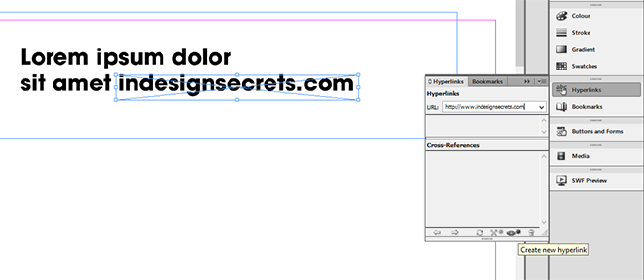
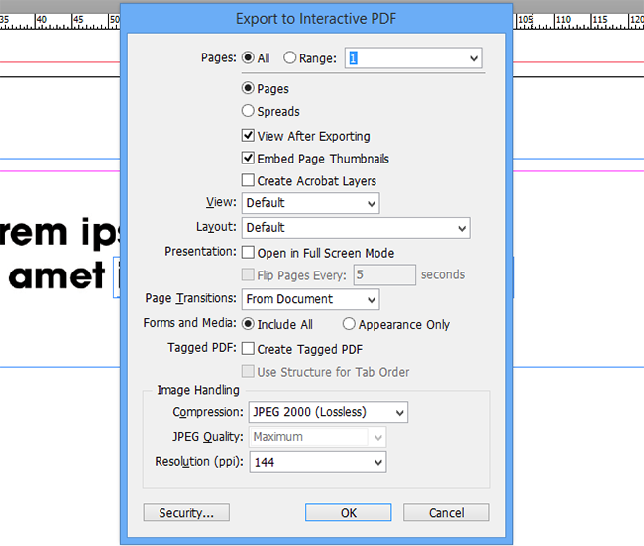
Make sure you save the file as an interactive PDF.

While you’re working with files like this, it’s useful but not necessary to group the invisible rectangle with the JPG you placed it over.

Creating an Interactive Game With InDesign
Now that you saw what the trick was about, here’s another (more fun) way of using it.
I used a photo that includes an answer to the riddle shown below as an example, but in the same way you could create an adventure style game, where the pages of the document would serve as different destinations, and the player could navigate to them by clicking on different areas in photos.
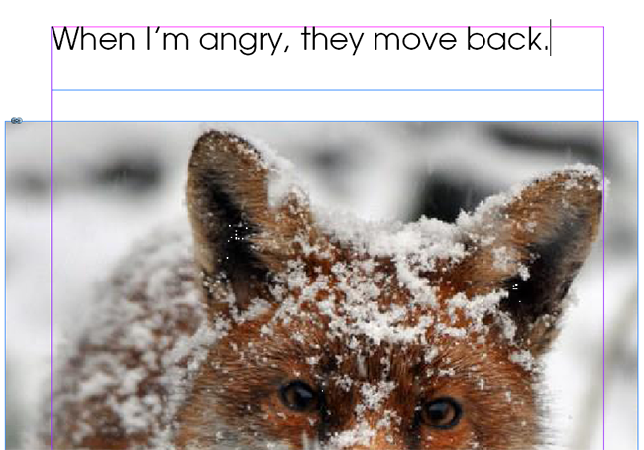
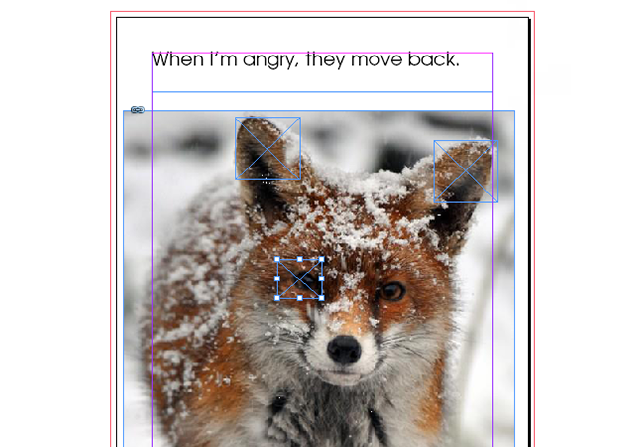
Draw a rectangle over the area that is the answer to your riddle.

Go to the Hyperlinks panel menu and select New Hyperlink.
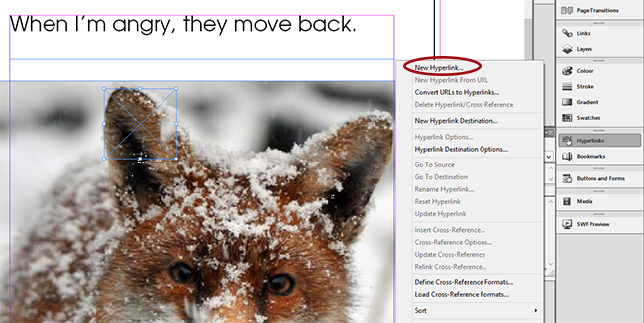
In the New Hyperlink dialog box, link to the page that contains the right answer. My answer will be on the second page.

Since in this case there are two different places in the photo that the player could click on (and they are both equally correct), I will copy and paste the invisible rectangle on top of the other ear. The second rectangle will have the same link location as the original one.

Insert the correct answer to the relevant page.
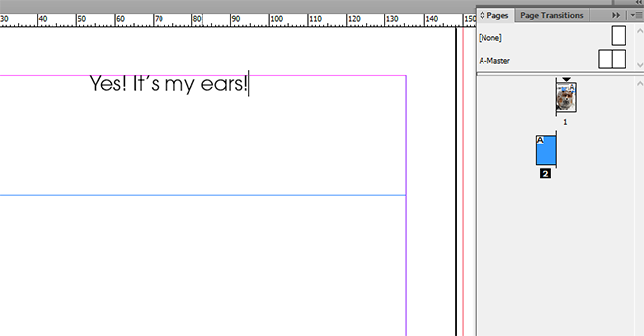
Once you save the file as an interactive PDF, and click on the fox’s ear…

it will take you to the page confirming the correct answer, like this:

You might want to also add links to the spots that are wrong answers to make it more interesting.
Make sure you add a ‘back’ option so players can easily navigate through the file.

So when the player click on the fox’s eye or nose…
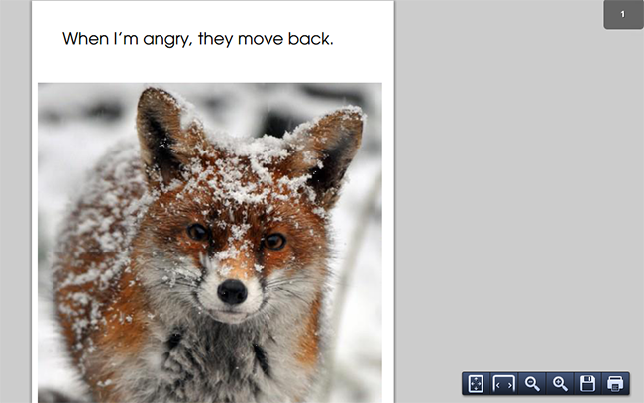
They get a screen like this:

Adding Multiple Hyperlinks to One Image
The third example is a rather simple one. Default InDesign buttons sometimes don’t work with the look you’re trying to achieve. Luckily, you can always import your own, but if there’s a collection of buttons (such as you get for social media), you don’t have to import them one by one. You can import all of them as a single image and just add the separate invisible rectangles over each of them.

Creating Email and Google Maps Links
The last example is, once again, about saving time. A couple of times I had clients supplying me with PSD files of flyers that they wanted like to email as interactive PDFs, but they wouldn’t send me fonts they used, so I couldn’t really take the flyer apart and redesign it. Fortunately, most of the time this wasn’t necessary, because I was able to place the PSDs into a new InDesign document and add the hyperlinks using the same trick.

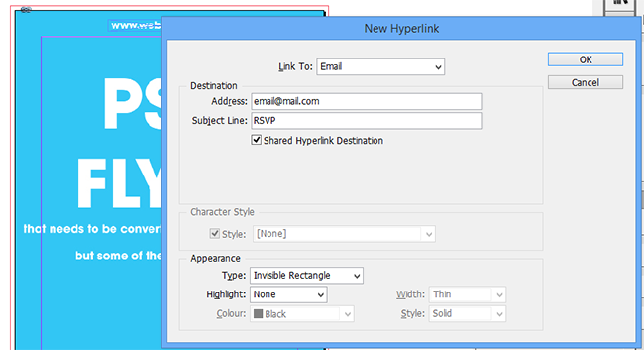
You can even add the hyperlink to an email address for inquiries and RSVP.

Just link to email and fill in the Destination options accordingly.
Linking the address to Google maps is another feature clients like seeing.

Tip: To get a nice short URL for a Google Map, click on the gear icon in the bottom right corner of the map window and select Share and Embed Map.
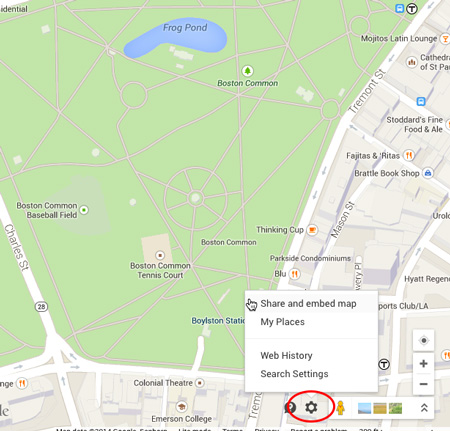
Then select Short URL and copy and paste it into the Destination field in InDesign.

Summary
Like I said, the invisible rectangle technique is not quite a conventional way of adding hyperlinks, but it comes in handy when you need to fix something quickly. It might be a bit too one-dimensional to be used for complex adventure games, but it definitely makes for a good mock-up of one. Also, if you’re teaching someone how to use hyperlinks in InDesign, this could be a fun and engaging way to do so, especially for younger students.
***
Ben Richardson is director of Acuity Training an IT training business based in Guildford, UK and is sharing some of the tips that delegates have found more useful from their InDesign classes.
Why does almost EVERYONE use the Rectangle Frame Tool when the Rectangle Tool should be used? The reason that there’s an X in the middle of a Rectangle Frame is because it’s EMPTY–missing a graphic. These should be used to hold artwork. If all you want is a rectangle, then just use the Rectangle Tool!
The Rectangle Frame tool is the right choice for this purpose since it always creates a frame that will not affect the look of your document (no stroke, no fill, no text wrap, etc). The Rectangle tool by default creates frames with a 1 pt black stroke, which you’d have want to remove, unless you wanted the bounds of the hyperlinks to be visible. It can also create frames with other formatting you wouldn’t want on these hyperlink frames since you can modify the [Basic Graphics Frame] object style.
The two reasons I like using the Rectangle Frame Tool are:
It’s just a rectangle lads…
I don’t really pay attention to which one I pick. It’s easy to create a stroke, remove a stroke, add a picture etc. to any of them.
It really isn’t that big of a deal.
It’s a nice post and a nice way to add hyperlinks to something.
Excellent tip to simplify your work and save time. I loved the fox game – what a fun way of learning! And Mike & David, thank you for your comments about rectangle tool v. rectangle frame tool – I too tend to use latter as I find having to fiddle with default presets of the rectangle tool a nuisance.
I am creating an InDesign file with hundreds of text links. When I import the word file which has the links, I loose them. Is there a way to import them? or a plugin I can buy/
Thanks so much.
Anne
Anne: When you import a Word file (.doc, .docx, or .rtf) the hyperlinks should come in, as long as you are keeping the formatting. Maybe check the Import Options dialog box (inside the Place dialog box)?
The style of the hyplink imports but does not link up within the text.
Hyperlinks to websites import but not text links.