

Skewed Text Path

With InDesign, as it is with Illustrator, you can add type to any path, regardless of whether you created it with one of the Shape or Frame tools, the Pen toolset, or Pencil tool. If you’re feeling extra creative, you can use the Type On A Path tool skew option to create type that twists and turns around the contour of any freeform drawn path. To do so, try creating a curved path with the Pencil tool, then place some text on the path and apply the skew option.
You can create some really interesting curved paths using the Pencil tool, especially if you draw them using higher Fidelity and Smoothness preference settings. To access these settings, double click the Pencil tool icon in the Tools panel. To get even better curves as you draw, try using a graphics pen and tablet. Before you add text to your curved path, you can use the Direct Selection tool and Pen toolset to fine-tune it. Or, if you have the Edit Selected Paths option enabled in Pencil Tool Preferences, you can edit the path by simply drawing over a line segment with the Pencil tool.
One your path is complete, add some text to it using the Type on a Path tool. Note that after you insert the Type On A Path tool cursor, you can type along the path or place text directly on the path from an external source file (such as a Word or .TXT doc) by applying the Place command (File > Place).
After you format the text the way you like, double-click the Type On A Path tool icon in the Tools panel to display the Type On A Path Options dialog box. These are the exact same Type On A Path options that are available in Illustrator. Choose Skew from the Effect pop-up menu and Center from the Align pop-up menu.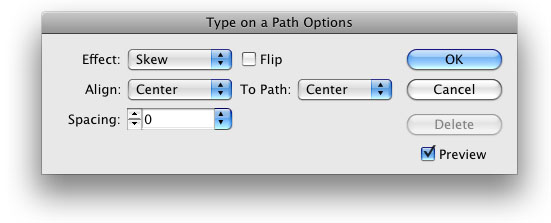
Click OK to close the dialog. Your text should look something like this.
This is just one of the many vector-style text effects that you can create directly in InDesign, without even having to launch Illustrator.
Very nice tip and refresher of an awesome tool. Thanks!
Very nicely done Ted, although I don’t really use type on path and the skewing at all, I’m sure that I know someone who does.
Thanks for the reminder. Sometimes, I forget the things that I don’t use often. “Rediscovery” is a wonderful thing!
Ok I get all this but I can’t find one solution: if you put type on a path and it is suppose to go to the bottom of the circle, then it is “upside down” from the reader’s point of view… I want to put type on a path and have the top of the x Height of the letters be aligned with the base line, which in this instance would be the cirle.
This way, letters on the curve at the top are right reading starting at 10 o’clock thru 12 over to 2 o’clock.. then the letters on the bottom are also right reading, left to right starting at 8 o’clock on the left to 4 on the right… this means the bottom of the letters are pointing outward…
I don’t see any option in IDCS3 to do this…
Okay , i was just looking for this! Could’nt find out, but now I got the answer. Thanks again. Great blog, lot’s of eureka moments for me… Regards, Betty
Kailas I am trying to do this, it’s driving me crazy! Has anyone ‘flipped’ text from outside a circle to the inside?
Done it! Got this info from another site:
Just highlight the type and then, go to ?Type>Type on a Path Options?. Select that and a dialog box comes up. With your type selected click on ?Preview?, then ?Flip? and at ?Align to Path? choose ?Ascender?.
so nice , thanks very much
Dear All I need to skew a text keeping the UPPER end of the letters aligned but having the lower end follow a rainbow type path (classic old ppt type of transformation). I have tried with “path” but this does not align the top
Any comments?
Thank you!Lawrence
@Lawrence: If I understand you correctly, you’re probably going to have to do this kind of stretch in Illustrator.