

The Rough Cut Effect

Here’s a fun variation on the sticker effect that I wrote about some time ago.

I call it the “rough cut” effect for lack of a better term. You’ll notice it in a lot of ads, magazines, and websites nowadays. I’ll leave it up to you to decide whether it’s a hot trend or a design cliché. ;)
Basically, the effect is meant to make a photo look like it was roughly cut out of a piece of paper, so there’s a light border around the subject, but the border is irregular and it does not follow the silhouette of the subject exactly. This effect is a lot of fun and it’s super easy to make and adjust. Remember all that time and effort you put into learning how to make sweet Bezier curves with the Pen tool? Forget it. Your aim here is to do the worst silo job of your life. Well, after you do a good silo job in Photoshop first.
Start with a photo of your subject.

Silhouette it in Photoshop to remove the background.

Place the photo in InDesign. The final effect will look much more convincing if you place another photo behind the one of the subject. Here I’m using a photo of some wood grain.

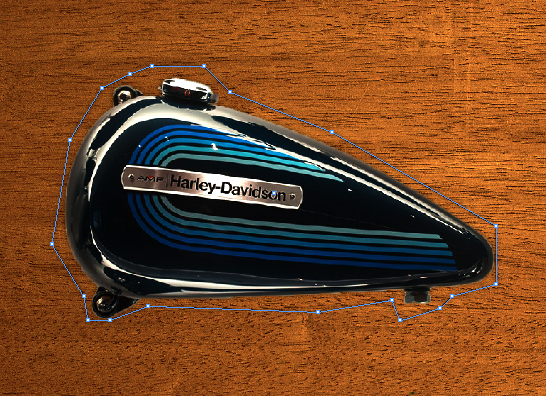
With the Pen tool, roughly trace the outline of the subject. Click, don’t drag. You want straight edges like you were cutting out the picture from a piece of paper with as much speed (and as little precision) as possible.
Select the placed photo with the Direct Selection tool, cut and paste it into the new frame you drew with the Pen tool. Delete the empty frame.
Remove any stroke on the new frame and give it a fill of a light tint of black (in the neighborhood of 10%).
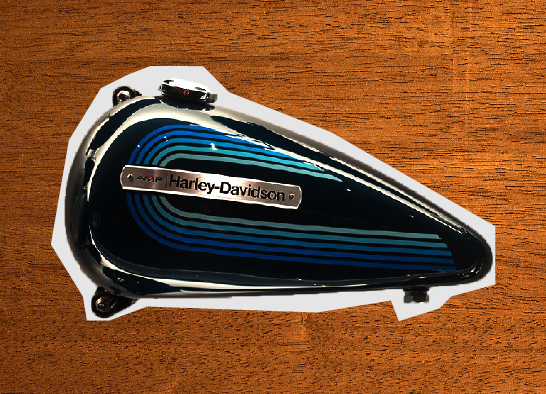
This makes it look much more like real paper than if you filled the frame with [Paper]*. Savor the irony of that before moving on to the next step.
Give the frame a small drop shadow. Make it dark and no more than a few pixels in diameter with a distance of zero.


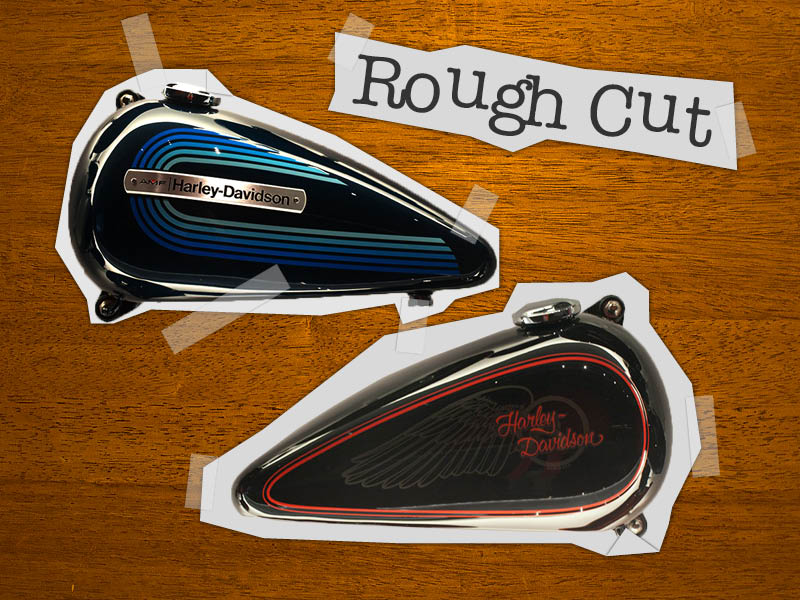
Not bad, eh? For extra credit, you can “tape” the photo to the background surface with a few small rectangles filled with 10% black and reduced in opacity to taste (somewhere around 40% opacity works nicely, depending on the background image). Vary the lengths of the pieces of tape and put them at odd angles for enhanced sloppiness. Also, give the tape a very small drop shadow to help sell it.

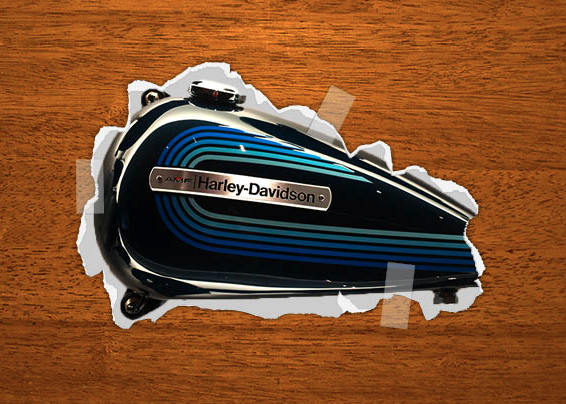
For additional extra credit, add a dog-eared fold on one or more of the corners.

To do this, take the Direct Selection tool and click on the edge of the frame where you want the fold to be. Be sure to select just one segment of the path. Copy it and paste it in place. It’s very odd, but at this point you have a second copy of the photo “in” that single path segment. Click the Select Content button in the Control panel to select the photo and then delete it. Now you just have the empty open path. With the Pen tool, click on one of the ends of the path and then click twice more without dragging to create the fold and close the path. You may need to tweak the drop shadow settings at this point to make the fold more convincing by reducing the shadow’s size.
Add additional photos or type with this same treatment to complete your rough cut effect.
Rough enough for you? No? Then take it a step further and use the Pencil tool to change the straight edges of the rough cut into jagged rips and tears. Then add some dimension by copying and pasting the frame, deleting the photo, lightening the fill, and using the Pencil tool to change the outline in some places. Send the new frame behind the one with the photo and you’re done.
Now that’s rough!
For way more InDesign FX, check out our ebook, my Lynda.com video series, or come out to PePCon where I’ll be doing a session on InDesign FX!
* When do you think Adobe will have to change the name of that swatch? Just asking.
Mike we could use this and many other funky ways to use Indesign. I work in a marketing department and make POS material. Keep them coming!
You can buy the eBook or the Lynda.com as mentioned in the last paragraphs :D
Thanks Laurie. And thanks Eugene!
Fear not, I’ve got piles of these FX littering my hard drive, so I’ll never run out. It’s kind of a hobby/obsession. So if anyone has an example of a specific thing they’re trying to create, let me know. Might be inspiration for a future post. :)
I’m truly enthusiastic with the new media management with Final Cut 10.1.