

Tips for creating ad-hoc bookmarks

InDesign’s Bookmarks panel (Window > Interactive > Bookmarks) provides an easy way to add bookmarks to be included as an aid to navigation in an exported PDF. Kelly Vaughan has written an excellent post about how to create these bookmarks using InDesign’s Table of Contents feature. But what if you haven’t used Paragraph Styles consistently in your document, or the visual structure of your document doesn’t match the logical structure you want to display as bookmarks?
InDesign makes it easy to create “ad-hoc” bookmarks based on whatever content you want to reference in your document. The process is easy, but I was reminded today of a couple of non-intuitive aspects of the process, so I thought it would be good to write this up.
To create a bookmark based on page content:
- Select the text on the page that you want to turn into a bookmark
- Choose New Bookmark from the Bookmarks panel menu.
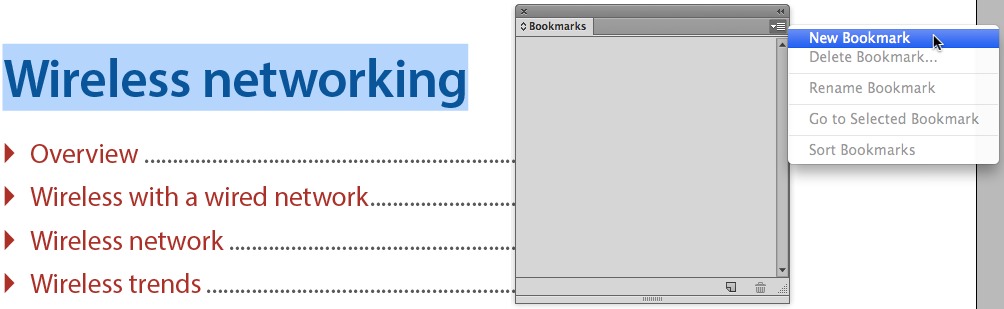
Use the Bookmarks panel menu (or the icon at the bottom of the panel) to create a new bookmark.
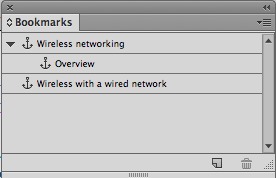
In the screen capture below, I’ve created three bookmarks, and I want to “nest” the last two bookmarks, making them second level bookmarks underneath the first bookmark.

Three bookmarks, all on the same level.
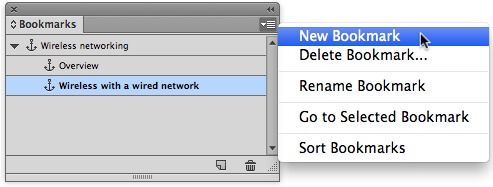
To nest existing bookmarks:
- Select a single bookmark (even though you can shift-click to select multiple bookmarks, you can’t nest multiple bookmarks at one time)
- Drag the bookmark on top of the bookmark you want to nest it under. In the example below, I’m dragging the “Overview” bookmark on top of the “Wireless networking” bookmark.

Drag one bookmark on top of another bookmark to nest the bookmark.
The result, a “nested” level 2 bookmark.
It is even easier to create a nested bookmark if you plan ahead while you are creating it.
- Select the text you want to create a bookmark from
- In the Bookmarks panel, select the bookmark you want to nest the new bookmark under
- Choose New Bookmark from the bookmarks panel menu.
Selecting a bookmark in the panel before you choose the New Bookmark command will cause the bookmark to nest under the selected bookmark.

The result: A nested bookmark.
If the text you want for the bookmark isn’t visible anywhere on your page, you can create a “page bookmark”:
- Turn to the page that you want the bookmark to navigate to
- Check to be sure that you don’t still have a text selection on another page (otherwise you’ll mistakenly create a bookmark to that content)
- Choose New Bookmark from the Bookmarks panel menu.
- Type the text you want the bookmark to display, then press the Enter key.

When you create a page bookmark, you will need to manually give it a name.

A page bookmark has a different icon than a text bookmark.
Hopefully this will make your work with bookmarks a bit easier!
Do possibly automate it? Thanks