

Tips for Selecting Objects Using the Layers Panel

When it comes to selecting objects on complex pages, the Layers panel is invaluable. In this post, I’ll show you the basics, as well as a few obscure tips and tricks that I’ve discovered as I use this method almost daily.
“But I never use layers in my InDesign layouts” you say! Did you know that since CS5, InDesign has automatically included every page object as an entry in the Layers panel? Open any InDesign file, go to the Layers panel (F7), and click the triangle to the left of “Layer 1” and you’ll see every object on the current page listed. Now let’s see why this is useful.
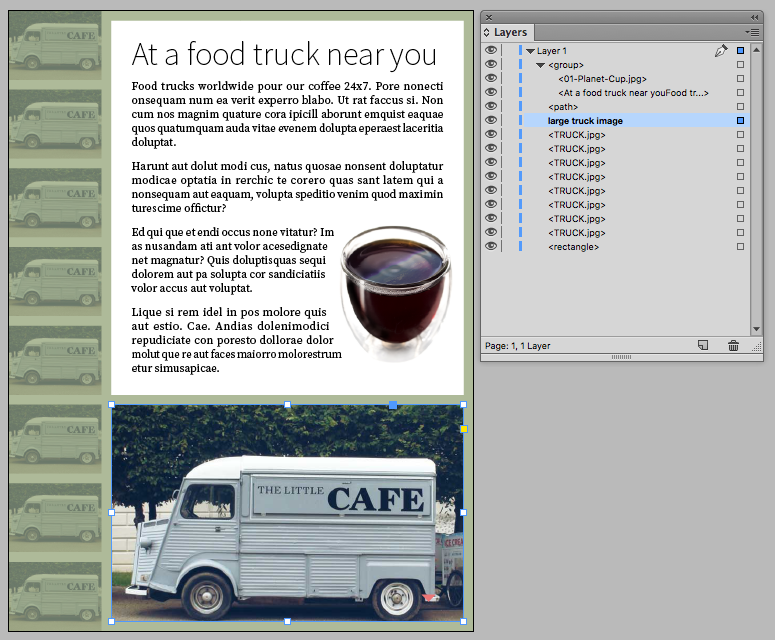
To begin, select an object on your page, and you’ll see that a small colored square to the right of one of the rows in the layers panel appears. This tells you which entry in the Layers panel corresponds to the selected objects.

Conversely, click on a hollow square to the right of an object in the Layers panel, and the corresponding object on the page is selected. The key to the Layers panel is to understand that you select items in the Layers panel by clicking on the item name, but you select objects on the page by clicking on the square to the right of the name. So, if you want to grab an item in the panel and drag it up or down to rearrange the stacking order, or move it to a different layer, you click on the item name and drag it up or down. But to select an object on the page so that you can change its fill and stroke, or move, rotate, or manipulate the object in other ways, you click on the square to the right of the name.
This is where all the power lies. On complex, richly-layered pages, or when working with interactive multi-state objects, groups, or objects pasted inside other objects, this is often the easiest way to select the object you need.
You can click twice on an object name in the Layers panel to change the name of the object. Naming objects intelligently makes them easy to locate in the Layers panel later on.
To select multiple objects on the page, you can click on the square corresponding to the first object you want selected, and then shift-click on additional squares.
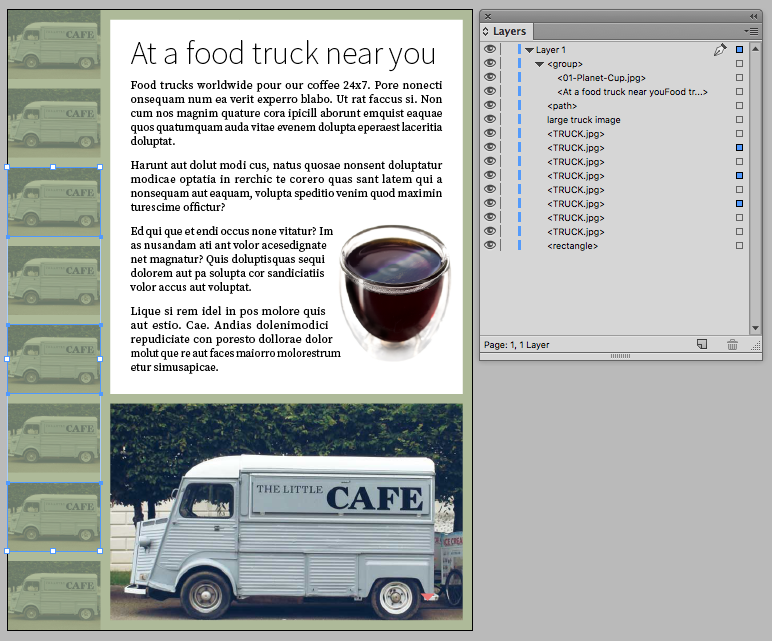
Or, you can shift-click or command/ctrl-click on the object names in the Layers panel to select multiple entries, and then right-click and choose Select Item(s) to select multiple objects on the page.

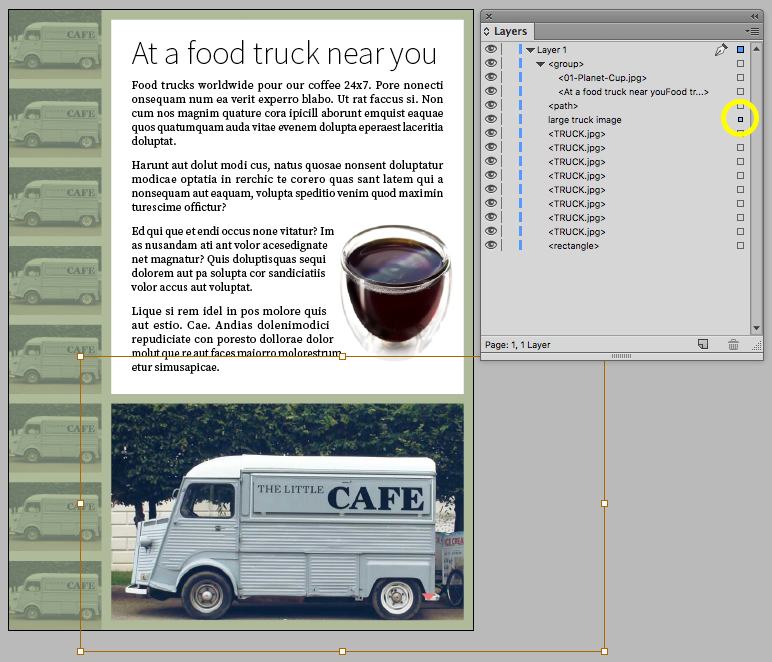
If you are having trouble finding an object on a page, right-click on a single entry in the Layers panel, and choose Select and Fit Item. This will not only select the object on the page, but also zoom and center the object on your screen for better visibility.

Option/Alt-clicking on a square next to a placed image will select the contents of the image, instead of the image frame.
Spend some time getting used to how the Layers panel works with page objects, and I’m sure you’ll find it a valuable way to select certain types of objects in many different layout situations.
Thanks, Keith, great tips. Selecting and dragging in the layer panel is also an easy way to move an object outside of a group, and Option + dragging an object will create a duplicate stacked on top of the original.
That’s true David, I wrote about this in my post here https://creativepro.com/grouped-objects-layers.php
Great tips Keith! Interestingly enough, just earlier this week all the small colored squares of my Layers Panel disappeared, no matter what file I opened. The problem persisted even after restarts—I had no way to select and drag individual objects in my Layers Panel. The fix was to reset my InDesign Preferences by pressing Shift+Option+Command+Control while starting InDesign, and clicking “Yes” when asked to delete the preference files.
The loss of those icons in the layers panel is an unusually common issue right now and as you’ve discovered trashing your preferences is about the only thing that will fix it.
Hi everyone and thanks Keith for these useful tip,
I’m a bit off topic but it would be useful to mention that you can isolate an object (hide all the others) by alt-clicking on the “little eye”. Do the same again to get all your layers back.
Wow, I’ve been using this for the whole while – perhaps I know some of the cool tips for In Design, but still love getting the tips as quite a number of them are new to me. thanks Heaps!!
Hi, thanks Keith, but those little squares are disapeared.
How can i restore this?
You will need to delete your preferences file to restore the squares. This is a common problem. See https://creativepro.com/rebuilding-indesign-preferences.php for instructions.
What a great tip! This should make finding and editing things inside multi-state objects much easier from now on!
I just tried out a few of the techniques mentioned here, and realized that objects that are created on a master page are initially locked (not selectable), and will not show up when you click on the disclosure triangle when on a regular document page. Command-Shift-Click will fix that for one object, or “override all master page items” will do it for all the items.
Fantastic! I’ve been using InDesign ever since it came out, but I never knew about these nifty little tips in the Layers palette.