

Using Paragraph Shading to Create Corners in a Table

One of the small and easy-to-miss updates in InDesign CC 2018 is the ability to add corner settings to the Paragraph Shading feature first introduced in CC 2015.
Uwe Laubender, a regular on the Adobe InDesign forum, replying to a user who wanted round corners on his table came up with a way to use that feature to apply it to a table. Below is the original question which was posted:
“I’m trying to style my tables and want some curved corners, I select the table, click the yellow ‘Edit Corners’ button, make the curve…then it throws the table outside the frame and when I click my frame to resize the table doesn’t have the curved corner although the frame visible does.”
Using the Paragraph Shading Feature to Create Rounded Table Corners
There is no interface in the Tables feature to apply paragraph shading—with or without round corners. But, with some cleverness and no small amount of adjusting, you can apply the paragraph shading with rounded corners to the text in the table cells at the corners of the table. Uwe’s answer: “So don’t use a fill color for the cells, just the shading for the text in the cell.”
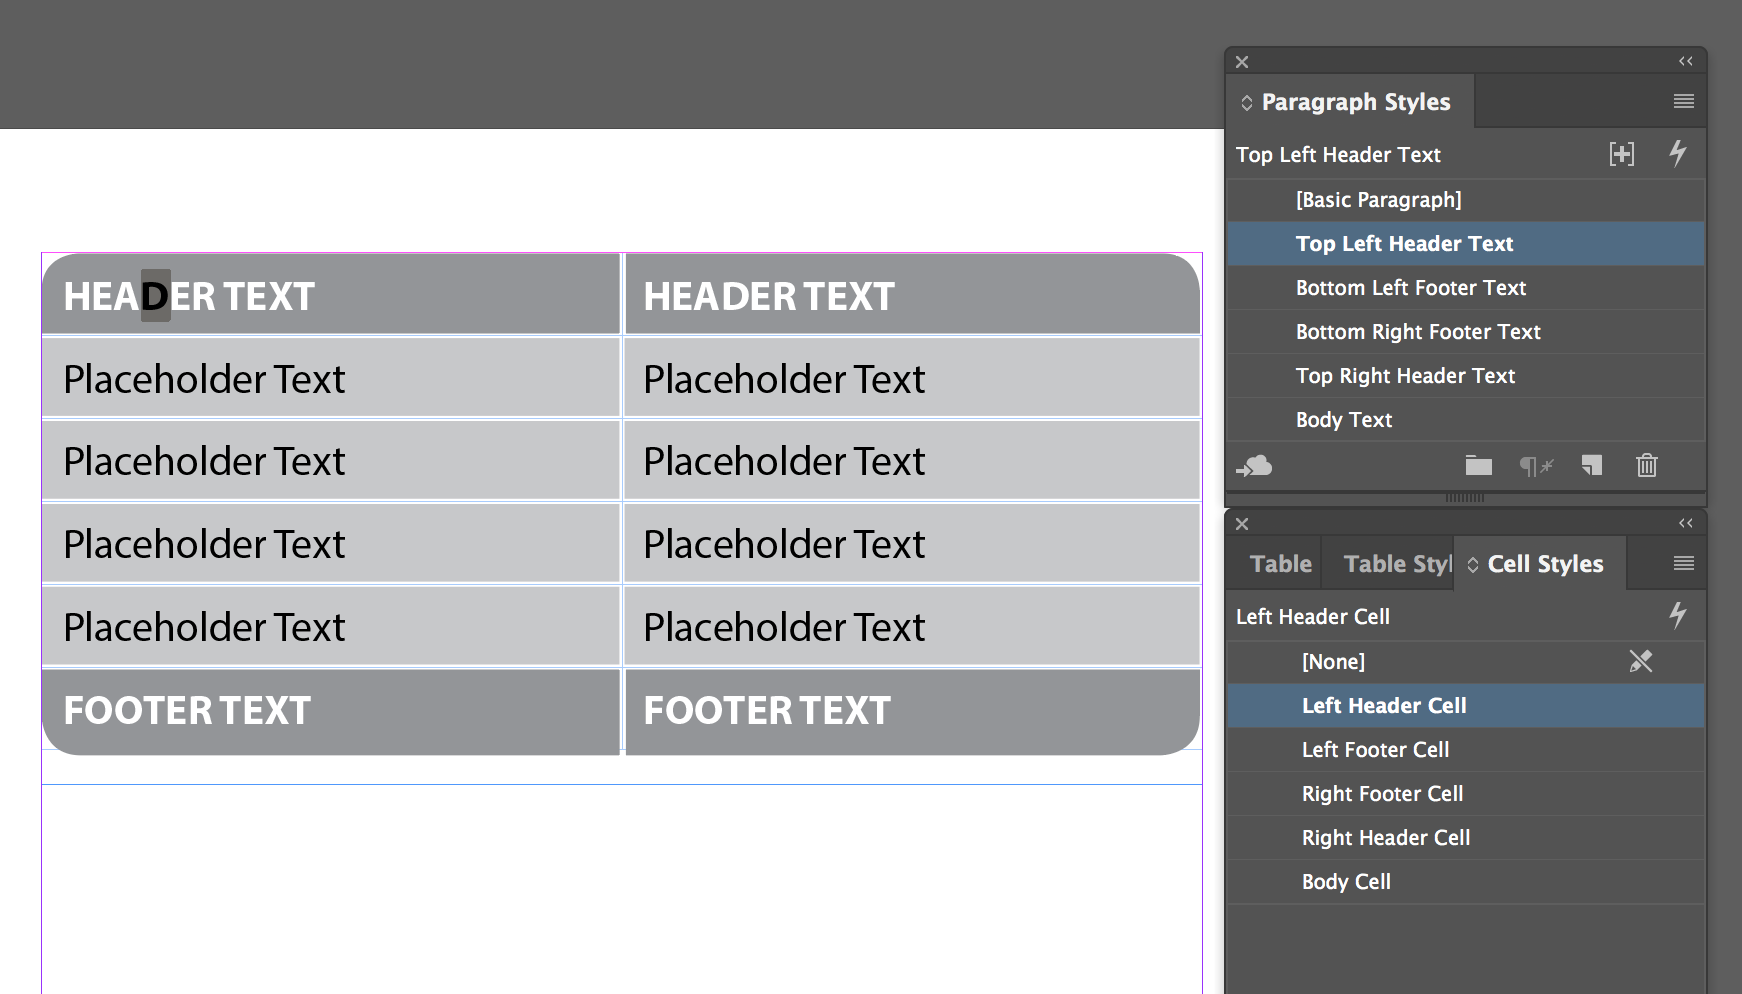
Figure 1: Paragraph shading with rounded corners applied to a table
When I first tried it, I was confused because I couldn’t see how to apply the shading effect. I first used the Paragraph panel to open up the Paragraph Borders and Shading dialog box. It’s tough to adjust the offsets on the top, left, bottom and and right to properly fit the shading to the cell. If you want four round corners, you need four sets of settings—one for each corner cell.
Uwe suggested it could also be done with paragraph styles included in cell styles. That makes it easier to edit and save the settings to re-use them again.
I created one paragraph style for each of the corner cells —Top Left Header Text, Top Right Header Text, Bottom Left Footer Text, and Bottom Right Footer Text, and a Body Text style. I included those paragraph styles in cell styles for the corner cells and the body cells—Left Header Cell, Right Header Cell, Left Footer Cell, Left Footer Cell and a Body Text cell.
It’s still a bit tedious and hard work but saving the styles makes it useful if you are using it in other tables. Figure 2 shows the Paragraph Shading in the Paragraph Styles dialog box for the upper left cell shown. (Notice that one letter of the text in that cell is selected so you can see the styles which are applied.)

Figure 2: Paragraph Styles dialog for Paragraph Shading applied to the upper left table cell
Figure 3 shows the Cell Style dialog box with the paragraph style for the upper left cell.
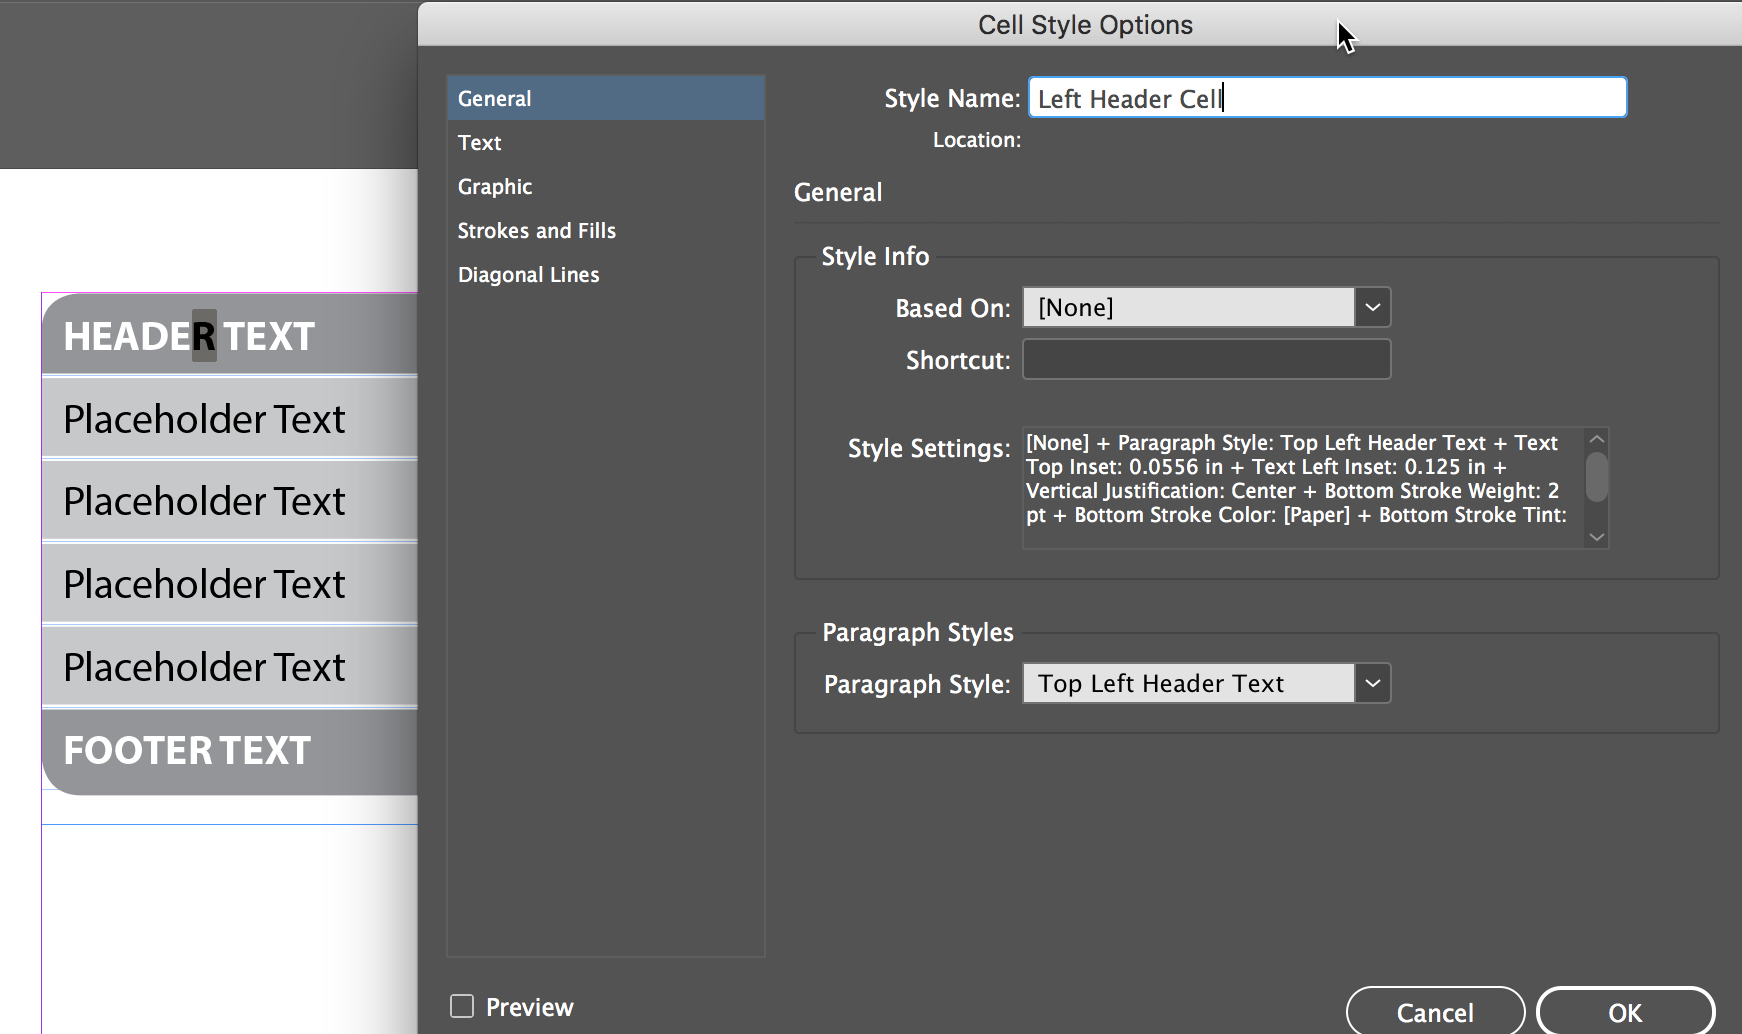
Figure 3: Cell Style which applies the paragraph style to the upper left table cell
This is really clever!
You are a Genius!! Welldone!!
It is a very good idea. But what if you just want plain white fill and a round bottom left and right corner with a thin black stroke ?
As a reply to myself : table setup is the solution for those cells.
For the best fittnig result, do not forget to set the Text offsett for the cells to 0 mm! (It defaults to 1.41 mm, that can cause white if you also use a line colour between columns)
Great suggestion, Frans! That would have helped.
It works fine also when you add paragraph borders with the same values, see example here (screenshot):
https://www.fvdgeest.nl/Border.png
An example can be downloaded from my dropbox:
https://www.dropbox.com/s/1xoi0hqhse9wmyh/Tabel_afgeronde_hoeken_via_aline_aarcering.zip?dl=0
(the problem still is that it will not resize when the cell is sized, but hey: we have a sort off rounded corners now in tables without pasting into a cell ;-) )
Funny! ….
How do you in the real life with cells whose content doesn’t cover all the cell?
The corner cells are the only ones that need the paragraph shading. Other cells could have a normal shaded background.
You just expand the offsets of the paragraph shading until it hits the boundaries of the cell.
Anyone who “just” wants to draw cells with rounded corners will appreciate! … Maybe not if they are hundreds of tables to play! ;-)
“… There are …” [sorry!]
Thanks for the link to your Dropbox file, Frans. It saves some time setting up the paragraph styles. And I learned some Dutch for free!
Can we do it in a Word document, Please upload a video, as I am visual learner it would be much easier. Thanks in advance.