

Working With Custom Glyph Sets

Tired of searching through the huge glyph sets of OpenType fonts for just a few obscure glyphs that you often need? Ever wonder if you could create a library of your favorite glyphs and use it across multiple machines? Yes you can! It’s easy to create, edit, and share custom sets of your most often needed glyphs in InDesign.
Here’s how it works…
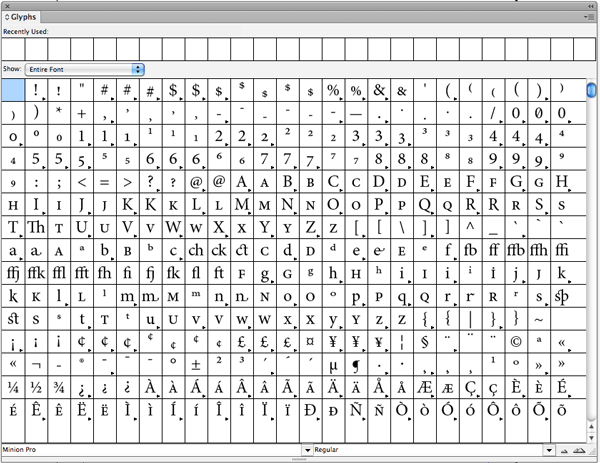
Open the Glyphs Panel by choosing Type > Glyphs or by pressing Option+Shift+F11 (Mac) Alt+Shift+F11 (Windows).
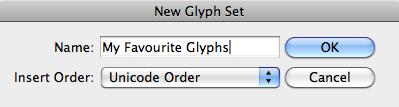
Go to the panel menu and select “New Glyph Set…”

Give a name to your new glyph set, like “My Favourite Glyphs” and click OK.
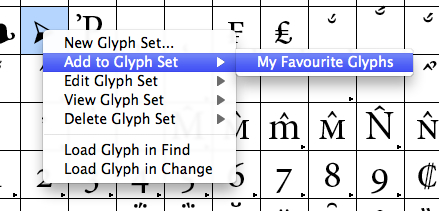
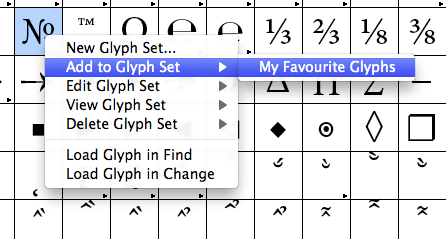
Now start adding your first commonly used glyph by right-clicking on it and selecting “Add to Glyph Set,” and then select the name of your personalized glyph set.
You can also add the glyph from the Alternate Section of a particular glyph.
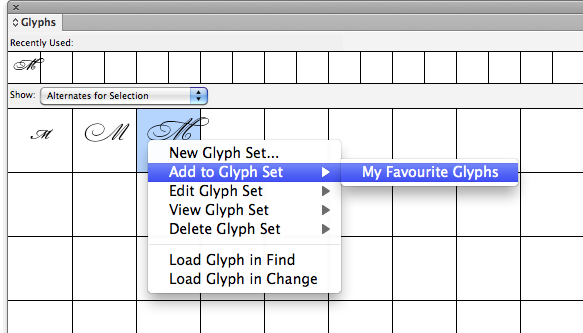
Keep on adding as many glyphs as you want to your personalized glyph set. You can also add the glyphs from other font styles as well. This way you can choose multiple glyphs from various fonts and keep them at one place.

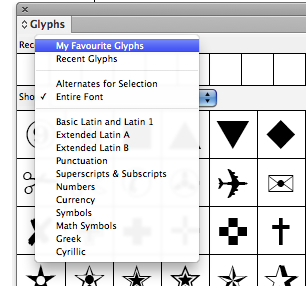
You can check your glyphs library by clicking on the Show drop-down list and select your Glyph-Set. In this case “My Favourite Glyphs”

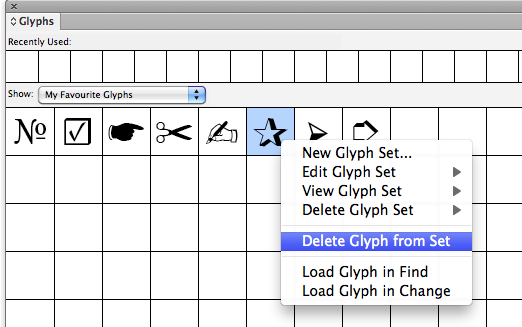
If you further decide to delete any particular glyph from your personalized glyph set, just right-click on the glyph and select “Delete Glyph from Set”.
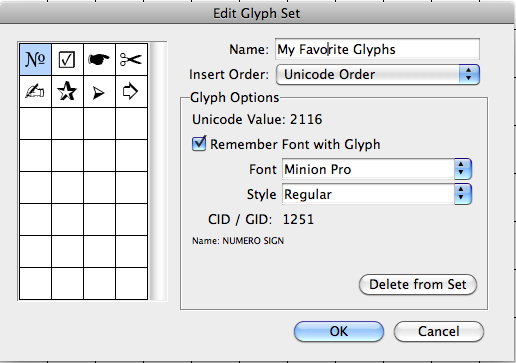
You can also edit the properties of your glyph set. Go to the panel menu, choose “Edit Glyph Set” and then your personalized glyph set.
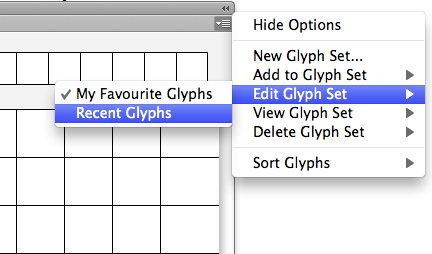
In the dialog box, you can rename your glyph set, change the options for a specific glyph, and delete glyphs that you no longer want in the set.
Custom glyph sets are stored in files that are saved in the Glyphs Sets folder, a sub-folder of the Presets folder. Once you are done creating and editing your glyph set, you can save a copy of this file as a backup or share it with others.
InDesign stores custom glyph set files in the following locations:
Mac OS
Users\[username]\Library\Preferences\Adobe InDesign\[Version]\[Language]\Glyph Sets
Windows XP
Documents and Settings\[username]\Application Data\Adobe\InDesign\[Version]\[Language]\Glyph Sets
Windows Vista and Windows 7
Users\[username]\AppData\Roaming\Adobe\InDesign\[Version]\[Language]\Glyph Sets
Very useful! Thanks!
I use glyphs from various languages all the time in InDesign, but somehow I never noticed that I could save a glyph set. Thanks so much for the tip.
In the “glyphs”palette only the characters of the current font display. Scattered characters can be collected in a own character set. The characters are saved with the Font, which is not always useful.
It would be better to have only the Unicode of the character, so that the desired character is inserted into the respective font.
For this, the “glyph edit (their own character set), the box next to ‘Save font glyph” taken away. Now the “only Unicode” character marked with a small red u. If you are with the cursor in the text and the font used does not contain the sign filed, the box is highlighted in pink or it will be the sign that is displayed in the font to Unicode.
see Figure:
https://plus.google.com/115478302954057022144/posts/ddHGKMsvNwu
Ingo, to avoid such problems, you must choose the option “Remember Font with Glyph” under the “Edit Glyph Set” dialog box. This way you don’t have to remember the font(s) for the Glyphs you have created the library. While inserting the glyphs from the Glyphs-set, InDesign will automatically apply/switch to the associated font. If you uncheck that option, then you have to apply the font every time, manually.
Thank you, Masood, to remind me of the option “Remember Font with Glyph”, that should be *unchecked* by default, I think! At least that would help my workflow a lot.
Unfortunately you have to set this option individually for every single glyph in the panel. You cannot shift click on all the glyphs in the stored subset and then uncheck “Remember Font with Glyph”. Or is that possible with a modifier key?
Uwe
I don’t remember there is such possibility of selecting all the glyphs in the set and changing the options globally. Might be someone can do this with a script. Do share with me if you get any.
@ Masood
“If you uncheck that option, then you have to apply the font every time, manually.”
Yes, if the only characters in a particular font is present (Wingdings).
No, if the unicode is saved, the characters of the font used in the text is displayed. (MINUS SIGN Unicode 2212, DOUBLE PRIME 2033, MULTIPLICATION SIGN 00D7, …)
Yes, you right Ingo. If we are making a glyph set of the common characters which are likely to be available in every font, than we can uncheck the Remember Font option, but if are creating a glyph set of some symbols etc which are font specific then we have to select that option.
Also note that you can check/uncheck the “Remember Font with Glyph” option for every glyph.
How can I create my own Glyphs in InDesign which are not in the character set of glyphs?
Look
https://creativepro.com/topic/looking-for-script-to-load-font-characters-into-a-glyph-set
All glyphs must be in a font. You can make your own fonts with a font app (like FontLab) or in InDesign with IndyFont: https://creativepro.com/creating-a-custom-bullet-or-character-with-indyfont.php
Is there any way to tell ID to display a certain custom glyph set whenever the glyphs panel is being opened. As it is, it automatically switches to “Entire Font”, even if a custom set had been chosen previously in the same session. Close the panel and open it: back to “Entire Font”.
That starts to feel tedious after the 600th time.
Disclaimer: I am aware that I could find a workaround that leaves the glyphs panel open at all times, but this meddles to much with what I’m used to regarding my workspace (and we are talking oooold habits here, the kind that die hard…)
Thanks for considering a reply.
I can find the stored glyph sets under MacOS 10.12, but can’t find them under Windows 10. Anybody know how to track them down on Win 10?
Never mind, I figured it out: you have to turn on View > Hidden Files…
Launch Windows Explorer. At the top, choose the View tab, and check “Hidden items.”
Go to…
[C drive]\Users\[username]\AppData\Roaming\Adobe\InDesign\[Version]\[Language]\Glyph Sets