

Wrapping Text Around an Anchored Object

Do you know how to wrap text around an anchored photo? If I can’t do this, how do I get a photo to anchor to the text around it and wrap the text around it?
Many people know how to paste graphics into text to create inline objects. But they get confused when it comes to handling text wrap. That’s pretty understandable because there are some real complexities to this subject.
There are three “flavors” of anchored objects. If you simply paste or place a graphic into your text where you want the graphic to appear, by default it will become an inline frame. InDesign sees this frame as a single character in the text flow (see below).
Inline Frame
If you select the frame with the Selection tool, and choose Object > Anchored Objects > Option, you’ll see that the positioning options are limited. You can only move the inline frame up and down within the current text frame (either by dragging or using the options in the Anchored Object Options dialog).
A second type of anchored object is also shown in the dialog: An Above Line Anchored Frame can be used to place a graphic in a paragraph above the insertion point.
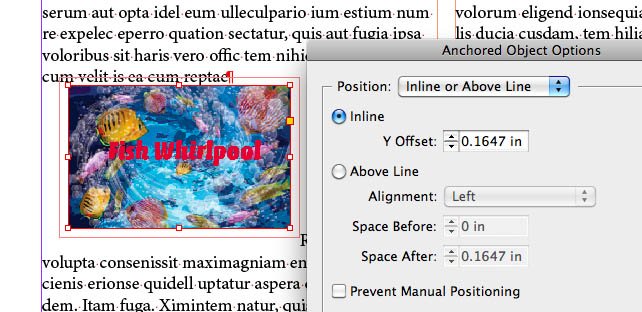
Anchored Object Options
You’ll have the most control over positioning if you choose Custom from the Position pop-up menu in the dialog. This opens a large and potentially confusing set of choices. The options are well explained in InDesign Help and in books like Sandee Cohen’s Visual QuickStart Guide or David Blatner and Ole Kvern’s Real World InDesign. But the important point is that it lets you position your graphic anywhere you want it, either inside or outside the text frame in which you have placed your anchor.
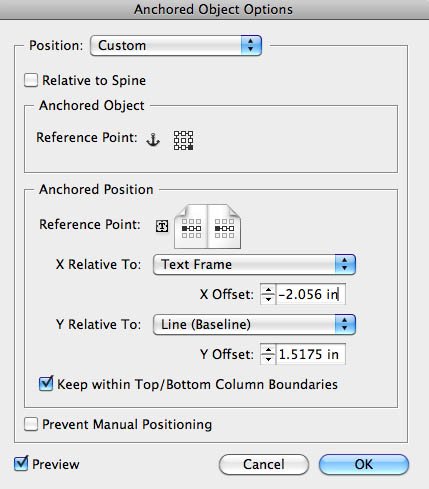
Custom Anchored Object Options
But there’s a shortcut: If you click OK, by default the anchored frame will be placed just to the left of the text frame. You can then drag the graphic with the Selection tool where you’d like it to be positioned.

Text Wrap for Anchored Objects
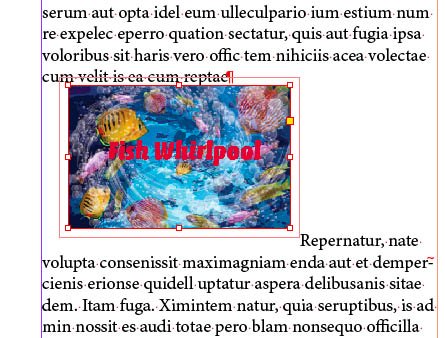
As you drag the graphic, you will observe the first rule of text wrap for anchored objects: Only the lines following the line where the graphic is anchored will wrap text. The line which contains the anchor won’t wrap. You can see what’s happening better if you turn on a couple of viewing options. If you choose Type > Show Hidden Characters, paragraph returns will show. More importantly, the anchor marker for the graphic appears as a Yen symbol. Then choose View > Show Text Threads (in CS5, it’s View > Extras > Show Text Threads). If you choose the anchored object with the Selection tool, a dashed line connects the anchor marker and the anchored object.
In the example shown above, the text runs around the picture on the lines below the anchor. But how do you get text to wrap on the first line of the paragraph? The answer is to move the anchor. The easiest way is to use the Story Editor. As I pointed out in another posting, one of the best uses of the Story Editor is to view and edit invisible markers. Open the Story Editor, and you can view the markers. Drag the anchor marker to the end of the previous paragraph.

Move Anchor
The result is that you can wrap the text on all lines of the paragraph following the anchor marker.

Result of Moving Anchor
The other limitations of text wrap and anchored objects: (1) Only the story in which you have the anchor is affected by text wrap options. (2) If you anchor an object inside a table cell, text wrap is ignored.
One more tip to speed to process of formatting anchored objects: Create an Object Style. After positioning the graphic relative to the anchor, choose the anchored graphic with the Selection tool. Then create a new Object Style. In the Object Style Options dialog box, Anchored Object Options is one of the panels. Use this to quickly format other anchored graphics.
If the anchored object is supposed to affect the first paragraph on the page or column, the method above won’t work. I make a style for the anchored object setting the font size and leading to 0.1, 0 paragraph spacing, and keep with next line. It’s virtually impossible to detect and makes the anchored object behave properly. I make training manuals with up to 50 thumbnails per chapter and this method has worked beautifully for me.
Thanks for the tip, Kriss. It worked well for me.
Worked for me too! Excellent solution!
Oh I so wish someone would do a step-by-step video with real examples or text with pics for this tip :) I would make such video myself IF I understood this this scenario fully.
But untill then *sigh* I think I am stuck with the good ole “place the anchor at the end of the previous paragraph” workaround : (
Great idea, Kriss. Just to clarify: Kriss is putting the anchored object on its own paragraph (with those tiny settings, so you don’t notice that there’s a paragraph there) at the top of the story.
Steve: This is great, as it trips up so many users. I really like the point about just clicking OK in the Custom Anchored Objects dialog box and then just dragging the object to where you want it (instead of trying to figure out the confusing dialog box). You can always go back to the dialog box later, after placing the object generally where you want it, to fine-tune it if need be.
I don’t know if you get these replies after 13 years, BUT this doesn’t work if the top of the text box/left-side page continues a sentence from the previous page. That places the “new” paragraph in the middle of a sentence within another paragraph. This is the feature of InDesign that I hate more than anything. I layout books for printing and I am NEVER able to place a picture at the top of the text box on a left-side page. I believe this is a noticeable design flaw in book layout. I can put one at the top of a right side page by anchoring it to text on the left side. Kriss’s trick would only work if the left side page began a new paragraph which doesn’t always happen when you’re laying out a book for publication.
Great tip about the anchor marker in the Story Editor. I always have difficulty with anchored items. Thanks!!!
An anchored object is designed to move as text reflows. The first line of the first paragraph is always at the top of the text. Surely a simple wrapped object would suffice in that instance.
Kriss, Glad to know i’m not the only one doing that :P
we’ve been doing this in our office since CS2 and it works great :)
THANK YOU! The first line not wrapping around anchored objects has always been so frustrating to me… so great to now have the solution.
I’m fairly new to CS3, and I was wondering if, Kriss, you could please help me with a bit more detail on your trick for securing an image at the top of a page. I apologize for not following this, but I’m not familiar enough with CS anything to understand exactly what I need to do.
Thanks so much!
I lay out 200-600 page manuals with lots of anchored margin notes and icons and there are two rounds of editing when I’m done with my first draft. So, all bets are off as to what will move. I have to anchor everything. The tip in the blog post is great if the copy will be fairly static once you’re done, but if it’s likely to wrap, you don’t want your anchored image for paragraph 2 attached to paragraph 1 if they are not in the same column or page. So, I make an empty paragraph with the smallest point size and leading possible and anchor the object to be wrapped in that paragraph. I assign that paragraph a style with keep options so that my anchored object “keeps” with the following paragraph and stays with the copy that is supposed to wrap it.
I even anchor full-page PDF files that get inserted. I’ve run into instances where I had a several page PDF placed on consecutive pages and the writer chose to move several paragraphs around. Of course the PDFs didn’t move and the text flowed over some of them and broke differently, so I had to find older PDF drafts of my files to see what was supposed to be before and after the PDF images because pages were breaking differently. It was a mess.
I’d like to thank you for this tip. I’ve been wandering around the internet for an answer to this for over a month, but forgot to look for it here (DUH!) Note to self: EVERYTIME I need to clarifty ANYTHING InDesign related, go to indesignsecrets.com FIRST.
Thanks a million!
Does anyone have a trick for attaching cpations to the graphic, that will move with the graphic and stay right under (or over) the graphic even if the graphic is off-set?
@Sue: I normally just group the image and caption (graphic and text frames) together, then anchor the group. A group of objects acts like a single object.
I am trying to anchor an object (grouped photograph and caption text box) above its explanatory text. I can’t figure out how to get the object IN the frame that InDesign makes. The image “disappears” when I move the frame so I guess it really isn’t in it? Will this trick you described work here?
And how to put a style on the frame InDesign makes so I won’t have to type in the dimensions or resize it 100 separate times. Please help!
Great article. Thanks.
Hi.
I have a follow-up question to Kriss’ tips.
My normal scenario use to be:
I want to put a graphic anchored to some text so it is always on the top left of the left page, but the paragraph relative to the graphic is not necessary starting at the beginning of the page – it usually begins at the end of previous page…
So, I can’t put a “tiny” paragraph before the text, it would stay on previous page.
And I don’t know where the text is going to break, so I can’t put the anchor exactly as the first “character” on the page…
Any solution? I can’t find any….
/best
/j
indesign CS5 / mac osx 10.5
this is very helpful, but i still have an issue.
i have two columns of text on a page in indesign.
an anchored image inside the rightside column of text, but i want that anchored image to span across both the first and second column and for the text in both the first and second coumn to wrap around it.
problem is, it seems like indesign only allows you to wrap text around an anchored object if it is AFTER the anchor not before.
Any ideas?
This is all really great and I’ve followed the various suggestions and my image is still displaying above the text in my epub even though it looks as I want it in Indd.
I’m just starting trying to work with epubs and it’s driving me a bit crazy.
To recap: I’ve made a new para and styled it to be tiny and then applied that to my anchored object which has wrap around it. In Indd my first para wraps neatly around the image. In epub format the pic sits on the line above the text which is set full out left
I’d really appreciate any thoughts
thanks
I have yet another follow up to Kriss’ question.
I have a calendar, made of a table. With an image in the upper right of each cell. Then, there are holidays on some.
I’ve placed my anchored image in its own paragraph (before the holiday text) and set its attributes to .1 pts and 0 leading. However, this does not affect the remaining text at all. It still looks like there is a hard return before each holiday (when I want it to be flush with the top of the cell.)
Does this work around simply not work within a cell? Am I doing it wrong?
I’m having no end of trouble getting an image to simply be anchored and right aligned with text wrapping around it. No matter what I do – yes I read right through the above – InDesign leaves a massive white gap to the left of my image. Help!
When you need a graphic to be the first object in a paragraph the easiest solution I know of is this:
1. Place the text cursor at the very beginning of the paragraph.
2. Edit>Copy the graphic or object to the Clipboard.
3. Edit>Paste the graphic or object into the paragraph.
4. Adjust the Drop Cap number of lines to match the depth of the graphic. This will seat the graphic into the paragraph, as ID will treat it like any other character.
5. Apply whatever text wrap values you want.
The only downside to this technique is when you also need that drop cap to appear after the pasted graphic. Even though you can set the number of character you want to drop, trouble occurs when your pasted graphic is 10 lines deep!
Easy trick:
1-Place the text cursor at the very beginning of the paragraph
2-Paste your graphic
3-Enter the text wrap value on your graphic
4-Set a first line left indent on your text style
I am working on a book with a layout set up as facing pages. The solution of moving the anchored object tot he previous line works well except when I want the anchored object to be at the very top right hand corner of the page. In this instance I only have the option to move the anchor to the previous page when it’s the facing page but when the previous page is above as opposed to facing, I don’t have the option to move it to the desired page. It will let me move the object across but not down to another page.
Great! Thank you so much!
I’m working on a book in which I have to place full-page PDF charts. I would like the PDFs/charts to flow with the text if possible and appear either on the facing page of a spread from where it is referenced, or on the next/first page of the next spread if more than one chart reference appears on a page. Kriss’ suggestion kind of works, but either I’m confused by the settings or maybe my situation is different. I have the text on a baseline grid. I tried creating a new zero type/leading paragraph style, however, how do I use this if the top of the page I want to put the chart/PDF on has a line or two of type from the last paragraph on the preceding page. Also, with reference to the keep option as part of the style, is it just selecting 1 in the “keep with” part of the dialog box or a setting under Keep text together.
In any case, I’m not completely getting this to work, so if anyone has more suggestions it would be appreciated. 300 page book with 40 full-page charts. Working in CC 2014. thanks
Once again, your site that given me invaluable information when I was working on a project. Great Site! Thanks so much!
I have prepared a 200 page document single text frames on master facing pages. Everything flowed well then on page 27 when I loaded the cursor and placed the text on page 27 it created a new text box which did not match the ones on previous pages. I have created many documents but never come accross this. Cannot seem to correct this
can anyone help
Usefull, thx!
There’s a lot of useful information here. Thanks for sharing, all. I recently experienced challenges with inline text wrapping in InDesign CC 2019 when I adjusted the character leading for spacing issues. I was able to resolve the issue by clicking on the line where the graphic was to be placed and, first, setting the leading to “Auto” for that line. After setting the leading to “Auto,” I was able to paste the inline graphic and have the existing text wrap appropriately.
I have a 2 column paragraph. I want to anchor a spanned image in. When I use this method or any other it overlaps the text. No matter where I move it; the text appears behind the image that is spanning over 2 columns. A visual. Top – – (text) and below it –– (img)
This is great until you need the anchored object to start at the beginning of a text frame.
I’m an old hand at Indesign, since v 2, but never used anchored objects until recently. I’m designing a book now w/ lots of images, this was an amazing tip. Expanding on it further, since an anchored object can be outside the text box, can it be a full page bleed too? I’ve tried various anchored settings, and it behaves in ways I can’t discern. If I could do this, my joy would be insurmountable. Thanks for any help here.